
автордың кітабын онлайн тегін оқу Things Worth Doing and How To Do Them
THINGS WORTH DOING
AND HOW TO DO THEM
Transcriber's Note: This cover has been created by adding color to the title page and is placed in the public domain.
THINGS WORTH DOING
AND HOW TO DO THEM
THE BEARD BOOKS FOR GIRLS
By LINA and ADELIA B. BEARD
Things Worth Doing and How to Do Them. Illustrated by the authors. $2.00.
Recreations for Girls. Illustrated by the authors. $2.00 (postage extra).
What a Girl Can Make and Do. New Ideas for Work and Play. Illustrated by the authors. $2.00.
The American Girl’s Handy Book; or, How to Amuse Yourself and Others. Illustrated by the authors. $2.00.
THE BEARD BOOKS FOR BOYS
By DANIEL C. BEARD
The Field and Forest Handy Book. New Ideas for Out of Doors. Illustrated by the author. $2.00.
The Jack of All Trades; or, New Ideas for American Boys. Illustrated by the author. $2.00.
The Outdoor Handy Book. New and Cheaper Edition of The American Boy’s Book of Sport. Illustrated by the author. $2.00.
The American Boy’s Handy Book; or, What to Do and How to Do It. Illustrated by the author. $2.00.
Things Worth Doing and How To Do Them
BY
Lina Beard
and
Adelia B. Beard
New York
Charles
Scribner’s
Sons
1906
Copyright, 1906 by
CHARLES SCRIBNER’S SONS
SPECIAL NOTICE
The publishers hereby give warning that the unauthorized printing of any portion of the text of this book, and the reproduction of any of the illustrations or diagrams, are expressly forbidden.
TO
OUR
LITTLE NIECE
BARBARA BEARD
PREFACE
We know our girls. We know and sympathize with their restless longing for activity. The normal girl simply must be doing something, and this ceaseless energy, at times rather appalling to her elders, is but natural and right. It is in the young blood coursing so swiftly and joyously through her veins, and it must find vent in one way or another. But there is no need of doing that which brings neither true pleasure nor the joy of accomplishing something worth while, for the world is full of delightful things really worth the doing. We have only to open our eyes and ears to find them crowding forward to claim our attention, and the choice is between better and best.
There are merry frolics and active games that stimulate the health and renew the vitality of the body and there are scores of charming things for willing hands to make which are not only worth the making but which bring skill to the fingers and breadth and energy to the mind.
In this, our fourth book for girls, we are giving some of the things we have found well worth the doing, and it is our hope that our girl friends will also see their worth and find in them inspiration for further experiments in pastime and frolics.
The Authors
July 3, 1906.
[viii] [ix]
CONTENTS
PART I
PARTIES, SHOWS AND ENTERTAINMENTSCHAPTER I
PAGE A Fourth of July Lawn Frolic 3Ground Decoration, 3; Firecracker Invitation, 4; Pantomime Charades, 6; To Make the Sun-bonnet, 7; Shuffle Race, 10; Hurling the Lance, 10; Daylight Fireworks, 11; Balloon Ascension, 11; The Myth, 12; Pandora Box, 12; The Balloons, 13.
CHAPTER II
A Wonderful Circus at Home with Moving Animals 15Mademoiselle Rosebud, 16; To Give the Horse Power to Move, 18; Bob, the Wonderful Elephant, 20.
CHAPTER III
A Novel Easter Party with New Easter Games 33Egg Tennis, 33; Number of Eggs, 33; To Prepare the Eggs, 34; Shower of Paper, 36; The Rackets, 38; The Game, 39; Butterfly Game, 42; Magic Dye Kettle, 43.
CHAPTER IV
A Doorway Punch and Judy Show 45The Stage, 45; To Make Punch’s Head, 46; Punch’s Dress, 50; Judy’s Head, 51; The Baby, 52; Drama of Punch and Judy, 53.
CHAPTER V
Hallowe’en Merrymaking 55Novel Ways of Telling Fortunes, 55; Invitation Rings of Grass, 55; Black Cats, 56; Pair of Old Slippers, 58; Cups and Bowls, 59; The Wedding Race, 61; The Vesper Rite, 65; Bean Bag Test, 66; The Witch Screen, 66; Fairy Airships, 70; Blarney Stone Game, 71.
CHAPTER VI
Dance of Titania, Queen of the Fairies 75The Stage, 75; Titania, 79; Costume, 82; Wings, 83.
CHAPTER VII
Thanksgiving Party 85Apple, Orange and Pumpkin Games, 85; Game Court, 90; The Game, 92; Rapid-Transit Thanksgiving Story, 92; Pumpkin Lantern, 93; Forfeit, 95.
CHAPTER VIII
Impromptu Moving Pictures for Thanksgiving 97Puritan Woman’s Dress, 98; Puritan Man’s Costume, 98; The Properties, 101; A Pantomime, 102.
CHAPTER IX
A Valentine Entertainment with Original Valentines 103The Post-Office, 104; Valentine Stamps, 107; When the Bell Rings, 107; Heart Valentine, 109; World Valentine, 109; Daisy Valentine, 110; Love’s Palette, 111.
CHAPTER X
The Wild West Show on a Table 113A Panorama, 113; Pasting Pictures, 120; The Performers, 120; A Tent, 123.
CHAPTER XI
Roof Picnic with Brook to Cross and Flowers to Pick 127Sunflowers, 127; Hollyhocks, 129; Roses, 130; Peaches, Plums and Apples, 130; On the Roof, 131; Country Picnic, 132; Crossing the Brook, 133; Japanese Tag, 134.
CHAPTER XII
The Magic Peep Show 137The Slides, 138; The Cow Jumped Over the Moon, 139; Life in Fairy Waters, 141; Easter Chicks, 143; Three Blind Mice, 144; Dance of the Dolls, 145; The Bouquet, 147; The Little Sun-bonnet Girl, 149.
CHAPTER XIII
Plant Your Garden if You Can 153A New Flower Game, 153; Marking Out Flower Beds, 157; Flags, 157; The Rackets, 158; The Game, 159; A Tally Card, 159; To Determine Choice of Sides, 160.
CHAPTER XIV
Jolly Little Santa Claus with His Reindeer and Sleigh 163The Sleigh, 164; Reindeer, 165; Santa Claus, 168; Christmas Gifts, 170; Christmas Cards, 172.
CHAPTER XV
A Living Christmas Tree 173How to Prepare, 173; The Peaked Hat, 174; To Decorate, 177.
CHAPTER XVI
How to Get Up a Girls’ Fair 179A Managing Committee, 179; Blackbirds, 181; Packages for the Blackbirds, 184; Express Office, 186; Letters, 187; Post-Office, 187; Decorations, 187; Postmaster, 192.
CHAPTER XVII
Camping Out in Your Back Yard 194CHAPTER XVIII
Outdoor Fun with Home-Made Tether Ball 207The Pole, 207; The Cover for the Ball, 207; A Court on the Grounds, 211; A Pattern for the Rackets, 214; The Object of the Game, 215.
PART II
MINIATURE SEVEN WONDERS OF THE WORLD
CHAPTER XIX
The Pyramids of Egypt 219Cheops’s Home, 219; The Pyramid, 220; Carving the Wonderful Sphinx, 225; Making the Date Palm, 227; Making the Camels, 228.
CHAPTER XX
The Colossus of Rhodes 233Island of Rhodes, 233; To Make the Colossus, 234; Mark the Features, 238; The Pedestal, 240.
CHAPTER XXI
The Pharos of Alexandria and the Mausoleum of Halicarnassus 245The First Lighthouse, 245; The Building Lot, 246; The Foundation, 248; The Marble Steps, 252; An Artificial Island, 254; The Mausoleum of Halicarnassus, 255.
CHAPTER XXII
The Statue of Zeus at Olympia 259Throne of White Cardboard, 263; Upper Dais, 264; Footstool, 265; Inlaying the Throne with Ebony, 267; The Drapery, 267; Winged Victory, 268.
CHAPTER XXIII
The Temple of Diana at Ephesus 269Ionic Column, 269; The Ground Plan, 270; The Outer Row of Columns, 271; A Cella, 271; The Goddess Diana, 272; Marble Steps, 274; The Side Steps, 276.
CHAPTER XXIV
Hanging Gardens of Babylon 279The King’s Wife, Amytis, 279; The Foundation, 280; To Make the Twelve Openings, 281; The Babylonian Arches, 283; Last Platform, 285; To Find the Centre, 285; Planting Shrubs and Trees, 287; Building the Steps, 289; Stone Broad-fronted Bulls, 293; Two Statues, 294; The Shrubbery, 297.
PART III
THINGS TO MAKE FOR HOME, GIFT DAYS AND FAIRS
CHAPTER XXV
New Christmas Decorations 303Paper, 303; Holly, 304; Holly Berries, 307; Wreaths, 310; For Mistletoe, 310; Stems, 311; Ropes of Evergreen, 312.
CHAPTER XXVI
Doll House of Pasteboard 315Windows and Doors, 316, 317; Doorknobs, 317; Window Glass, 318; Window Sash, 319; The Frieze, 322; A Rug for the Living Room, 323; Book Shelves, 324; Tissue Paper Curtains, 324.
CHAPTER XXVII
The Making of a Bayberry Candle 326Bayberry Bushes, 326; The Leaves, 329; The Berries, 330; Ready for the Candles, 330; Bayberry Wax, 331; Candle Moulds, 331; Candlewicks, 334.
CHAPTER XXVIII
Water Toys—Little Wax People that Swim and Ride on Rafts 338Patterns for the Little People, 338; A Toy Life Rope, 340; The Bathing Place, 341; For the Raft, 341; A Little Lumberman, 344; Launching the Raft, 345; Making the Mermaid, 345.
CHAPTER XXIX
How to Weave without a Loom 349Method Invented by the Author, 349; A Weaving Board, 349; Directions for a Blue and White Cotton Rag, 350; To Weave, 352; To Lengthen the Warp, 353; To Make a Heavier Rug, 357.
CHAPTER XXX
How to Make Your Own Easter Cards and Gifts 358Cards Representing Easter Flowers, 358; The Cross, 360; The Tulip Bud, 361; The Dainty Bloodroot, 363; Easter Egg Card, 363; Easter Bells, 364; To Make the Turtle, 366; The Pig, 367; The Spoon, 368; An Umbrella, 369; The Doll’s Chair, 370; Strawberry, 371; Doll’s Cradle, 372; Bird’s Nest, 373; Sail Boat, 373; Napoleon, 375; Josephine, 379.
CHAPTER XXXI
Home-Made Candlesticks 385The Clay, 385; Modelling Tools, 387; Strong Table, 387; China Saucer, 388; A Close Coil, 389; The Handle, 393; Blending of Decoration, 394; How to Preserve Unfinished Work, 395; Glazing, 395; Other Methods of Coloring Pottery, 396.
CHAPTER XXXII
What to Make of Bananas, Oranges and Apples 399An Orange-skin Coracle, 400; A Canoe Made from a Banana Skin, 401; Apple Lantern or Fairy Lamp, 403.
CHAPTER XXXIII
Little Paper Columbus and His Paper Ship 405Columbus’s Ship, 406; To Make the Mizzenmast, 408; The Bowsprit, 408; The Forward Deck, 409; Deck-Fence, 410; A Spar, 410; The Mainmast, 411; The Sails, 411; A Paper Flag, 412; Main-Topsail, 412; Crow’s Nest, 412; The Jigger Sail, 413; Wigwams, 416; Ferdinand and Isabella, 417.
CHAPTER XXXIV
How to Make Friends with the Stars 418Ursa Major, 418; Ursa Minor, 420; A Fairy Tale about the Starry Bears, 421; Cassiopeia, 421; Leo, the Lion, 422; Northern Crown, 423; Castor and Pollux, 423; Orion, 424; Taurus, 425.
CHAPTER XXXV
Stencil Painting and How to Make the Stencils 426Dyes, 426; A Portière, 427; To Make a Design for Stencilling, 428; Stencilling Cheese-cloth Curtains, 433; The Tassels, 435; Laundering, 438.
PART I
PARTIES, SHOWS, AND
ENTERTAINMENTS
CHAPTER I
A FOURTH OF JULY LAWN FROLIC
When the ink is quite dry pinch the paper together at the centre, making it look something like a paper flower, twist it a little, and tie on the point a piece of the white cotton string. The string should be about ten inches long and must be tied at the middle (Fig. 3). Drop one end of the string through the cylinder and, taking hold of the end, draw the invitation into its envelope. Crush in the extra red paper at each end until it fills the opening and leaves the string extending from the centre (Fig. 4). Write the address and the words, “Pull the long string,” on the outside of the now almost perfect giant firecracker, and deliver by hand, for such an invitation would be broken and spoiled in going through the mail.
Divide the party into two sides of equal numbers and let the first side choose a proverb to be acted out in pantomime and guessed by the opposite side, which is taking the part of audience. When the proverb is guessed the actors must retire and the other side take the stage. If the subject of the first charade is not guessed the same side must present another proverb, putting new actors in the place of those who have just taken part. Not a word must be spoken in the charade, but the actors must make their meaning as clear as possible by good acting.
Clear the space on the far side of the hoop that no one may be hurt by the falling lances, then have each player in turn throw his or her lance with the object of piercing the paper and sending the lance entirely through the ring. Each player may have three trials in succession, and unless her lance passes through the hoop at least once she is counted out. There are three rounds and the player wins who, at the end, has succeeded most frequently in sending her lance through the hoop.
Paint Mademoiselle’s face, arms, and neck flesh color; her waist, skirt, stockings, and slippers light blue; make a full double tissue-paper skirt of the same color by gathering a strip of light-blue tissue paper through the lengthwise centre, folding the edges together and tying this double skirt around the little lady’s waist. Cut a narrow strip of the same blue paper and fasten one end around each wrist that it may float freely in the air as she gallops around the ring.
This done, remove the banners and let the horse with his pretty rider dance around the ring, sometimes on his hind feet, as in Fig. 12, and again on his fore feet (Fig. 11), while little Rosebud easily retains her footing, looking more than ever like a real circus rider.
needed for the game depends upon the number of players. There should be three eggs provided for every two players. In case the first player succeeds in breaking two eggs in succession, the third egg will not be used during the game, but may do duty at another time in another game. Should the first player fail in breaking the second egg, then all three eggs will be required.
leave one white and color all the others, making each shell of a different color. When this is done, allow the inside of the shells to become thoroughly dry; then fill them with pieces of tissue paper cut in small squares a quarter of an inch or less in size. These can be quickly made by folding the tissue paper like Fig. 27 and cutting it into strips of fringe (Fig. 28); then cutting off the ends of the fringe little by little (Fig. 29). Fill the red egg-shell with bits of red paper, the yellow shell with yellow paper, and so on, making
Lay the frame you have just made down on a large piece of strong writing-paper and mark a line on the paper one inch from and entirely surrounding the outer edge of the frame down to the handle. Draw another line close to the outer edge of the frame, then cut out the design along the outside line. Slash the edge up to, but not across, the remaining pencil line (Fig. 39). Cover one side of the slashed border with paste or glue, and, again placing the frame on the paper, turn the flaps, one at a time, over the edge of the frame and attach them firmly to the frame and to the inside of the paper (Fig. 40). When the paste is perfectly dry, make another paper cover in the same manner and paste its slashed edge over the frame on top of the first, putting one cover directly over the other and so making it double; this will make the racket quite strong and firm.
will be a piece of plain solid-colored cloth, which must reach across an open doorway, be tacked upon each side and extend down to the floor, where it should be again fastened that there may be no danger of its blowing aside. Put this curtain up high enough in the doorway to reach a trifle above your head, for you must be completely hidden from the audience. The full-page illustration shows the back of the stage and gives the manner in which Punch and his family are made to move about in the opening between the top of the doorway and the curtain. It is this opening which constitutes the stage. The illustration also shows a band of cloth stretched across the extreme top of the doorway, and short side curtains added to the outside of the stage to improve its appearance.
Make it much larger, according to the dimensions given on patterns, and let it be of soft material in very bright, gay colors. The front and back are exactly alike, and the two pieces are sewed together at the sides, the seams extending to within two inches of the bottom of the skirt, leaving the sides split up that distance. Slide the paper arms up in the sleeves and fasten them in place at the top with a drop or two of glue. Make a wide, white double ruffle, slip it on Punch’s neck and push it up against the head. Then gather the top of the dress so that it will fit Punch’s neck, and fasten it on under the ruffle with strong glue, allowing the bottom of the paper neck to extend down below the gathered top of the dress. Make a high cap of brilliant red cloth to fit Punch’s head; trim it with a turned up band of vivid green edged with white and glue the cap to the head. With a stitch or two or an elastic band fasten an inked paper lighter in his right hand to serve as a stick.
by the pattern used for the head of Punch, but omit the ears and cut off the ends of both nose and chin. They should not be so long for Judy. Strengthen the neck with cloth and fasten the head together as you did that of Punch. Make blond hair of two pieces of yellow tissue paper pasted in narrow irregular folds on the inside of the top opening of the head; then bring over and down on the outside as if combed loosely over Judy’s ears. Paste the lower ends of the paper hair above the neck on the back of the head. Paint Judy’s eyes blue. In all other respects than the details mentioned, make Judy’s head the same as you did that of Punch. Make her arms and hands the same, the double ruffle for the neck the same, the dress the same cut but of contrasting color. Cut Judy’s cap from thin white material, make it circular and gather it entirely around, about one inch from the edge. Attach strings of the same material, and tie them under Judy’s chin (Fig. 47).
fresh grass is best, but the dried will do—and hang the rings on bushes (Fig. 48), or lay them on the outside window-sill, making a wish on each grass ring as it is put into place. To insure the fulfilment of the wish, you must not see the rings again until after Hallowe’en. The fairy troupe will find the green circles as they come floating along through the air on gay-colored bubbles from the magic spring waters of Fairyland. During the last days of October fairies are always looking for such invitations.
Give every one an apple and a wooden toothpick. Each player may push the toothpick in any part of the apple; the spot occupied by the toothpick tells the fortune, but the apple must be kept in one position, and on no account turned after the toothpick is once in. When all have inserted the toothpicks each boy and girl in turn must hold up his or her apple that all may see while you read the fortune.
[63]
[64]
[65]
When all the charms have been tested, announce that before returning the treasures to the witches you will place them on exhibition; then turn back the witch screen and let the girls and boys gather around the tray of queer charms, where they can laugh and exchange comments to their hearts’ content. The effect of the witch screen may be enhanced by using a breadth of brilliant-red muslin and pasting on it black moons, stars, cats, etc. Erect at each end of the screen a comic pumpkin lantern head, with white paper fastened on the inside over the features to light them up, instead of a real light placed inside. Slide each pumpkin head on the end of a pole, and rest the pumpkin firmly on four long, strong nails driven in around near the top of the pole. The lower end of each pole may be steadied and supported by being inserted in a hole bored through the centre of a heavy piece of plank, where it must form a very tight fit; or you can sink the pole into a deep pail of stones and earth. If it is possible to have the only light in the room placed back of the screen, the effect produced will add to the mystery and enchantment. Make all decorations as funny as you like, but avoid anything grotesquely unpleasant. Let every item be agreeable, from the least to the most important arrangement for the evening’s fun.
When order has been restored and all have their airships, each girl and boy in turn must read aloud the prophecy brought by the fairy vessel.
Find a pretty head in some old paper or advertisement, cut it out and gum it on the pasteboard head. Remember, though, that the printed head must not be of very heavy paper, as the upper part of the doll should be lighter in weight than the lower, otherwise the figure will not balance. If you cannot find a head in colors, you must paint the printed black-and-white one; give the face, neck and arms a flat wash of light-pink water-color paint; color the lips and cheeks red, the eyes blue and the hair brown. Make the long stockings a darker pink than the light flesh tones, and paste slippers of gilt paper on the feet.
Make the dress of pink chiffon. Cut the dress skirt three and three-fourth inches long and one yard wide, press it in knife-blade plaits, running up and down, then gather and tie it on the doll over the white tissue-paper skirt. Do not attempt to hem any portion of the clothing, as the object is to keep it all light and airy. Fashion the waist of a smooth strip of pink chiffon tied with narrow pink ribbons at the shoulders and brought down to the belt-line into a point back and front, and sewed in place. Form a silver girdle of the tinsel ruching used on Christmas trees; place the tinsel around the Queen’s waist, allowing the two free ends to hang down over the front of the dress. Glue a little of the same tinsel around the front of her dark hair, where it will shine like a crown of diamonds. Make Titania daintily hold up and out each side of her dress. Do this by stretching out the sides of the dress skirt and gumming the material to each wrist.
Examine the apple and make sure there are no raised ridges in the paper and that the entire covering lies flat and smooth. Tie one end of a piece of brown thread around the base of the stem. Wind the long end of the thread once tightly around the apple, giving it a twist around the stem to secure it in place (Fig. 84). The thread must pass across the exact centre of the blossom end of the apple. As you wind the thread turn the fruit and watch the thread that it may not swerve either to this side or that. A second time wind the thread around the apple, making the first encircling thread band double. Cross this double band with another double band, marking the apple into quarters, secure the thread about the stem, and again wind it around the apple, dividing two opposite quarters each into two pieces.
The leader must begin the tale, which may or may not be original. He must speak for only a few minutes, then stop, when his right-hand neighbor, without hesitation, must take up the story and carry it on for a few moments. In this way the story goes the round, each right-hand player in turn telling his part. Every player has the privilege of making his portion of the tale original, even though the preceding part may not be so. It is also the privilege of every one to change the story to a dream, or a fairy tale. Quotations may be introduced, verses recited, or snatches of song sung; in fact, the oftener the story is twisted and turned the greater the interest; but there must always be some connection between the part being told and that which has gone before. The entire romance must be finished before the light in the wee pumpkins burns out. If a player should fail to continue the story when his turn comes, he must pay a forfeit, and when the story is finished, redeeming the forfeits adds to the fun.
Cut a short section from an ordinary wax candle (Fig. 94), shave down the sides, making the bottom heavier and larger than the top (Fig. 95). Run a pin through the centre of the candle from bottom to top; then pull it out. Fit the candle inside on the centre of the bottom of the apple, hold it in place while you run the pin up from the outside of the apple, through the skin and into the pinhole in the centre of the little candle. The pin should hold the candle firmly in place; if it does not do so, pull the pin out and see what is the matter; possibly the candle needs hollowing out a trifle at the base in order to fit the slight rise in the apple on which the candle stands. Put on your thinking cap, examine and make the candle stand absolutely straight and firm.
[99]
[100]
[101]
To make the design, fold through the centre a square piece of paper measuring five and one-half inches along each edge. Fold this oblong crosswise through its centre, and you will make a small square of four layers of paper. On one side of this square mark the outline of a heart, allowing the corner of the small four-folded square, which is also the centre of the large square of paper before it is folded, to form the point of the heart (Fig. 105). Cut out the top of the heart through all four layers of paper, also the curves of the sides of the heart; cut these only part way down as shown by A and A (Fig. 105). The dotted lines in Fig. 104 represent creases.
[105]
[106]
[107]
There are many styles of valentines which you can make. Fig. 106 is effective and requires only a few moments to manufacture. For
is another design. For this use a circular piece of white paper about four inches in diameter. Shade it around the edge a little to give an idea of roundness (Fig. 107), then with ink draw on the disk the outlines of North and South America to represent the world (Fig. 108). Paint the continent a light yellow. Put the lettering on in bright colors, placing an awl drawn in outline (Fig. 109) and a figure 2 in the position shown in Fig. 110. Paint the awl red.
(Fig. 111). On a piece of paper six inches long and three and a half inches wide draw a circle near the top, making it not quite three inches in diameter. Paint the circle bright green as a background for the white daisy. Make the daisy of three or four layers of white tissue paper folded like Fig. 112 and cut along the scalloped outline shown in Fig. 112. Unfold the petals and they will be like Fig. 113; but as the number should be odd, you must cut off one of the petals. Sew the centre of the daisy to the centre of the green circle, then paste a small yellow paper disk (Fig. 114) over the stitches. Paint a small red heart at each upper corner of the valentine and paint a narrow blue ribbon tied to each heart and looped between, as in Fig. 111. If the valentine is intended for a girl write under the green circle in red letters:
Purchase two yards of low-priced white cambric dress skirt lining; fold the cambric lengthwise into three equal divisions; then cut the folds apart, making three lengths each two yards long and about eight and one-fourth inches wide; sew the pieces together along the end edges, lapping one over the other that the seam may be as thin and flat as possible (Fig. 125). This will give you a strip almost six yards long for the panorama. Do not hem either the top or bottom. Allow a blank space of white cloth, sixteen and one-half inches long, at the beginning of the panorama; then commence
Cut a strip of brown tissue paper nine inches long and two inches wide for the centre, gather the paper tightly along one lengthwise edge and tie it close up under and against the head of a slender nail (Fig. 136). Around the nail under the brown centre, slide on first one, then the other, circle of gathered yellow petals, taking care to have the petal points of the lower circle lie between and not over those of the top circle. Finish by driving the nail which runs through the sunflower, into one side of a stick or broom-handle, with the lower end sharpened (Fig. 137).
of every color can be made of circles of tissue paper five and a half inches in diameter, held at the centre, two circles one inside of the other, and the centre pushed and squeezed together, causing the edges to fold and turn until they resemble the real flower (Fig. 138). Smaller circles, crimped by drawing the paper through the partially closed hand (Fig. 139), can be made into pinks, and you may have brilliant, nodding poppies in the same way, only these are of smooth, uncrimped circles (Fig. 140), placed one inside the other, with a small circle of dark-green paper for the centre, and all three layers pinched together at the extreme centre (Fig. 141). Large peonies are similar in construction to some of the flowers you have made, so try to work these out yourself.
In case there are no bushes, or if the bushes are too few in number, use branches or sticks with natural foliage, or leaves made of green tissue paper; make the latter of paper in several layers, that a number may be cut at a time like the pattern (Fig. 143). Crimp through the centre by folding lengthwise over a hat-pin and pushing the folded centre together (Fig. 144). The method is quick and gives satisfactory leaves (Fig. 145). Cut leaves in different sizes as you will need some larger than others.
Build a wooden fence over which the girls and boys climb to enter the picnic grounds; even though the improvised fence may not closely resemble the real article, it will help to render the feeling of being in the open country more realistic.
and march among the flowers and fruit trees; end the procession by circling around the spot chosen for your dinner table, where all must deposit their lunch baskets. Of course you will not have an actual table, as the tablecloth must be spread on the ground and the girls and boys sit around it.
is a lively game and great fun. Get a number of flat stones that will lie steady, and are large enough to step upon; arrange them about eighteen or twenty inches apart, in an irregular line, over a stretch of ground twenty or more feet across. Let the players in turn tip-toe on the stones just as though they were crossing a brook of running water, each girl and boy being obliged to pay a forfeit for every misstep into the make-believe water. If stones are not to be had, use blocks of wood, or, if need be, pieces of paper in place of stones. As each player crosses the brook, the rest of the party must call to her to be careful, not to fall, that she is going too fast, that she is going too slow, or make similar comments. They can cheer her, and in many harmless ways try to confuse the player with their calls, but it is against the rules to touch or even go nearer to her than two yards.
After the designs are cut out, paste colored tissue paper over the openings, and when you look through the little hole you will see wonderfully bright and gay scenes all in transparent colors. An ambitious red cow will be found jumping over a yellow moon, and instead of being accompanied by the usual dish running away with a spoon, you will find an energetic wood sprite dressed all in Lincoln-green. The sprite has tied a rope of wild grape-vine to the cow, and, clinging to the rope, is sailing through the air and over the moon with his queer steed. Fig. 152 shows
The tissue-paper coverings may be cut in any shape, but each piece must cover well the opening of the figure or portion of figure intended to be the color of the paper. Have the white paper across the horns lap less than one-eighth inch over the red paper of the cow (Fig. 154), and manage the pink paper of the sprite’s face in the same way where it meets the green of his cap and clothing.
to designate the color of the various flower beds. From inexpensive cotton cloth of a solid red color cut a flag eighteen inches long and twelve inches wide; hem the raw edges; then tack one end of the flag on a slender stick one yard or more in length; sharpen the free end of the stick and push it down into the earth at the outer back corner of the flower bed intended for the red roses. Have the flag stand straight and firm. Make a white, a yellow and a pink flag in the same way. Erect each in the outer back corner of its own bed, which will be the bed where roses of corresponding color are to be planted. All the flags must be of equal height.
will be required for keeping a record of the game. Make one of white pasteboard (Fig. 199). The initials can be changed to those taking part in the sport. Every point scored must be written under the color and initial or name of the person who scores it. When, because of the failure of one player, the opposite side scores a point, the score must be recorded in the third column belonging to that side on the tally card under the word “Won.”
We know that he is sure to come every Christmas, and the girls and boys look forward gladly to his visit. The little Hollanders name our Christmas Saint Santa Claus, the same as we do, though sometimes we call him Kris Kringle. In England he is both Santa Claus and St. Nicholas, in Switzerland Samiklaus, in Russia he is St. Nicholas. But no matter by what name he may be called, he is always the same, always the jolly little fellow bringing good cheer to every one. Santa Claus takes great delight in driving his tiny reindeer and sleigh full of toys over roofs of houses for the special benefit of the girls and boys he knows, and that includes all of them.
and a box for the body of the sleigh (Fig. 202) to set on the sled (Fig. 203). Find some furs to use as robes to hang over the sides and back of the sleigh; any kind will do—boas, collars, circulars or rugs. Fit them in and over the sides of the box. If you have no furs, try plush or colored blankets. Tack gay-colored paper over those portions of the box which are not concealed by the robes, and lay a small, light board over the top front of the box, resting the ends of the board on the sides of the box to make the seat on the sleigh. Cover the board with the same paper as that tacked on the box.
Cut out your deer and with pins or thumb-tacks fasten him out flat on another large sheet of paper; then with the soft lead-pencil run a line on the paper around the deer, which will give you the second deer; outline the markings on this like those on the first deer; then cut it out. If you want six deer for Santa Claus’ sleigh make them as you did the second deer. Back each deer with very heavy, stiff pasteboard and nail a thin strip of wood on each of them. Let the wood reach from the middle of the head to the edge of the hind leg (Fig. 207). Fasten the two animals together with three narrow flat sticks tacked across from deer to deer, one stick at the centre and one on each of the two ends of the slanting strips of wood fastened on each deer. The framework will then rudely resemble an inclined ladder. Stand the reindeer in front of Santa Claus’ sleigh and see how fine they look.
make a large rag doll stuffed with straw or excelsior. It is not necessary to spend much time on making the doll, as it will be used only once, and will then be almost entirely covered, showing only the upper portion of the face for which you can mark easily with features. Make the boots (Fig. 208) like stockings of black muslin; have them long and loose enough at the ankle to form wrinkles. The trousers (Fig. 209) should be of scarlet cotton flannel, fleece side out; the coat (Fig. 210) cut of the same material; the cap (Fig. 211) of the red cloth cut melon shape, and sewed together. Santa Claus’ costume must be trimmed with bands of fur. Ermine will look best, and it is easiest to make. Cut strips of white cotton flannel and mark them with black ink to represent the little black elongated spots on real ermine. Trim the tops of the boots (Fig. 208), the neck, sleeves and edge of the coat (Fig. 210) and edge of the cap (Fig. 212) with fur. Make the wig of raw white cotton, and fasten it on the doll’s head (Fig. 213), then the beard, moustache and eyebrows also of raw cotton (Fig. 214), and glue them on the face. Paint Santa Claus’ face pink, his cheeks and the end of his nose bright red, and his eyes blue. When dressing him, bring the fur-topped boots up over the trousers (Fig. 200).
Choose quite a tall girl for the angel of the tree and from dark green, undressed cambric cut a long, plain cloak that will fit smoothly over her shoulders and hang like an inverted cornucopia from neck to feet.
[176]
[177]
Take an ordinary wooden tub (Fig. 226), cover the outside with gay tissue paper laid on in flat plaits from top to bottom. Paste the paper along the inside of the top edge, carry it over on the outside down under the bottom edge. Cover the handles with the same paper, and fasten ribbon bows on the outside of the handles (Fig. 227). If the tub is covered with pink tissue paper, tack pink ribbons on the handles; if red paper is used fasten green on the handles.
[195]
[196]
[197]
Make six wooden pegs resembling Fig. 252. You can have them either round, square, three-cornered or irregular; the only essentials are that the pegs be strong and large enough to hold the tent securely. Have a notch cut near the top for the tape and a point whittled at the bottom that the peg may be easily driven into the ground.
and make the table in true woodsman fashion. Take four strong forked sticks, sharpened on the lower end, and drive two of them into the ground in a straight line about one foot or more apart, and the remaining two in a line with, and two feet from the first sticks (Fig. 254). Have the sticks stand above the ground about two feet, or the height you want the table, and keep the crotch, or angle where the two forks separate, on all the sticks at an equal height from the ground. Lay a stick across each pair of forked sticks. Get a piece of board, rest one end on each of the supports you have just made, and you will have a rustic table, strong and suitable for any camp (Fig. 255). Use wooden boxes for seats. Select one box for your
in which to keep supplies and camping utensils. Fit one or two shelves, made from a side of another wooden box, in the cupboard. Do this by first nailing strips of wood, for cleats, on the inside of each side of the cupboard at equal distances from the bottom (Fig. 256). Slide in the shelves, resting each on two pieces of wood (Fig. 257). Set a lot of lids of tin cans in the cupboard to serve as camping plates, also a few tin spoons, an old table knife, a kitchen fork or two, three tin cups, and a smooth, clean, folded piece of white paper for a tablecloth.
Ask your mother to let you have a large, clean pail suitable for drinking water. Carry the pail to the opposite side of the yard from your tent. There dig a hole large enough to sink the pail down about half its height (Fig. 258). Bank the loose earth up all around the pail (Fig. 259), and cover the earth with leaves, grass, moss and vines; hiding the pail completely with the greenery; then fill the pail with fresh, cool water, and lo: there is your mountain spring (Fig. 260).
but you can pretend there is one. Drive two forked sticks in the ground a short distance from each other; lay a stout stick across from one to the other forked stick; then pile up some dry twigs midway between the stakes. Tie a strong cord on the centre of the cross stick, leaving one end long enough to loop down and under the handle of a pail or kettle and reach up and tie to the short end of the cord. You can put various things into the camp kettle and pretend to cook them over the make-believe fire (Fig. 262).
Make the boat seats of short boards laid across from side to side of the wooden box and nailed in place (Fig. 268). Use broom-sticks for oars, and make believe the boat is off on the water, a long distance from the tent.
Fit the network over your ball (Fig. 279), allowing the covering to remain on the ball while you tie the bunches of strands into another row of four knots below the first row. Look at Fig. 278. The bunches are all numbered, showing how they are to be united. Corresponding numbers must be tied together: 1 with 1, 2 with 2, and so on. The result will be like Fig. 280.
The length of the tether pole you are to use depends upon your height and that of your young friends. Make the pole long enough to allow being planted sufficiently deep to be firm and steady and extend up above the surface of the ground, vertically, to the height of about three feet above your head. Cut a notch near the top of the pole before erecting it (Fig. 285). Tie one end of a long string fast around the notch. The string must be well waxed, twisted and doubled and waxed again, and it must reach within two feet of the ground. Tie the ball on the loose end of the string and erect your pole so firmly that it will not even tremble when you bat the attached ball ever so vigorously (Fig. 286). Fig. 287 gives the first step in tying the ball on the pole string. D is the end attached to the pole, E is the loose end. Pass E under D, then around back again over D and through the loop (Fig. 288); repeat this stitch over and over, drawing the string very tight each time. Finish by tying the E end of the string on the D end in several knots. Examine Fig. 289. It will give you the process of tying, but the knots are drawn loose that you may see how each is made. Paint a red ring around the pole just above the height of your head. Make
The cross in each court is intended to mark the spot where a player must stand to “serve” or strike the ball when the game first begins. The player must stand on the cross of the chosen court while serving; at other times during the game she may go any place within her court, but she must stay in her own court on her own side of the line.
[218]
[219]
that the sand might slip off when it struck them. Try pouring some sand on your pyramids and you will understand the reason of the peculiar style of architecture. The land in Egypt on which the Sphinx and pyramids stand is the plain of Gizeh; consequently, you must give that name to the place where you set up your structures. The
Several date palms, either grouped or scattered, would look well and tend to relieve the severity of the landscape. A thin layer of sand sprinkled over the plain, the stand of the Sphinx and the paper roots or stands of the trees will give the place a realistic appearance, and the scene will then be ready for the camels and Arabs. You may own
of Lindus, that you are a great sculptor and can model all sorts of wonderful and beautiful objects, and that the city of Rhodes has commissioned you to make a gigantic bronze statue of Apollo, their sun god. So you must pretend that you have built two small islands at the entrance to the port of Rhodes, and that on each island you have erected immense stone pedestals fifty feet high, so that your Colossus need not be obliged to stand in the water. The statue must be made to span the harbor with “legs wide apart,” as Napoleon stands in the pictures of history.
When stuffing the figure, use the cotton soft; do not roll it into hard wads, and be careful not to run the end of the stick through the cloth covering and tear it; the same care must be taken when inserting the pins up the legs. With thread and needle stitch an outline between the fingers and around the lower portion of the raised hand. Filling in the figure with cotton will give you an idea of the labor your great-grandmothers expended upon their bedquilts when they stuffed elaborate designs of grapes and vines on the coverings. Such quilts are now highly valued. Give Apollo an
[239]
[240]
Think what that means: When it is finished the people from other countries will see your Pharos and wonder why it never occurred to them to build a lighthouse, and they will hurry to erect similar structures on their coasts, that sailors on all the seas may have guides in times of danger and not be dependent upon bonfires burning at the entrances of harbors. These chance watch-fires are now the only kind of lighthouses the people have, so get ready your material and make preparations for building, that you may help the poor sailors. Remember, though, that we are living in the third century B.C., and that we are not in the United States but on the island of Pharos.
[247]
[248]
on which to erect his lighthouse, but you may have the fun of making one for your Pharos. Find a box a little larger than the lighthouse and cover it loosely with any kind of stiff cloth; have the cloth smooth and tight only over the space on which the Pharos is to stand. On all the other portions of the box the covering should be irregularly placed, so that it will jut out in places; fold in others and have as much the appearance of an immense rough rock as possible. If the box is of pasteboard, sew the cover on with a stitch here and there; if of wood, tack the cover on. When ready glue or
on one side of the first story of the Pharos; then paint over it with white paint so that the name cannot be seen. After the paint has dried, write over the white paint, “King Ptolemy.” Sostratus of old carved his name deep on the stone wall of the building, then plastered over it and set the King’s name in the plaster. Instead of the plaster you have used paint.
[261]
[262]
[263]
then bend dotted lines and cut heavy lines. Bend inward the side part A (Fig. 339) including D and L; then bend forward the top part B; slide C through D from outside and bend inward the box-like arm at E. Bend the other arm likewise. Bend backward the sides extending along the dotted lines F F and G G, then the front along dotted line H; at the same time slide I and I against the inner sides of the throne J and J. Bend forward the back of the throne at K. Bring forward the arms and run L and L through M and M, then pass L and L forward through N and N, and slide them back through O and O. Bring the extension P, including T and Q, across the front; run the tongue Q through R. Bend the left side, passing S through T and U, which fits directly under T; S must go through the two slits to the under side of the chair.
see how gracefully the capital curves into a roll on each side, reminding one of a blossom on the end of a stem. The column you have made is called Ionic, and when you examine the columns or pillars of buildings, you will easily recognize those with Ionic capitals. It was principally because of the beautiful rolled capitals crowning its columns that the temple of Diana was known as one of the Wonders of the World, for it was the first structure that utilized this beautiful style of architecture.
of your temple (Fig. 350). The distance from the outside edge of one ladder-like strip to the outside edge of the other is nine inches. The strips are each sixteen inches long, two inches wide and divided into six spaces. Make the spaces by folding a sixteen-inch strip of paper exactly crosswise through the centre, then folding each half of the paper three times. Place this strip along the edge of the sixteen-inch lines on the ground plan and mark the spaces. Draw the oblong for the cella on the centre (Fig. 350). Make it four inches wide and ten and one-half inches long, leaving half an inch space between this oblong and the inner sides of the ladder-like strips. Take one column at a time and glue the slashed portion firmly on the ladder-like strip. Begin at A, Fig. 350, and
of a coverless white cardboard box minus the two ends (Fig. 353). Let the cella be four inches wide, ten and one-half inches long, and five and one-half inches high. When making any article of cardboard, always lightly score every line intended to be bent; this is very important to insure good work. Glue the cella or inner temple on the boundary lines marked for the purpose on the centre of the foundation board, and glue the outside of the two walls firmly to the edges of the rolled capitals of the columns which touch them.
for the centre where the two sections join, of a two and one-half by three-inch piece of cardboard ruled in half-inch squares and cut like the heavy line on Fig. 360. The steps on this must be cut still deeper, each one-half inch, according to the heavy lines in Fig. 360, and the extensions bent over at dotted lines as in Fig. 361. Fit and glue the straight edge of the left-hand front section of steps on this brace; have the brace flush with the edge of the steps. The brace should not reach to the tops as the tread of that step lies upon the foundation of the temple. When the brace is on, lap the edge of the right-hand section over the left-hand section half an inch; glue the two together, and the front flight of steps will be finished.
to explore the gardens with her. Up, up the many flights of marble steps you go to the tip-top of the beautiful hill, and standing there by her side you have a splendid view of the surrounding flat country as well as of the River Euphrates, which divides the city into two equal parts, half on the east and half on the west side of the river. The Gardens are built as high as the walls of the city (three hundred feet) so you can readily look over the walls to the stretch of land on all sides.
After all the lines are properly scored, cut the lines A A and B B (Fig. 365) only far enough inward to meet the lines C C and D D (Fig. 365). Allowing a scant half-inch extension at each corner on the lines C C and D D, cut the corners out as in Fig. 366. Bend the four little extensions, then the sides E and F (Fig. 366). Cover the extensions with strong glue and, bending the remaining sides G and H (Fig. 366), glue the extensions, one at a time, securely on these sides.
around the edge of all the arches as shown by the arch N (Fig. 367); then with scissors cut the two sides of the second division up to the arch and, holding the cut piece with your thumb and first finger, bend it backward and forward until it breaks away from the strip, leaving an arched opening. Smooth the rough edge of the arch by cutting away the uneven particles. Cut all arches in like manner O O (Fig. 367) and cut the least bit from across each end of your strip—not more than a sixteenth of an inch—that the strip may slide inside of the box foundation. The strip will be a guide in making all of the arches of your Garden.
When this is all complete, make a third box still smaller, of pasteboard nine and one-half inches square. Measure off a two-inch border on every side to form the sides of the platform. The box should be five and one-half inches square and two inches high. Cut arches in this platform with the aid of the same guiding strip of open archways after first cutting off three additional openings to make it fit the new box. You can also trim off the bottom of the pillars along the lengthwise lower edge of the strip that it may be narrow enough to fit more perfectly in the third platform.
of the structure firmly together and fasten the whole building to the ground, cut sixteen strips of white writing paper two inches long and a scant half-inch wide; fold each strip crosswise through the centre; then, paste half of one strip on the fourth platform upward from the right-hand lower corner; bring the free half of the strip out flat on top of the next platform, which extends immediately beneath it, and gum down securely (Fig. 374). Bind the other three lower corners of the top platform down to the top of the next platform in the same manner; then fasten the third to the second and the second to the first platform, also the first platform to the ground. When the paste is perfectly dry, cautiously remove the hat-pin.
at the right of the second story as you glued the first on the left hand of the first story. Crease the third stairway in the same way as the first, for it is to run in the same direction. Let these stairs measure in length from C to C (Fig. 375) two and seven-eighths inches, in width five-eighths of an inch, height from D to D two inches, length D E two and one-half inches, top of side D F half an inch, height of back two inches, width five-eighths of an inch; the top landing one-half inch by one inch. Fasten this stairway at the left-hand corner of the third platform.
Make Fig. 378 of white paper and with ink draw the wings, face and hat like Fig. 379. Then cut out the strange animal, part bull, part bird, and part man. Bend at dotted line on top of wings (Fig. 378); bend outward all four of the extensions under the hoofs and stand the creature at the top of the first stairway. Paste the extensions out from the hoofs firmly to the platform. Carve or cut out seven more stone bulls and place two at the head of each stairway as in Fig. 377. Gum each stone bull securely in place. One more bull is needed which must stand up high on top of a stone shaft (Fig. 380). Height of shaft is three and one-fourth inches, not counting flaps or bull; width of same pattern at top fully two and one-half inches, width at bottom three and one-fourth inches. Height of bull from top of wings to bottom of feet one and one-fourth inch. Mark and fold it along dotted lines like Fig. 381, sliding the two flaps P P (Fig. 380) through the slits Q Q; crease the flaps backward to form paper hooks that hold fast. Turn out the extensions R R, which must be pasted down flat near the right hand on the back part of the top of the third story. The shaft will extend up high above the fourth story, as in Fig. 377.
[295]
[296]
[297]
For the holly and evergreen choose a dark moss-green paper, which is a yellow green with no tinge of blue. For the mistletoe you must have a light gray-green, also of a yellow tone, a light cardinal red for the brilliant holly berries, white for the waxy mistletoe berries and dark gray-brown for holly stems. One sheet each of the red and white paper will probably be sufficient for all the berries you will want, and one sheet of gray-brown will answer for the stems. Besides the paper you must have a spool of fine wire or coarse thread for winding and some natural bare branches or twigs, or a roll of heavy bonnet wire for stems.
With a soft lead pencil draw the outline of a half holly leaf after the pattern (Fig. 400), the fold of the paper forming the straight edge of the outline. Cut along the pencil line, open the fold and there will be sixteen leaves like Fig. 401. The dotted line running lengthwise through the middle of the leaf shows where the paper was folded. Have a damp sponge ready and slightly moisten the fingers of your right hand on the sponge—never with your lips in handling green paper. Take one leaf in your left hand and with the moist fingers of your right hand twist each point of the leaf into a sharp spike, beginning at the top of the leaf as in Fig. 402. Twist the lower part of the leaf into a stem (Fig. 403) and, refolding the leaf down the middle, pinch the underside of the fold to form the mid-rib, bringing your two hands together and puffing the paper a little as you do so (Fig. 403). The finished leaf should resemble Fig. 404. The crinkled appearance given by pinching and twisting adds much to the natural look of the leaf. You may vary the size, making some leaves smaller than others, but keep as nearly as possible to the pattern, for experiment has proved it to be a good one.
cut the gray-green tissue paper into pieces eight and one-half inches long by one and a half inches wide. Bring the two ends of a strip together, folding through the middle, to form the oblong (Fig. 414). Fold Fig. 414 lengthwise through the middle along the dotted line and on it draw the outline of half of a mistletoe leaf, with the straight edge on the long fold and the stem end on the short fold of the paper (Fig. 415). Cut along this outline, open the folds and you will have twin leaves like Fig. 416. Bring the two open leaves together and twist the connecting part into a stem like Fig. 417. Make a number of white mistletoe berries according to the directions given for the red holly berries and wrap them together in pairs; then nestling a couple close in between two leaves (Fig. 418) wrap them on the stem. The
Fasten on the leaves and berries by wrapping with fine wire and then cover the stems with strips of the gray-green tissue paper, wrapping it as directed in making the holly branch. The only difference being that while the holly stem is wrapped with paper only far enough to cover the red stems of the berries and the leaves are put on afterwards, the mistletoe leaves must be fastened on with the berries and the entire stem then covered with the paper. You will remember that the stems of the natural mistletoe are as pale in color as the leaves, so no dark wood must show in your branch.
To make the doll house. Get three stiff pasteboard boxes about fourteen inches long, thirteen inches wide and six and one-half inches high (Fig. 423). Cut the thirteen-inch front and the right-hand side from the first box (Fig. 424). Take the second box and lay the fourteen-inch front down flat on top of an old, common wooden table which can be used without fear of injury, and with the aid of a ruler, draw two straight lines across the front on the inside of the box; let each line be about one and one-fourth inch from the side. Keep the box as it is while you score the lines with a sharp penknife; then cut out the front, leaving the upright pieces to form the corners at each end (Fig. 425). Cut the thirteen-inch front and left-hand side from the third box (Fig. 426). Mark two high windows (Fig. 427) on the inside, near the front of the left side of the first box (Fig. 424). Make each window two and one-half inches high and two and one-half inches wide, leaving a space of three-fourths of an inch between them. Lay this left side of the box flat down on the table and use the sharp penknife to score the dotted lines and cut the heavy lines. Always cut and score from the inside of the box, otherwise the shutters will turn inward.
To make the doll house. Get three stiff pasteboard boxes about fourteen inches long, thirteen inches wide and six and one-half inches high (Fig. 423). Cut the thirteen-inch front and the right-hand side from the first box (Fig. 424). Take the second box and lay the fourteen-inch front down flat on top of an old, common wooden table which can be used without fear of injury, and with the aid of a ruler, draw two straight lines across the front on the inside of the box; let each line be about one and one-fourth inch from the side. Keep the box as it is while you score the lines with a sharp penknife; then cut out the front, leaving the upright pieces to form the corners at each end (Fig. 425). Cut the thirteen-inch front and left-hand side from the third box (Fig. 426). Mark two high windows (Fig. 427) on the inside, near the front of the left side of the first box (Fig. 424). Make each window two and one-half inches high and two and one-half inches wide, leaving a space of three-fourths of an inch between them. Lay this left side of the box flat down on the table and use the sharp penknife to score the dotted lines and cut the heavy lines. Always cut and score from the inside of the box, otherwise the shutters will turn inward.
of large-sized beads, and fasten one on each side of both doors with a strong, heavy piece of broom-straw run through and glued in a hole punctured through the door with a coarse darning needle or hat-pin. Slide a bead on each end of the broom-straw and glue them securely in place. Strengthen the hinges of each door with a narrow strip of thin white cotton cloth pasted lengthwise on the open door, half on the door and half on the wall.
of white tissue paper cut to fit the various windows, allowing one-fourth of an inch extension on all four sides. Immerse the paper thoroughly on both sides in oil; with a dry, clean cloth wipe off the oil; again immerse the papers, let them remain in the oil for some minutes and a second time wipe the oil from both sides of each paper. This makes the paper almost transparent.
When the house is perfectly dry, tack one thin strip of wood across the entire length of the top of the back wall of the house from end to end. You can manage this very readily by turning the house and laying the back wall flat on the table, the top edge of the wall barely covering the strip of wood; then you can tack at long intervals from the inside of the wall and fasten the pasteboard walls to the wood. Be sure to glue the ends of the side wall strips securely to the back wall strip.
Brush a thin layer of paste the width of the frieze along the top edge of the walls of the kitchen (Fig. 424) and fasten on the yellow frieze. Do the same with the living-room, fastening on the green frieze (Fig. 425), and in the bedroom the pink frieze (Fig. 426).
[328]
[329]
are oblong and from two to three and a half inches in length (Fig. 448). They usually have several teeth, or notches, near the tip and are quite narrow at the base. Sometimes they are scattered and again in close bunches. The young leaves are a pale green frequently tinged with red; when matured they are a bright green, glossy, and of a leathery texture and they are very fragrant when crushed in the hands. The bark is brownish gray and the young stems light, or golden brown.
then into a six-quart preserve-kettle pour three quarts of berries and fill to the brim with cold water. This allows two quarts of water to one quart of berries. Put the kettle on the range and let it boil steadily four hours—actually boil, remember—and whenever the water gets three inches below the brim fill it up with hot water. The boiling berries will perfume the house with a spicy balsamic odor that is delightful. When the four hours are up set the kettle back and let the berries simmer for an hour or two, then farther back where it will simply keep hot. At night take them off the range and set away to cool without removing them from the kettle. The cooling down from the boiling point to the point where the wax begins to form should be very gradual to obtain the best results, therefore the simmering and keeping hot after boiling.
Use the remaining lighter, which is the fifteenth, for the mast; flatten out the large end and slide it through the central opening or crack of the raft between the seven lighters on each side; then bend the flat end of the mast along the under side of the next lighter, up through the next space, over the next lighter and down through the forward space. Weaving it over and under the lighters of the raft keeps the mast firm and steady (Fig. 476).
like Fig. 477. Fold a piece of white writing paper; trace one-half of the lumberman on it (Fig. 478), and cut out the figure. When he has been painted and waxed, stand him by the mast with one arm around it. Weave his feet in the raft as you wove the mast, and he will stand up as straight as a good soldier (Fig. 476).
forty inches long will answer for weaving anything one yard or less in width and is of a convenient size to handle. The one-yard width is what an ordinary loom produces, but if you would have your rug or portière wider there is no reason why the board should not be longer. To prevent the material from catching, your board must be smooth on both sides and on the edge and it should be as wide as possible. A good-sized pastry board is excellent for weaving a piece less than twenty-two inches in width.
Fasten your strips on in this way with the tacks half an inch apart and you will have eight ends or eight strips of warp which will form the side border. For the top border cut the blue strips into ten-inch pieces, twist them at the middle so that the ends will be of an even length, and tack them along the line as far as you wish the centre to extend; then add the longer strips of warp for the other side border, as in Fig. 485. To the ends of the short blue warp sew strips of white, lapping the ends with the blue on top. Sew them securely like Fig. 486 and whip the end edges to make them lie perfectly flat.
Tack the end of the strip, which is now the warp, a little to the left and a trifle below the upper left-hand tack (Fig. 487) and, starting under the first strip of warp, weave it in and out several times; then draw the warp out its full length as you do a needle and thread after taking several stitches. Keep the warp flat and even when it is woven and push it up close to the tacks. Weave across in this way, always under one and over the next, and drawing out the end of the woof every little while. When you have reached the last strip of warp on the right, turn the woof over it and weave back again in the same manner (Fig. 487).
[355]
[356]
[357]
If you are not able to paint the flowers satisfactorily, use any colored, printed flowers you happen to have, either the embossed ones that come for scrap books, or those cut from colored advertisements or newspapers. Select three different blossoms or groups of flowers and, taking the largest first, lay it down flat on a strip of stiff paper with the stems or lower part toward the edge of the paper; then run a pencil line entirely around the edge of the flower; this will give a blank enclosed by the outline of the flower. Place the same blossom on the paper again, being sure to bring the top of the flower to meet the top of the outline flower, in order that the two parts may fit; then make a second tracing. Examine the lily in Fig. 491 and you will understand more clearly. Unless the two flower tops meet, one side of the flower tent will be upside down.
is a most appropriate design for Easter. You can make one of cardboard which will stand alone. Cut Figs. 493 and 494 from stiff paper, and make the slit down through the top of one and up through the bottom of the other; then slide the two crosses together by placing Fig. 493 at right angles down through the top of Fig. 494, adjust the two pieces and your cross will resemble Fig. 495. The card may be closed flat by turning the two crosses until they lie closely against each other. You can decorate this double cross by painting or pasting flowers on it, or lettering it with the words, “Easter Greeting.”
that will give almost, if not quite as much pleasure, for not more than four cents. This will be of pasteboard and will fold flat like the cross, but when opened a little chicken will sit up on the inside with its beak wide open and its wings lifted as if ready to sing its little chickie song. More than that, our egg will stand firmly on one end as Christopher Columbus made his famous egg stand.
Our Easter card of bells is fashioned after the old Spanish style of architecture, in which the church bells are often seen suspended in open alcoves which are built up flat above the body of the church. Copy Fig. 506 on cardboard and cut it out. Make three bells like Fig. 507 and fasten one on each of the three round dots on the church belfry (Fig. 506). Sew the bells in place as you did the tulip petals, but in this case allow the thread to be a trifle looser that the bells may sway back and forth, as if ringing, when you move the card. Cut up the slit through the centre of the stand of the card and crease along the dotted line, bending half of the stand forward and the other half backward. This will give a good platform and the card will stand alone (Fig. 508). Make the belfry (Fig. 506) of a warm gray-colored cardboard and gild the cross and bells. When dry indicate a slight shading with pen and ink.
Draw on heavy writing paper Fig. 509. Cut it out, and from white tissue paper make two strips like Fig. 510. Paint eyes and mouth on the head and mark the feet; then with strong glue or sealing wax cover the edges of an egg-shell cut lengthwise and place it on Fig. 509; next fasten a strip of tissue paper (Fig. 510) along the side of the turtle between the fore and hind foot, making the strip reach partly on the egg-shell and partly underneath on the writing paper; this is to make the egg-shell and the heavy writing-paper adhere more firmly together. Fasten the remaining strip on the other side of the turtle in the same way, bend the head up a little and the tail down, also bend all the feet down and the result will be a queer little Easter turtle able to stand alone (Fig. 511).
(Fig. 512). Select a good-sized white egg and blow out its contents in this way: carefully bore a hole at each end of the egg, enlarging them only sufficiently to enable you to send its contents out of one end by blowing in the hole at the other end of the egg; this done, cut from strong, stiff paper or cardboard diagram, Fig. 513, the tail; Fig. 514, the fore leg; Fig. 515, the hind leg; Fig. 516, the ear. Make two ears, two fore and two hind legs. Mark eyes, nose, and mouth on the small end of the shell; curl the tail with a penknife or scissors and glue it on the pig by spreading out the slits and fastening them on the back of the pig; then in turn glue in place the legs and ears and behold! the pig (Fig. 512).
(Fig. 517) requires a lengthwise half of an egg-shell, a piece of stiff cardboard and a bit of plain white tissue paper for its manufacture. Cut the edges of half a shell evenly all around with a pair of sharp scissors, being careful not to crack the shell during the operation; then cut the handle from cardboard (Fig. 518). Glue and attach the handle with sealing wax on the outside of the small end of the shell, bending the handle down a little where it joins the shell, secure the handle still more tightly in place by fastening a piece of tissue paper (Fig. 519) over that portion of the handle which is glued to the egg-shell, allowing the tissue paper to extend out a little beyond either side of the handle and fasten the extensions tight down on the shell. When finished the spoon can be gilded along its edges or otherwise ornamented (Fig. 517).
made of half an egg-shell would protect us from the rain if only it were large enough, but such an umbrella is a good size for your purpose, because you desire an odd little toy and here it is (Fig. 520). To make the umbrella, cut from paper (Fig. 521), fold it together as in Fig. 522, turn down and outward the upper flaps; then glue the two sides of the folded handle tightly together; next fasten the spread-out flaps down on the inside centre of half an egg-shell with sealing wax; be sure to make the handle come in the middle of the shell, otherwise the umbrella will lop over a little to one side. The rim and handle may be painted brown or black, and lines to represent the seams of a real umbrella can be made on the outer surface of the shell.
is not difficult to make. Cut Fig. 523 from medium-weight paper, not too heavy, ornament it as in Fig. 524 or in any other way you may fancy, then take half an egg-shell and glue the chair seat over the open end with melted sealing wax, bend the back in an upright position and allow the slit edges of the seat to be bent down on the egg-shell and fasten in place. The bottom of the shell must be levelled off a little and the hole covered with a piece of paper, in order to make the chair stand up as it should. If tinted paper be used in making this toy it enhances the appearance, though the colored paper is not necessary, as white ornamented makes a very pretty little chair.
The strawberry is in reality a candy box. Take a fine-looking egg and blow out its contents, then dye or paint it red and with black ink mark the dots as in Fig. 525. Next fill the egg-shell with small candies and cover the opening at the top with a piece of green tissue paper cut like Fig. 526. Fasten the paper on the shell with paste used sparingly and only where it is necessary. On the top of the strawberry glue a bow of narrow green ribbon and the candy box will be finished and ready for a unique Easter gift.
(Fig. 528) is made by breaking the egg in the desired shape, first drawing a line with pencil, so that it may be correct, then piercing the pencil line with a fine needle. The wee cradle thus formed is pasted on rockers made of stiff paper and bent down at each end (Fig. 529).
fashioned from an egg. The egg must first be pierced at both ends, and the contents blown out, leaving the hollow shell; then a face, as nearly as possible resembling the Mikado, painted on the egg. A narrow strip of black paper (that encasing needles will answer the purpose) must be pasted on the back of the head, and made to stand erect with the top end curled forward as in Fig. 535; the egg should then be painted black, except the face, as seen in the picture. The head must be made to stand in the same manner that Columbus made his egg stand, by levelling off a portion of the end.
Hero though he is, Napoleon is the better for a companion, and we will give him his first wife, Josephine, whom he crowned Empress of France on December 2, 1805, the day of his own coronation.
take out a good sized lump of clay, put it on a pastry board and knead it like bread. This is to work out all the air and make the grain close and fine. If the clay seems too stiff spread it out in a flat cake, pour a little water in the middle, bring the edges together and knead again until the whole piece is softened. When the clay is too soft spread it out and put it in the air where it will soon stiffen. If it is freezing out of doors do not expose the clay but let it dry off in the house. From time to time, while you are working the clay, cut the lump in two with a palette knife or ordinary table knife (A, B, Fig. 559). Put the outside edges together (C, D, Fig. 560) and continue kneading. The professional potter has a wire strung above his table and on it cuts his clay quickly and neatly in half, but a knife will answer very well. You may have a number of
one you have no fear of harming, and that stands firmly and evenly on the floor; a piece of smooth, rather thick board about ten inches square upon which to build your pottery and a small pastry board. Place the table near a window where there is plenty of light and under it lay a piece of oilcloth to protect the floor; thus prepared you may plunge into your work and accomplish wonders without disturbing the general order of the room. At a convenient place on the table set a small bowl of water and a cup of slip. The slip is simply clay softened in water until it is about as thick as cream. A large piece of old muslin, that you can tear in pieces as needed, should always be at hand, and a wet sponge on which to wipe your fingers.
roll it between your palms, lay it on the pastry board in front of you and with an even pressure of your hands roll it back and forth until it lengthens out and forms a snake-like piece a little more than half an inch in diameter (Fig. 566). Do not let the roll flatten, keep it as round as possible and of an equal size from end to end, then press it with your fingers and flatten the top just enough to take off its roundness. When this is done place one end of the roll narrow side up exactly in the centre of the saucer and make
Before beginning to coil cover the roughened surface around the candle with slip, then press one sharpened end of the clay roll onto the saucer close to the candle (Fig. 572) and bring the roll once around the candle. Make crossed lines on top of the coil, brush with slip and coil again. Continue roughening the top of the coil and covering with slip until you have built the holder up a little over two inches from the saucer, then sharpen the end of your roll and join it to the top (E, Fig. 573). With a brush dipped in slip, fill up, to some extent the creases between the coils and make the coil even and round where it may have been pressed out of shape, for in this part we allow the coil to show.
of a coil of clay as shown in Fig. 574. First the small coil, joining the base of the holder to the saucer, then the larger coil which connects the small coil, and the inside and the outside of the saucer. Use your first finger for keeping the hole in the centre of the large coil the proper size. Build up the edge of the saucer slantingly to join the inner coil of the handle (F, Fig. 574) and allow a ridge to extend from the outer coil a short distance along the outside of the saucer (G, Fig. 574).
while the clay is still moist fill in with new clay and slip. If the piece is perfectly dry mix some finely powdered baked clay with water, making a thick paste, and fill the opening. You may be able to get the unglazed baked clay at the pottery, but if not put a thin cake of clay in any kind of a very hot oven and allow it to bake several hours, then grind to a fine powder. Keep this powder in a labelled box that it may always be at hand when needed.
with colored glaze before it is fired or you may have it fired and returned to you in “the bisque,” when it can be glazed and sent to be fired the second time. One firing really seems all that is necessary for small pieces, however. Fig. 563 was fired but once, the glaze having been applied to the unbaked clay and it came from the pottery in a perfectly satisfactory condition, without crack or blemish.
Long, long ago, before there were any steamboats, sailboats or even rowboats in the British Isles, when men’s clothes were merely the skins of wild beasts tied on with leather thongs, the people went on the water in little circular boats called coracles. These boats were wickerwork baskets covered with the hides of animals and resembled bowls in shape. They were sent skimming over the water very rapidly by means of a paddle which was dipped in first on one side of the boat then on the other. The coracles were so small a man easily carried his boat on his back to transport it over dry land, looking, one would think, very much like a huge turtle walking on its hind legs.
Place the coracle in a basinful of water, put a small doll in it, stir the water round and round with a stick, and watch the boat glide along as swiftly as if its little occupant were paddling with all her might.
PLACE a chair against one end of the bath tub, for Spain, and another chair at the other end of the tub for America. If the chair seat is lower than the rim of the tub, build up with books until the top book is as high as the tub; then fill the bathtub more than half full of water and pretend it is the Atlantic ocean. Cut out two paper dolls, one for King Ferdinand, the other for Queen Isabella. Remember which chair is Spain, and seat the royal couple in Spain, on a throne, made of a bent piece of cardboard. Bring Columbus before the monarchs and let them bid him Godspeed; then put Columbus in his ship, the Santa Maria, with a number of sailors, and send the vessel sailing off on her voyage of discovery. Gently push the boat forward by the projecting spar at the stern, and the little craft will sail along like a real ship on a real ocean; but you must be careful not to push too hard and capsize the vessel. When the boat reaches America, have ready on the chair at that end of the bathtub, some wild Indians with their wigwams, and let Columbus and his men land, while the Indians stand gazing at them in astonishment.
Cut along all the heavy lines. Bend the four dotted lines of the prow ledge (H, I and H, I) backward. All other dotted lines must be bent forward, and care taken to keep the bends exactly on the dotted lines. Do not bend the laps enclosed by the tiny circles along the sides J, J, J, J, J, J. These circles merely show how far the slashed sides lap over each other to form the correct shape of the Santa Maria, for you must know that Columbus’ vessel was very different in build and appearance from any ships we find at the present time. The prow and stern were much higher than the middle of the boat and at the top the stern was quite narrow while at the bottom it was wide, making the rear of the ship big at the bottom and small at the top.
(Fig. 591) of cardboard six and one-half inches long, split the wide end up lengthwise through the centre two and one-fourth inches, then fold the remainder lengthwise through the centre according to the dotted lines Fig. 592. Open the split end and place one-half on the inside of one side of the prow, and the second half opposite on the inside of the other side of the prow. Leave these ends loose, resting the bowsprit in the short opening at the centre top of the point of the prow, where the two short ledges, H and I (Fig. 589), meet.
of cardboard (Fig. 593) two and one-fourth inches long and at its widest part a generous one and one-eighth inch. Cut the hole N, five-eighths of an inch from the wide, straight edge; then cut a strip five and five-eighths inches in length and three-fourths of an inch in width, slash as in diagram and bend at dotted line (Fig. 594). Cut the slit M, and fasten the strip on the deck by pasting the flaps over the top of the curved edge of the deck (Fig. 595). Slide the flat point of the projecting bowsprit through the slit M (Fig. 594), and run a paper lighter foremast, nine and one-half inches long, not including the bent end, through the hole N (Fig. 593). Bring the deck down over the prow, adjust the bowsprit to the inclined height of the bowsprit in the illustration and paste the two split halves of the end of the bowsprit on each side of the inside of the prow. Fasten the foremast tight on the bottom of the boat and paste the deck on the ledges, H, I, H, I (Fig. 589). Make a
for the stern of the boat as you made the bowsprit Fig. 592, only the spar should be shorter, extending beyond the stern of the boat about two inches. Slide the large end of the spar through the opening in the deck at E (Fig. 589) and rest the split ends on each side of the mast.
of very light-weight writing-paper, the top edge straight, side edges slanting, and bottom edge curved inward. Make the greatest height of the foresail for the bow four inches, the width three and one-half inches. With the scissors point, punch two small holes in this foresail, one in the middle at the top and one in the middle at the bottom. Enlarge the holes slightly by inserting the point of a lead pencil and twisting the pencil gently around (Fig. 599). Remember that all holes for the masts to run through must be made rather small, to prevent the sails from sliding too far down the masts. Bend the top and bottom of the sails together to curve the paper, that the sails may appear to be in a good stiff breeze when fastened on the masts. Slide the foresail you have just made on the foremast; it will stay in place without glue. Make
saw or cut off the top of an ordinary wooden spool and paint red downward points around the top edge, a pointed band around the centre, and two straight, narrow bands at the lower edge (Fig. 602).
of heavy stiff writing-paper or very light-weight cardboard, like the pattern (Fig. 606), which measures from the top of the head to the lowest edge of the stand, four and three-fourths inches. Without the stand the figure measures four inches. Carefully cut out Columbus, mark his features, hair, and clothing in black ink. Cut his cloak (Fig. 607) of red tissue paper, bend at dotted lines across the shoulders, and fold back the open front as in Fig. 608. Make the red tissue paper cap (Fig. 609), and fold lengthwise across centre (Fig. 610); then put both cloak and hat on Columbus, that he may be ready to start on his journey (Fig. 611). Cut out a number of sailors (Fig. 612) to go on the boat with Columbus, and a lot of Indians (Fig. 613) for Columbus to find when he lands on the shores of America, at the other end of the bathtub.
for the Indians of paper cut in half circles. Bend back narrow, pie-shaped pieces along the two straight edges of each half circle, make the pie-shaped pieces reach midway up toward the centre; then bend the half circles into tent-like forms, pin the two top edges of each one together, and you will have wigwams, with the doorway flaps bent back. Cut off the top peak of each, wigwam and stand some heavy long broom straws in the opening to represent poles used in real wigwams (Fig. 614).
Ursa Minor is turned in an opposite direction and position from the Great Bear, and the pose makes it easy for us to find the Pole star, because when we once trace out the stars of the Great Bear in the real sky we will see that the two outermost stars of the four which form its bowl, point to the Pole star. We can pretend that we have tied a string on the star in the outside top end of the Big Dipper (Figs. 616 and 618 A), and that we are stretching that string out from the Dipper star in a direct line; then we can tie the string on the Pole star in the end of the Little Bear’s tail, as shown in Figs. 618 and 620, where the dotted line represents a string.
In the sky all of her stars are brilliant, except the one marked K. This is a shy little twinkler and appears rather faint at times; but in the Autumn when you hunt for Cassiopeia, you will be able to see the star K, if your eyes are bright. This lady with uplifted arms is the wife of a king. Trace her and cut her out, punch holes through the centres of the seven stars, then catch hold of the sweeping train of the queen’s dress and hold her up to the light, when the pinholes will look like Fig. 622, reminding one of a chair turned upside down, with its feet toward the queen’s head and its back down toward her feet. You will be delighted with this constellation, for it is very beautiful, and you may find Cassiopeia any night of August, September, October, November, December, January and February, as she is always then visible after dark.
for he is very fine-looking with his starry mane and a star almost in his mouth (Fig. 623). Trace the lion carefully, name him Leo, and cut him out; pierce holes through the stars and hold the figure up to the light. The little girl in Fig. 617 is enjoying her Leo very much. Notice how earnestly she peers through the holes, for she is determined to know the constellation. When you look through the pinholes of Leo, you will find that the constellation resembles a sickle, as in Fig. 624. The lion is in plain sight during February, March, April, May and June, so you have a long time to make friends with him.
sons of Jupiter; always sit together up among the stars. The constellation is called Gemini (Fig. 627). When stars are clustered together, we say the group is a constellation. All of the starry people and animals are only different constellations. In this group each boy has a star on his head, a star on one knee and a star on one foot, which makes six stars. Trace the twins on cardboard, cut them out together in one piece and punch a hole through the centre of each star. Hold the constellation up to the light, and the group of wee, sparkling stars seen through the pinholes will resemble Fig. 628. Look for the twins during the months of December, January, February, March, April and May, and remember you must find the group of stars like Fig. 628.
(Fig. 629). He appears in November and remains where we can see him through December, January, February and March. Orion is one of the most brilliant of constellations. The strenuous hunter has but one visible foot, the other being hidden by his pet hare seated in front of it; so we are obliged to make the star, man with one foot. The fairy tale says that he was a giant and the mightiest hunter ever known. There is a star on each of his shoulders and one on his cheek, forming a triangle; then there is another star down on his left foot and one on his right knee. Trace the mighty hunter and cut him out as you did the other constellations. Draw a line from star to star and, after adding the three stars which form Orion’s belt, pierce holes in all, look through them (Fig. 630) and make friends with the harmless, starry giant. Fig. 631 is
are the best, inasmuch as they are supposed to be fast colors. There is an inexpensive dye now on the market that comes in tubes like oil paint and does not require boiling. This is convenient to handle, as it is merely necessary to dissolve it in water. Tapestry dyes may also be used but are much more expensive. Heavy, non-washable material may be stencilled with oil colors. The color is not used as a paint but as a stain and must be entirely dissolved in turpentine to make it flow easily. Our first drawing shows
Buy a tube of olive green dye, one of yellow and one of cardinal red. Squeeze about a teaspoonful of dye into a teacup, add two tablespoonfuls of boiling water, stir until dissolved, then add enough boiling water to give the desired shade. You can test the depth of color by dipping bits of white cloth in the dye. Each dye must be in a separate cup and a little yellow should be added to the green after it is dissolved, but before it is diluted with the extra water. Have ready
Fold one piece of the dyed cheese-cloth crosswise through the centre and crease it (Fig. 642). Thread a coarse needle with a strand of the floss and run it through the crease, leaving several inches of the floss at each end (Fig. 643). Draw the material into gathers and tie securely (Fig. 644). Then bring the two ends together. Make a loop of the floss about one inch long (Fig. 645), and fasten by taking one or two stitches in the gathers. Open the fold, bring the ends of the floss on the underside of the tassel, tie close to the gathers and cut off the ends. Run another gathering thread across each half of the tassel, half an inch below the gathers at the top (Fig. 646). Draw the thread tight, wrap it around several times to form the neck (Fig. 647), and fasten with several stitches. Cut the floss close to the wrapping and with the scissors trim off the bottom of the tassel until it is perfectly even (Fig. 648). Sew the tassels several inches apart on the bottom edge of the curtains, as shown in illustration. When the curtains are
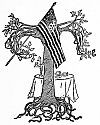
THIS is not to be a formal lawn party, but a genuine, fun-provoking Fourth of July frolic with every one in comfortable dress appropriate for active games. There is to be no dancing, no tennis, nothing in the way of ordinary entertainment except, perhaps, the refreshments, and they too should be as nearly in keeping with the day as possible.
Prepare your guests for something novel by issuing your invitations in the form of giant firecrackers.
Decorate Your Grounds
and make them as festive as possible with fluttering flags, floating streamers, red, white, and blue bunting, and Japanese lanterns. Also provide a number of small flags, one for each guest, to be worn in the hat, hair, belt, and buttonhole. This little touch of uniform will not only make the scene gayer and more exhilarating, but, like badges of an order, will have the effect of dispelling the stiffness of new acquaintances, and bringing the party closer together as members of one band of merrymakers.
For the Giant Firecracker Invitations
you will need several sheets of bright red tissue paper, more of white tissue paper, and some white unlined writing paper. A ball of soft white cotton string will also be required.
Fig. 1.—Lay the paper cylinder on the red tissue paper..
Cut an oblong of red tissue paper, a circular piece of white tissue paper, and a square of writing paper for each invitation. Make the red oblong six inches long and three inches wide, the circle six inches in diameter, and the writing paper four inches square. Of the paper square make a cylindrical roll that will measure about three-quarters of an inch across the end. The easiest way to do this is to roll the paper on a candle, keeping the end edges even, and paste the side edge down while still wrapped around the candle. Pull the candle out of the paper and you have a perfect cylinder. Place the paper cylinder on the red tissue paper oblong so that there will be an even inch of red paper at each end (Fig. 1). Paste one long edge of the red paper to the cylinder and roll it on the table, bringing the opposite edge up smoothly, then paste that edge also in place (Fig. 2).
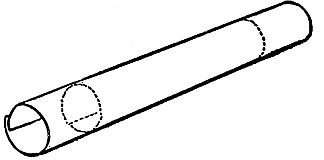
Fig. 2.—Cylinder in red paper cover.
Now prepare and write the note of invitation to be put in the firecracker envelope.
With Short Brush Strokes,
from inside to edge, paint an irregular band of blue, half an inch wide, around the edge of the tissue paper circle, using water colors for the purpose. Write the invitation with red ink around the circle just inside the blue border, or straight across above and below the centre.
Although the party is to be informal, a note written in the first person does not harmonize with the impersonal nature of a firecracker, therefore it is better to word the invitation something like this:
Miss Mary Brown requests the pleasure of the Misses Green’s company at an informal lawn frolic on Wednesday, the Fourth of July, from four to six o’clock. Active games.
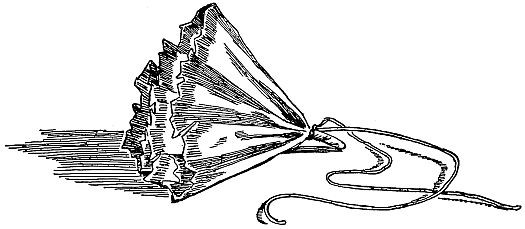
Fig. 3.—The note of invitation looks like this.
When the ink is quite dry pinch the paper together at the centre, making it look something like a paper flower, twist it a little, and tie on the point a piece of the white cotton string. The string should be about ten inches long and must be tied at the middle (Fig. 3). Drop one end of the string through the cylinder and, taking hold of the end, draw the invitation into its envelope. Crush in the extra red paper at each end until it fills the opening and leaves the string extending from the centre (Fig. 4). Write the address and the words, “Pull the long string,” on the outside of the now almost perfect giant firecracker, and deliver by hand, for such an invitation would be broken and spoiled in going through the mail.

Fig. 4.—Giant firecracker with invitation inside.
The following
Order of Entertainment
is well adapted to the Fourth of July lawn frolic:
- Out-of-door Pantomime Charades.
- Shuffle Race.
- Hurling the Lance.
- Daylight Fireworks.
The programme opens with the not too vigorous game of
Pantomime Charades.
This will give all the opportunity of taking part and alternately acting and resting. Stake out the four corners of your stage with groups of flags, driving their sticks into the ground to hold them upright. Provide seats for the audience in front of the stage and at the back or side arrange a screen as dressing and green room for the actors.
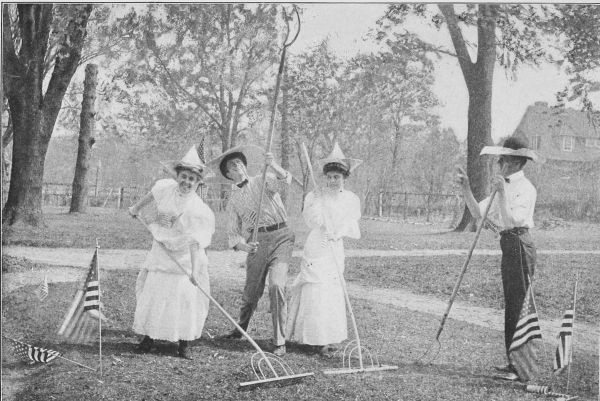
Making Hay While the Sun Shines.
Divide the party into two sides of equal numbers and let the first side choose a proverb to be acted out in pantomime and guessed by the opposite side, which is taking the part of audience. When the proverb is guessed the actors must retire and the other side take the stage. If the subject of the first charade is not guessed the same side must present another proverb, putting new actors in the place of those who have just taken part. Not a word must be spoken in the charade, but the actors must make their meaning as clear as possible by good acting.
Our first illustration shows the out-of-door pantomime charade in progress. The proverb is: “Make hay while the sun shines.” This requires but one act as the first part, “Make hay,” and the last part, “while the sun shines,” are both represented. Making hay is acted out and that the sun is shining is implied by the quaint sunbonnets and wide-brimmed hats worn by the actors.
The Costumes Are Impromptu,
and may be prepared in a few minutes. The odd and most charmingly becoming bonnets, somewhat resembling Dutch caps, are made of newspapers, pinned in shape. The men’s wide-brimmed hats are simply ordinary hats with wide brims made of wrapping paper. Black derby hats were worn on this occasion, but straw hats are better. The girls’ dresses are turned up in front and pinned at the back. If checked gingham aprons are worn looped up at one side they will add to the color effect of the costume.
To Make the Sun-bonnet,
take one folded sheet of a newspaper and turn the folded edge back four inches (Fig. 5). Fold down the corners like Fig. 6, put it on the head, bring the straight edge together at the back and pin it with a large pin. Bend out the laps at the sides and you have made Fig. 7; Fig. 8 gives the pattern of the boy’s hat. Cut a large circle from rather stiff, new wrapping paper; press it down upon the top of the crown of a man’s straw hat; crease it along the edge of the crown, then cut a hole in the centre two inches within the creased line. Slash from the inner edge to the creased line as shown in Fig. 8, fit the paper brim over the crown of the straw hat and pin in place to the hat band.
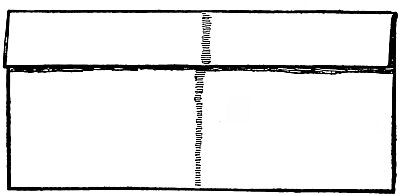
Fig. 5.—Fold the newspaper for the bonnet like this.
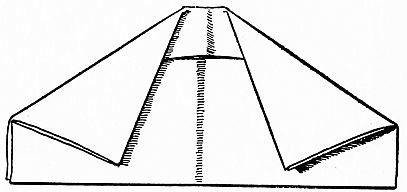
Fig. 6.—Fold down the two corners.
High peaked hats, wide collars, and even short capes may be quickly manufactured from paper and the effect of the impromptu costume is marvelously good.
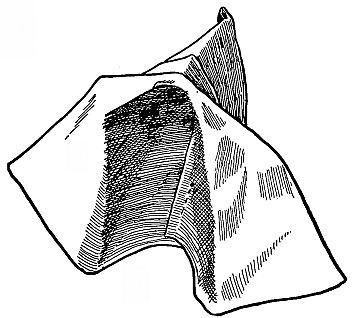
Fig. 7.—A most becoming newspaper bonnet.
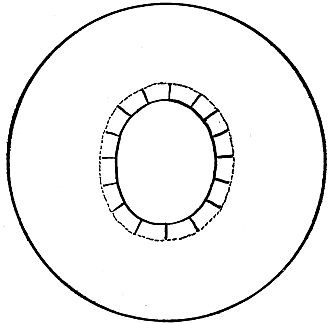
Fig. 8.—Cut the boys’ hat brims like this.
The Shuffle Race,
next in order, is new and it is funny. Its requisites are, for the girls, short skirts, held well above the ankles, and low shoes or slippers many times too large, worn over ordinary shoes. Unless the foot can be lifted out of the shoe without touching it with the hands the shoe is too small. For the boys you must provide the largest sized slippers obtainable, having uppers only at the toes.
The course should be about one hundred feet over a smoothly shaven lawn. The contestants must stand in line at the starting point and at the word “go,” start off on the race, shuffling along as fast as possible. The boys have no advantage over the girls in this game, for it is no easier for one to cover the distance quickly, shuffling along in the large shoes, than for the other, and both look equally ridiculous in their absurdly frantic efforts to win the race.
After resting from the shuffle race allow your guests to try their skill at
Hurling the Lance.
From the limb of a tree have suspended five or six feet from the ground a small wooden hoop, about eighteen inches in diameter, covered like a drumhead with white tissue paper.
Provide each player with a round, green, tapering stake, white tipped and five feet long—the kind used for propping up plants. On the blunt end of each stake, or lance, should be tied streamers of red, white, and blue, which will make streaks of color as they are sent hurtling through the air.
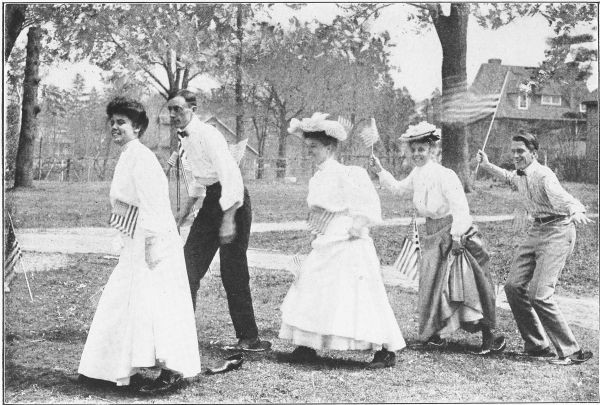
Hurrying Along in the Shuffle Race.
Clear the space on the far side of the hoop that no one may be hurt by the falling lances, then have each player in turn throw his or her lance with the object of piercing the paper and sending the lance entirely through the ring. Each player may have three trials in succession, and unless her lance passes through the hoop at least once she is counted out. There are three rounds and the player wins who, at the end, has succeeded most frequently in sending her lance through the hoop.
Let the farewell be a
Burst of Daylight Fireworks.
Strings of firecrackers stretched from tree to tree, bunches hidden under barrels, harmless torpedoes for your guests to explode, and any other fireworks that do not need darkness for a background may be used.
It is a good idea to make
The Balloon Ascension
an especial feature of the display. In the early days of our country “Independence Day” was not to be thought of without a balloon ascension, and the time-honored custom may be observed, but in a new way. This part of the programme should come as a complete surprise, and all the preparation for it be kept secret, that none of your guests may suspect what you have in store for them. The old observances always included a patriotic speech, and that, too, should form a part of the ceremony, being used as an introduction to the balloon ascension. You may make the speech yourself or get some one to do it for you, but in either case let it be quite short. Balloons should not be mentioned, but in some way the old Grecian myth of Pandora and her wonderful box must be brought in.
The Myth
can be used quite appropriately and effectively for, as you will remember, it was to punish Prometheus, and mankind in general, for stealing fire that Zeus commanded Hephæstus to form from earth this most beautiful Pandora, in order that by the charms with which the other gods endowed her, she might bring trouble and vexation upon them. It does not appear to have been altogether her charms, however, that worked the mischief, for we are told it was curiosity that induced her to open the box, or cask, which was filled with winged blessings for men, thus allowing all of the blessings except hope to escape. As the remarks are being brought to a close have your
Pandora Box
carried out and placed in front of the speaker.
In this case the box is to be a good-sized sugar-barrel, wrapped in flags, or red, white, and blue bunting, and having a lid that is easily lifted. With the final words let the speaker step forward and suddenly raise the lid of the barrel. This will set free not the things that were in the original Pandora box, but a number of gas-filled, rubber, toy balloons, that will burst out like a volley of fireworks, for a moment filling the air with color and movement, then sailing upward and away to finally disappear from view in the blue sky overhead.
In preparing your Pandora box choose a barrel that is perfectly smooth inside, without long splinters or nails to pierce the fragile balloons. Then see that the cover has a handle or knob by which it can be lifted. A spool fastened on with a screw will serve very well and is easily grasped by the hand.
The Balloons
are the kind one sees for sale on the streets tied in great bunches by their long strings. Red is the most common color, but sometimes they vary. Frequently there are white ones with red or yellow lettering and bands, and again, just before the Fourth, red, white, and blue ones may be found. Have all the colors possible, and crowd in as many as the barrel will hold, cutting the strings off close to the balloons that they may not become entangled, and taking great care that they do not escape, like the blessings, before their time.
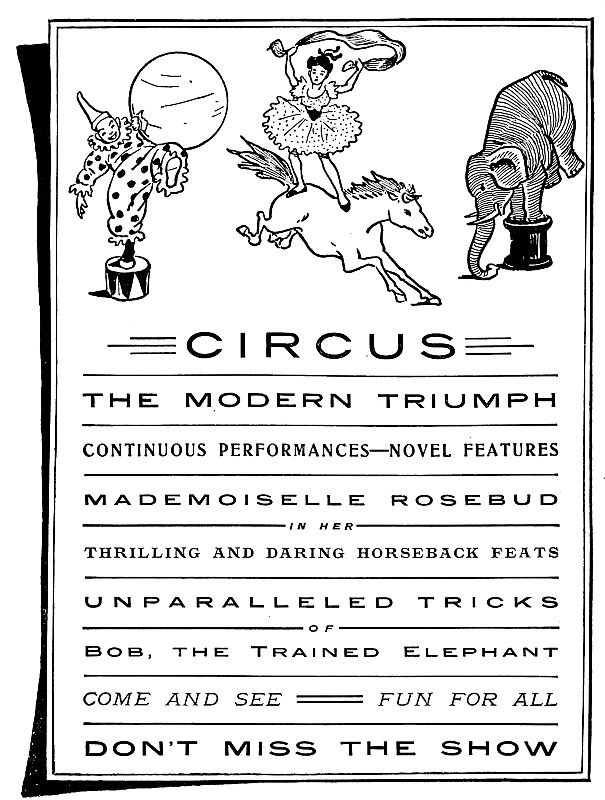
CHAPTER II
A WONDERFUL CIRCUS AT HOME WITH MOVING ANIMALS
MAKE your poster as nearly as possible like the one on the opposite page. Paint the lettering in gay colors on a big sheet of paper and a day before the show tack it up in a conspicuous place where all the family will see it, for, of course, your show must have an audience, and if you follow out all directions very carefully it will be well worth seeing.
Have your circus on top of a large table, or on the floor, or out of doors on the bare ground. Almost any place will do where there is a good-sized level surface.
Make the circus ring about forty inches in diameter, outline it with chalk and cover the marked line with either sawdust or dry corn meal built into a narrow ridge similar to that of earth around the large rings; then your circle will look just like the ring of a real circus.
Be sure to have some kind of music at your show, if only music on a comb. Place a piece of paper over the comb and play a lively march. Let all the music be sprightly and gay.
Following the method given for making the horse and elephant, you can make various other moving animals.
Fig. 9 shows
Mademoiselle Rosebud
standing firm and upright without the slightest tremor as her Kentucky charger leaps high in the air over an outstretched banner.
Fig. 10 gives the pattern of the horse and rider, which you can trace on stiff cardboard, not too heavy. If enlarged to twice the size given they will be more imposing, but this is not necessary, as the size of pattern is very good.
When outlined cut out the design, let the horse remain white, and with pen and ink draw the lines which give him form, shaping the head and neck, and separating the legs, as in Fig. 9.
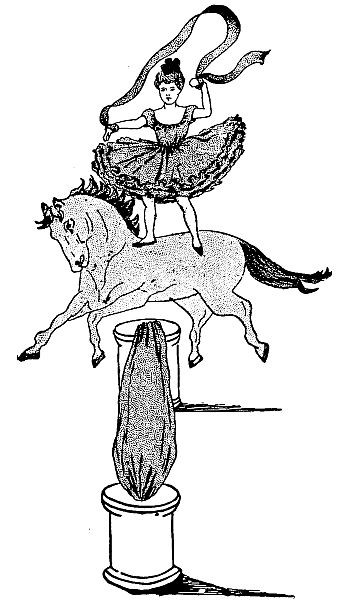
Fig. 9.—Making the high jump.
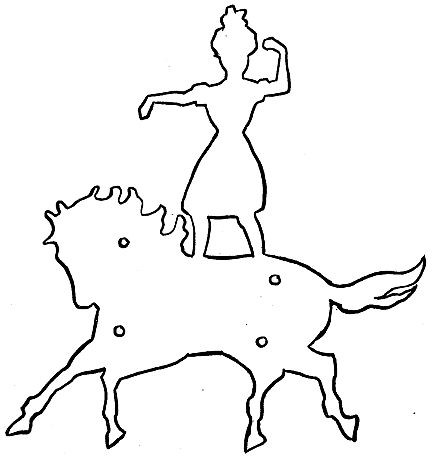
Fig. 10.—Pattern of horse and rider.
Paint Mademoiselle’s face, arms, and neck flesh color; her waist, skirt, stockings, and slippers light blue; make a full double tissue-paper skirt of the same color by gathering a strip of light-blue tissue paper through the lengthwise centre, folding the edges together and tying this double skirt around the little lady’s waist. Cut a narrow strip of the same blue paper and fasten one end around each wrist that it may float freely in the air as she gallops around the ring.
To Give the Horse Ability to Move,
pierce four holes through the body with a large needle, as in Fig. 10. Be sure to have the holes in the right places that the horse may balance perfectly; then when the threads are in position there will be no difficulty in making the horse stand and walk alone, as a well-trained steed should.
Use four pieces of strong black thread, all of the same length, about forty inches, for leading the horse. Tie all four ends of the thread together, and make a large knot in each strand seventeen inches from the joined ends. Run each thread through a separate hole in the body of the horse. Slide the horse against the knots tied in the thread and then tie a second knot in each thread close up to the other side of the horse.
Be very particular about these knots; they should rest against the body of the horse, that the animal may be firmly inserted between eight knots, four knots tight up against each side of his body. Sew a tag of black tape on the thread where the ends are tied together and pin the tag down to the floor in the centre of the circus ring.
Tie the Ends
E and F (Fig. 11) together and fasten them to a piece of pasteboard; do likewise with the ends of the threads G and H, then hold the two threads which are near the front of the horse, E and F (Fig. 11), in one hand and the other two threads, G and H, in the other hand while you walk slowly around the outside of the ring, allowing little Rosebud to ride demurely around in a circle, as such performers always do when they first enter a real circus ring.
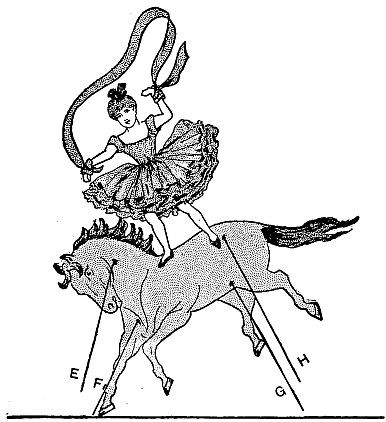
Fig. 11.—Threads showing how to make the horse dance.
After the audience has been duly impressed by the novel sight of a paper horse and rider moving, apparently without aid, around the ring, the black threads being practically invisible, let the horse stand alone while you bring out two or three brightly colored tissue-paper banners, with each end of each scarf pasted on the top of a spool. Place the banners at various distances around the ring; then again take up the threads and
Make the Horse Run and Jump Over Each Banner.
This done, remove the banners and let the horse with his pretty rider dance around the ring, sometimes on his hind feet, as in Fig. 12, and again on his fore feet (Fig. 11), while little Rosebud easily retains her footing, looking more than ever like a real circus rider.
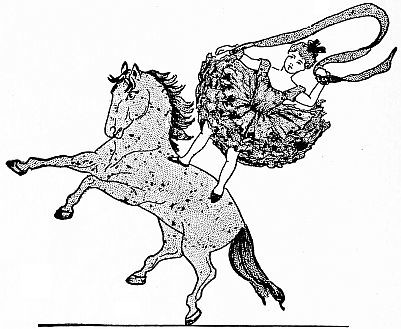
Fig. 12.—Horse and rider dancing around the ring.
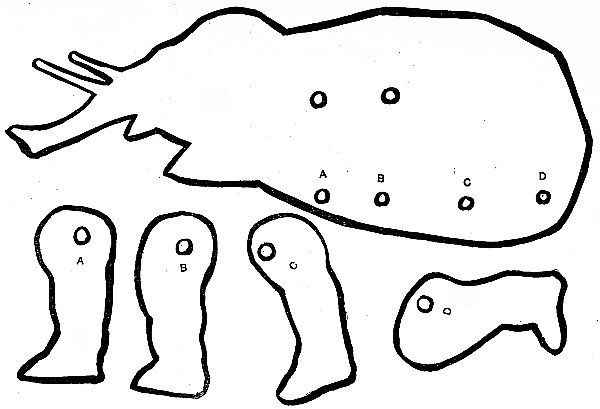
Fig. 13.—Pattern of Bob the elephant.
Fig. 13 gives the different parts of
Bob the Wonderful Elephant.
Make them all of stiff cardboard and larger if possible than the diagram; then with pen and ink draw the ears, eyes, and tusks (Fig. 14); waterproof drawing ink is best for this purpose, but common ink will do. When the ink is dry give all parts, except the tusks, a light wash of India ink, to turn the animal a natural dull gray color. With black thread fasten the leg A on the far side of the elephant, running the thread through the hole A in the elephant and tying the thread into a large knot on the leg, then making another knot on the near side of the body; the leg and body are fastened to each other in this way between two knots of thread. Have the pieces close together, but loose enough to allow the leg to move easily. Attach the next leg, B, on the near side of the body at the hole B. The leg C goes on the far side of the body at the hole C, and the leg D on the near side at the hole D. The legs A and C are on the far side, and B and D on the near side of the animal (Fig. 14). Sew one end each of two strands of black thread to a small piece of black tape. Make a large knot in each thread, eighteen inches from the tape, run the free end of each thread through one of the two holes high on the elephant’s body (Fig. 13), and slide the elephant on the threads close to the knots. Make other knots on this side of the body, in the same way you managed the Kentucky charger, then pin the tape to the centre of the ring and
Start Your Elephant on a Walk
around the ring.
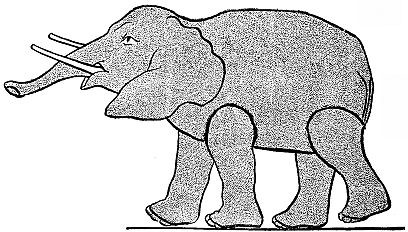
Fig. 14.—“I’ll walk.”
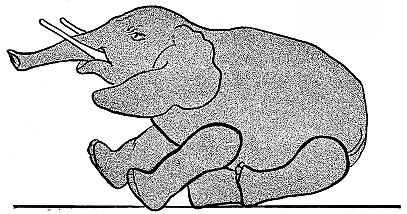
Fig. 15.—“Won’t go another step.”
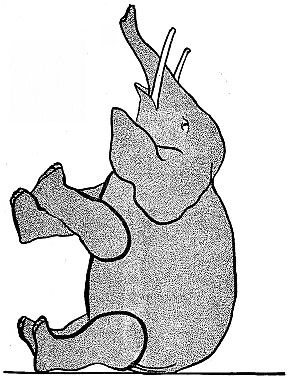
Fig. 16.—“See me sit up.”
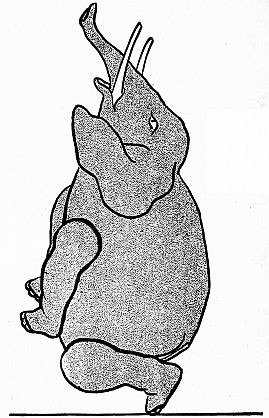
Fig. 17.—“I can dance.”
If the horse and rider interfere, take them away and let the unparalleled animal have the field to himself. When Bob goes around the ring he always gets tired and draws back, declining to move another step. Make him do this by gently pulling the back thread backward. Bob is very comical when assuming this pose (Fig. 15). Raise the front thread and the little fellow will sit up[25] [26] [27] (Fig. 16). Slowly and gently raise both threads a trifle and Bob will begin to dance (Fig. 17). Raising the back thread a little, not enough to take his foot from the ground, and at the same time lowering the front thread, will cause Bob to crouch and crawl along (Fig. 18). Fig. 19 shows Bob when he is in a hurry. Make this by lowering the front thread of Fig. 18.
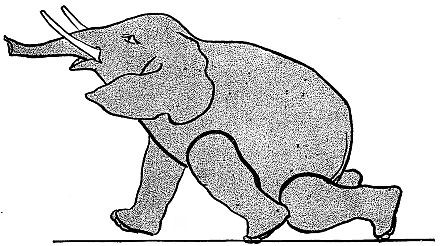
Fig. 18.—“I am coming.”
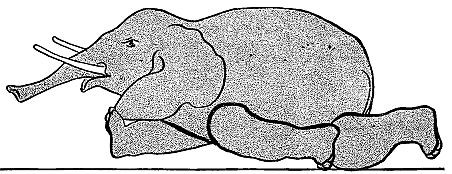
Fig. 19.—“Hurry! Get out of the way.”
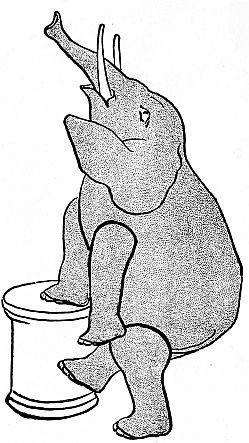
Fig. 20.—“Here goes.”
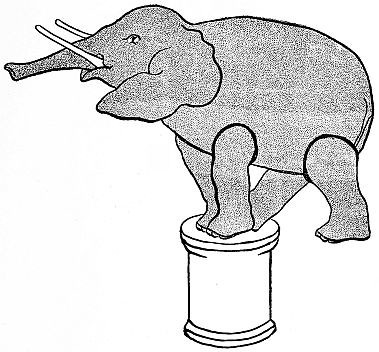
Fig. 21.—“How is that?”
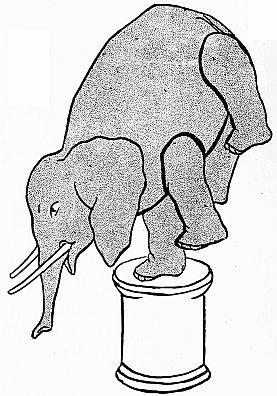
Fig. 22.—“Difficult, but I can do it.”
Now Stand a Spool in the Ring
raise the clumsy little fellow up on his feet and walk him over to the spool, where he will naturally rest one foot on top while he takes a long breath before climbing up (Fig. 20). Move the threads carefully and the elephant will climb on the spool (Fig. 21). Lift the back thread, and Bob will slowly and cumbersomely raise up until he balances himself on one fore foot on top of the spool (Fig. 22). By cautiously moving the threads you can make the elephant lower himself and step down and off (Fig. 23). When the animal is entirely off the spool, raise up and back the front thread and he will sit down upon the top of the spool to rest (Fig. 24). Without any trouble Bob can stand erect on the spool, as in Fig. 25.
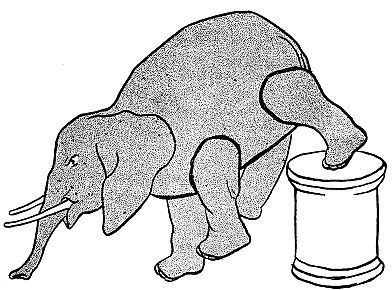
Fig. 23.—“I’m coming down.”
All the poses given were taken direct from those actually assumed by Bob while he performed to the accompaniment of music, when rehearsing to a small but appreciative audience, preparatory to appearing before the public in print. The Kentucky charger also went through all his acts to the same music.
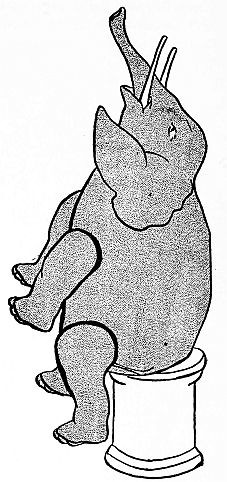
Fig. 24.—“Must rest.”
Remember to mark and color the wrong side of each figure as it should appear, so that the animals and rider may look well from all sides of the ring.

Fig. 25.—“Just balance like me.”
The horse can go rapidly, but the elephant, to be lifelike, must move slowly. When the circus is over roll the threads on their respective pieces of cardboard and bits of tape to avoid tangling them, and have a box ready in which the animals may lie flat until again needed.
This little circus will make a fine parlor entertainment, or would do admirably as a side show at your next fair, when a small extra admission could be charged and wee glasses of lemonade and tiny popcorn balls passed around to the audience in true circus style.
CHAPTER III
A NOVEL EASTER PARTY WITH NEW EASTER GAMES
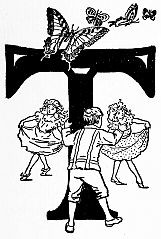
THERE are no end of delightful things to do at an Easter party, and every game may be in keeping with the season.
The game of
Egg Tennis
Fig. 26.—Carefully bore a hole in each end of the shell.
is particularly pretty. As you play this new Easter game, showers of color will fill the air, sometimes descending in sparkling bits of orange, again reds, then greens or blues, yellows or purples, with all their beautiful tints. Quivering and shimmering, down the colored rain will fall, lightly covering your hair, clothing, and surrounding objects, while you stand, racket in hand, watching the result of your stroke. Your companions, seeing your success, will be eager to try their skill, also, with one of the pretty magic eggs. These colored showers do not even look wet, and they will not injure the most delicate of fabrics, for they are composed of countless bits of bright tissue paper.
The Number of Eggs
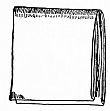
Fig. 27.—Fold the paper like this
needed for the game depends upon the number of players. There should be three eggs provided for every two players. In case the first player succeeds in breaking two eggs in succession, the third egg will not be used during the game, but may do duty at another time in another game. Should the first player fail in breaking the second egg, then all three eggs will be required.
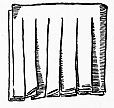
Fig. 28.—Cut the paper in fringe like this.
How to Prepare the Eggs
Select eggs as nearly of a size as possible; take one egg at a time and with a very coarse needle carefully bore a hole in each end by pressing the point of the needle against the shell and then turning the needle around and around until a little hole appears. Be very careful when boring not to press the needle with too great a force, as there is danger in so doing of cracking the shell and rendering it useless. When both holes are made, increase the hole on the large end of the egg until it is about as large around as the head of a common hat-pin (Fig. 26), then place the small end to your lips and blow out the contents.
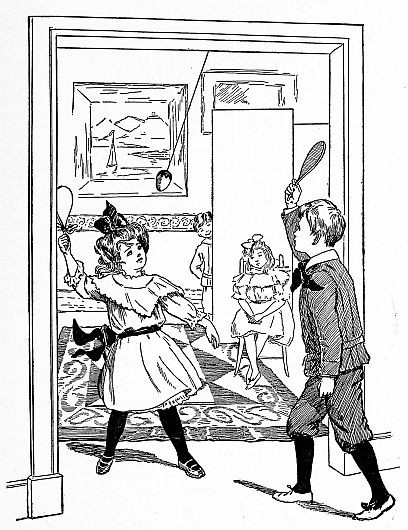
Playing the New Easter Game of Egg Tennis
After the Shells Are Emptied
leave one white and color all the others, making each shell of a different color. When this is done, allow the inside of the shells to become thoroughly dry; then fill them with pieces of tissue paper cut in small squares a quarter of an inch or less in size. These can be quickly made by folding the tissue paper like Fig. 27 and cutting it into strips of fringe (Fig. 28); then cutting off the ends of the fringe little by little (Fig. 29). Fill the red egg-shell with bits of red paper, the yellow shell with yellow paper, and so on, making

Fig. 29.—Cut off the ends of the fringe.
The Shower of Paper
in each egg-shell correspond to the color of the shell. Fill the white shell with squares of white tissue paper, and when the shell breaks in mid-air, the shower will resemble the dainty petals of cherry blossoms as they fall when shaken from the trees by a light breeze. The effect is very pretty, calling to mind the Feast of Cherry Blossoms in Japan, when the girls and boys accompany their elders to see the cherry trees in full bloom.
Fig. 30.—Gilt paper disk.
Cut Gilt Paper Disks
two inches in diameter (Fig. 30); fold each disk through the centre (Fig. 31), then fold again crosswise through the middle of the first fold (Fig. 32). Fold once more (Fig. 33), and, following the dotted lines on Fig. 33, cut the points as shown in Fig. 34 and you will have the eight-pointed star (Fig. 35). While the point is still folded with a sharp pair of scissors clip off the point (A, Fig. 34). This makes the hole in the centre of the star (B, Fig. 35). Through the hole in each star thread the two ends of a strong string. Cover the under side of the star with paste, separate the two ends of the string and hold them down on each side of the egg (Fig. 36), then draw the star down on to the shell over the strings, and press tightly in place until the paste holds (Fig. 37). Clip off the ends of the string that extend below the star.
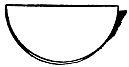
Fig. 31.—Fold the disk through the centre

Fig. 32.—Fold the disk a second time

Fig. 33.—Fold once more.

Fig. 34.—Cut out the point.
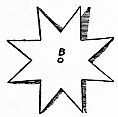
Fig. 35.—The star unfolded
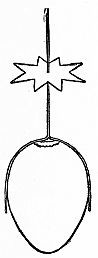
Fig. 36.—Hold the two ends of the string down on each side of the egg.
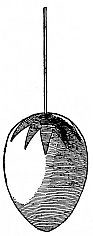
Fig. 37.—Draw the star down and press tightly in place.
When the paste is quite dry and the paper firmly attached to the shell,
Hang One of the Eggs
directly in the middle of a wide doorway so that the egg will be about as high as the shoulders of the players. If there is a curtain pole in the doorway tie the string to the pole; if not, drive a tack on top of the door frame and suspend the egg from that. Where the doorway is quite wide, like the old-fashioned doors between two parlors, two eggs may be hung and four players take part at one time. In that case you will need four rackets; ordinarily two rackets are sufficient.
Make the Rackets
of flat rattan, taking two pieces, twenty-seven inches long for each racket. Soak the rattan to make it pliable, then bind the two pieces together with string as in Fig. 38. Bend the now double rattan to form a loop, bring the four ends together and wrap them into a straight piece for the handle (Fig. 39).
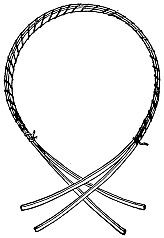
Fig. 38.—Bind the two pieces of rattan together.
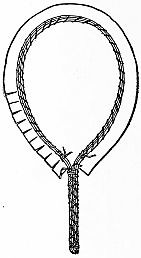
Fig. 39.—Bring the four ends together to form a loop.
Lay the frame you have just made down on a large piece of strong writing-paper and mark a line on the paper one inch from and entirely surrounding the outer edge of the frame down to the handle. Draw another line close to the outer edge of the frame, then cut out the design along the outside line. Slash the edge up to, but not across, the remaining pencil line (Fig. 39). Cover one side of the slashed border with paste or glue, and, again placing the frame on the paper, turn the flaps, one at a time, over the edge of the frame and attach them firmly to the frame and to the inside of the paper (Fig. 40). When the paste is perfectly dry, make another paper cover in the same manner and paste its slashed edge over the frame on top of the first, putting one cover directly over the other and so making it double; this will make the racket quite strong and firm.
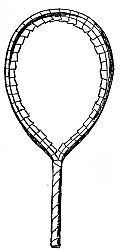
Fig. 40.—Turn the flaps of the border over the edge of the frame.
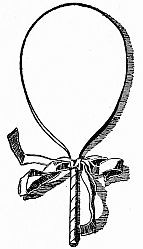
Fig. 41.—Finish with a bow of ribbon
Wind a strip of paper one-half an inch wide around the handle, pasting it as you wind, and turn the end of the paper up over the end of the handle (Fig. 40). Finish with a bow of ribbon, tying it on where the handle joins the racket. Fig. 41 shows the completed racket right side up.
The Game of Egg Tennis
is played in couples, and the object is to break the egg-shell and send the paper rain flying in the air. The sport is adapted to all ages, from the little child scarcely large enough to wield the racket to grown girls and boys, and even older people will become excited as they try to strike the fragile toy.
The players must stand facing each other at equal distances from and on opposite sides of the suspended egg. The distance is decided by swinging the egg and then placing the players within easy reach of it before it swings above their heads. This is done by the umpire, who takes charge of the game and decides any disputes.
Promptly at the signal,
“Ready,”
given distinctly by the umpire, the player who has been appointed starter gently swings the egg outward toward her opponent, and the egg is then “in play.” The other player immediately tries to strike the egg with her racket, using sufficient force to break the shell or send it flying swiftly toward the first player, who in turn promptly hits or misses the egg. Whether struck or not, the egg will return to the other player, who will surely be able to strike it the second time it comes to her, if not the first. And so the egg is kept swinging rapidly back and forth between the two players until the shell is broken. With the breaking of the shell comes the beautiful shower of tissue paper which is sent flying through the room by the stroke, and the player who releases it wins a point in the game.
When the First Egg is Broken
a second one must be put in its place, and the unsuccessful contestant has another opportunity to make good her record, playing with the same opponent. If the breaking of the second egg proves a tie—that is, if it is broken by the player who was at first unsuccessful—a third egg must be suspended and the same couple continue to play until that, too, is broken. Then the unsuccessful player drops out of the game, and the winner of two points to his opponent’s one steps aside to await his final play after the other couples have had their turn. Should one player win two points in succession the third is not played, for two points lost sends a player out of the game.
When all the couples have played, the successful competitors alone remain in the game. These form new couples and play as before, each in his order. This time there is but one egg for each couple, and the player who fails to break the shell must withdraw, giving his place to the next player, while the successful one holds his place until another breaks the egg. In this way but one player comes out victorious.
When space allows two eggs to be hung in the doorway and two couples take part at the same time, there must be two umpires, one for each couple, for in the excitement of the fray, one person cannot watch all the play.
RULES OF THE GAME
1. The umpire may not take part in the game while acting as umpire. She shall keep tally and decide all questions which arise regarding the game.
2. The egg shall not be struck except with the flat face of the racket.
3. When an egg is broken by striking against the surrounding woodwork, or in any other manner other than with the face of the racket, it counts one against the player who made the stroke and scores one for his opponent.
4. Two points scored during one play declares the successful competitor the victor.
5. A play consists of any number of trials until the two eggs are broken.
6. Two eggs shall constitute a play when there is no tie; in case of a tie there shall be three eggs.
Butterflies as well as eggs are appropriate for Easter and the
Butterfly Game
will come in well as second on your programme.
All the girls are butterflies in this game and all the boys are collectors. The collectors are stationed in different parts of the room and stand some distance, at least six feet, apart. They may not move their feet to step in any direction, but, standing in one spot, may reach out on all sides with their hands as they try to catch the butterflies flitting past them.
Each Butterfly
must lift the skirt of her dress with both hands and move it back and forth as she flies among, around and between the collectors. This moving of skirts as mimic wings makes the game appear very pretty to the onlookers, and the collectors find it difficult to grasp the fluttering draperies.
It is the Part of Every Collector
to catch as many butterflies as possible and as each butterfly is caught she must stand close behind the collector to whom she belongs. The second captive stands behind the first with her hands on the shoulders of number one. The third takes her place behind number two with her hands on the shoulders of number two and so on to
The Last Captive
The game becomes exciting when but one free butterfly is left, darting about, skilfully evading the outstretched hands of the collectors, each intent upon capturing this last and greatly valued prize. For in the count the last butterfly captured is equal to two of the others.
The game ends when all are caught and the winner is he who possesses the greatest number of butterflies, counting the last one caught as two.
The Magic Dye Kettle
will be a unique, amusing and mystifying feature in the entertainment of your guests. For this some preparation is necessary.
First you must have the tinsmith remove the bottom of a new, inexpensive, tin kettle, one that has a lid to fit and will hold several quarts. Then in the bottom of a square wooden box, about as large as a small table, have a hole cut a trifle smaller than the bottom of the kettle. Knock out one side of the box, stand it bottom side up so that the round hole will be on top, place it in the position it is to occupy, and throw over it some kind of a cover which will reach to the floor and hide the box completely on all sides. In this cover you must cut a hole to fit the hole in the box, and place the hole in the cover directly over the hole in the box. Place the lid on the kettle and stand the kettle over the hole and it will appear to be merely sitting on the table, as there will be nothing to indicate the opening beneath.
Under the Box,
ready for use, place a shallow tin pan larger around than the bottom of the kettle, and cover the bottom of the pan with sawdust; also place under the box a basket filled with hard boiled eggs of various colors, three eggs of each color.
In another part of the room have ready another basket containing the same number of hard boiled eggs but all uncolored.
While the Butterfly game is in progress let some one who is in the
Secret of the Magic Kettle,
hide under the improvised table and at a given signal lift the shallow pan and hold it tightly under the hole in the box.
Explain to your guests that you have for the occasion a magic kettle, which, while they wait, will color eggs for them without water and without heat. Pass around the basket of uncolored eggs and invite each one to take an egg. Tell three members of the party to decide upon a color they wish their eggs dyed (all three must be the same color) then, as you raise the lid, to shout the color in unison, and carefully place their eggs in the kettle.
As soon as the eggs are in quickly replace the lid and wave your hands back and forth over the kettle. Apparently you will be working a charm, but in reality you will be keeping the too curious from taking a peep into the kettle to see what process is going on.
When the uncolored
Eggs are in the Kettle
and the lid is on, your assistant underneath must gently and without the least noise lower the pan she is holding, and in which the eggs have been deposited, remove the uncolored eggs and substitute three others of the color she has heard wished for. Then lifting the pan she must again hold it close under the kettle until
The Colored Eggs are Taken Out
and three more put in to be dyed.
Give your assistant several minutes to make the exchange of eggs, then lift the lid and allow the eggs, so quickly and so marvellously colored, to be lifted out by their owners.
When all the eggs have been dyed lead your guests from the room without allowing any investigation of the workings of the magic kettle and while they are out have box, kettle and eggs taken away so that the charm of mystery may not be broken.
CHAPTER IV
A DOORWAY PUNCH AND JUDY SHOW
EVERYBODY laughs when he sees Mr. Punch, with his funny long nose, and his wife Judy in her frilled cap. The show is all fun, every bit of it; even the little baby seems to understand and appears actually pleased when Punch and Judy toss him back and forth, as they might a rubber ball. When the infant happens to fall, he is never hurt; the accident is but a good joke and part of the sport. One great charm about the show is, that you can make Punch and his family do exactly as you please and say exactly what you want them to say, for so long as you are showman they yield implicit obedience to your will.
The only material necessary for
The Stage
will be a piece of plain solid-colored cloth, which must reach across an open doorway, be tacked upon each side and extend down to the floor, where it should be again fastened that there may be no danger of its blowing aside. Put this curtain up high enough in the doorway to reach a trifle above your head, for you must be completely hidden from the audience. The full-page illustration shows the back of the stage and gives the manner in which Punch and his family are made to move about in the opening between the top of the doorway and the curtain. It is this opening which constitutes the stage. The illustration also shows a band of cloth stretched across the extreme top of the doorway, and short side curtains added to the outside of the stage to improve its appearance.
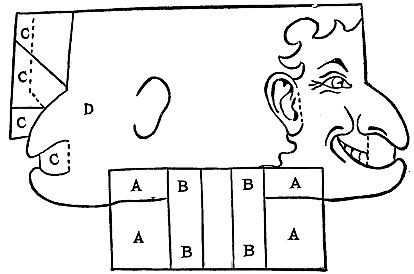
Fig. 42.—Draw Punch’s head like this.
To Make Punch’s Head,
cut a piece of unruled white writing-paper eight inches long and five inches wide, to allow a generous margin, and on it draw Fig. 42, making the head 6 inches across one way and 4 inches the other. Paste a strip of thin cloth over the neck which includes the entire space between the four corners marked A-A-A-A, and over this cloth paste two more cloth strips in the spaces marked B-B and B-B. The cloth strengthens the neck and prevents it from tearing while the head is in motion. Carefully mark the[47] [48] [49] features, copying them also on the right-hand side of the face (D). Cut out the head, including flaps, and the ears along their outer edge. Cut the line of the chin into each side of the neck as far as the second strips of cloth (B-B and B-B). Roll the neck until it fits loosely on your first finger, then paste it together like a ring. Paste the tips of each side of the nose together, also those of the chin.
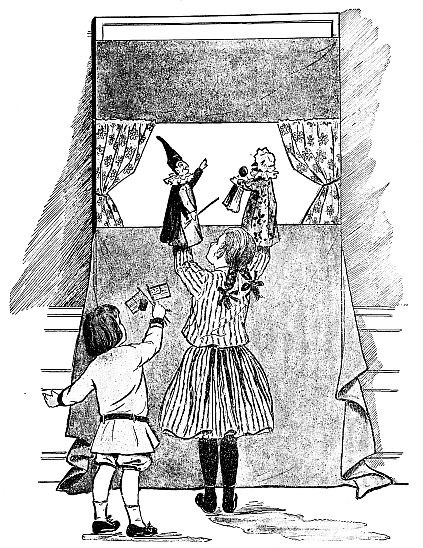
Behind the Scenes in the Doorway Punch and Judy Show.
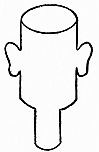
Fig. 43.—The top of his head is open.
Bend the flaps at the dotted line on the edge of the face and paste the other side of the face part way over the flaps, covering the spaces C-C-C-C. If the head seems too narrow, bend the paper out to make it appear wider. Roll an extra piece of writing-paper and fit it inside the head. Be sure that the roll lies evenly and is close up against the inside of the head; then bend out the ears, paste the paper lining in place and paint the entire head pink except the eyes and teeth. When the first color is dry, paint the markings on the ears red; the hair and eyebrows, markings for teeth and the eyes black; the lips, nose, chin and cheeks a brilliant red.
Fig. 44.—Make the hand in the shape of a mitten.
The top of Punch’s head is open (Fig. 43), but we will cover it with a high, pointed cap, and the uncovered space where the chin comes forward beyond the neck will not be noticed when Punch is dressed, for the double ruffle around his neck hides all deficiencies. Make each arm of a roll of writing-paper pasted together along the edge. The roll must be about four and three-quarter inches long. Flatten and paste together one end of each arm, and on these flat ends draw the outline of a mitten, which will serve as a hand; when the paste is dry, cut out the mitten (Fig. 44). Paint the hands and arms pink.
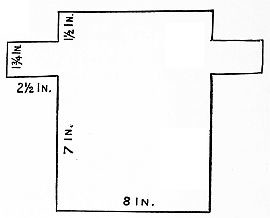
Fig. 45.—Cut Punch’s dress after this pattern.
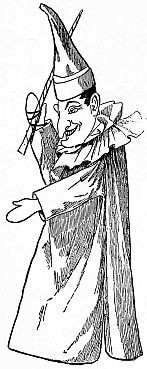
Fig. 46.—Your funny old Punch.
The arms should fit loosely over the ends of your thumb and forefinger. Fig. 45 gives the pattern of
Punch’s Dress
Make it much larger, according to the dimensions given on patterns, and let it be of soft material in very bright, gay colors. The front and back are exactly alike, and the two pieces are sewed together at the sides, the seams extending to within two inches of the bottom of the skirt, leaving the sides split up that distance. Slide the paper arms up in the sleeves and fasten them in place at the top with a drop or two of glue. Make a wide, white double ruffle, slip it on Punch’s neck and push it up against the head. Then gather the top of the dress so that it will fit Punch’s neck, and fasten it on under the ruffle with strong glue, allowing the bottom of the paper neck to extend down below the gathered top of the dress. Make a high cap of brilliant red cloth to fit Punch’s head; trim it with a turned up band of vivid green edged with white and glue the cap to the head. With a stitch or two or an elastic band fasten an inked paper lighter in his right hand to serve as a stick.
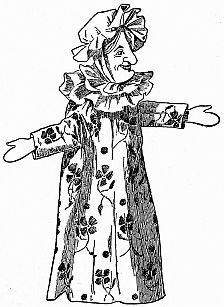
Fig. 47.—Judy will look like this.
Now slip the first finger of your left hand up in Punch’s neck, run your thumb and second finger of the same hand in the paper arms, and make Punch turn and twist his head while he gesticulates with both arms. You will laugh before you know it, and be delighted with your funny old Punch (Fig. 46).
Make Judy’s Head
by the pattern used for the head of Punch, but omit the ears and cut off the ends of both nose and chin. They should not be so long for Judy. Strengthen the neck with cloth and fasten the head together as you did that of Punch. Make blond hair of two pieces of yellow tissue paper pasted in narrow irregular folds on the inside of the top opening of the head; then bring over and down on the outside as if combed loosely over Judy’s ears. Paste the lower ends of the paper hair above the neck on the back of the head. Paint Judy’s eyes blue. In all other respects than the details mentioned, make Judy’s head the same as you did that of Punch. Make her arms and hands the same, the double ruffle for the neck the same, the dress the same cut but of contrasting color. Cut Judy’s cap from thin white material, make it circular and gather it entirely around, about one inch from the edge. Attach strings of the same material, and tie them under Judy’s chin (Fig. 47).
The Baby
must be quite light in weight. Make it of a piece of pink tissue paper about eight inches square. Draw the paper through your hands several times to crush it into small folds, then, while it is crushed together, double at the middle and wind a thread around near the folded end to form a neck, leaving half an inch above for the head. Gather a piece of white tissue paper around the baby’s neck to make its dress, and cut a straight strip of white tissue paper for the baby’s cap. Lay it flat on top of the head and bring the two ends down straight on each side of the face. Gather the cap at the back, add strings and fasten it on the baby’s head. Features may be marked on the face with paint, but be very careful not to use much water with the colors, for water will melt the tissue paper face.
When All is Ready
slip Judy on one hand, Punch on the other hand, and make them talk and act to the best of your ability. Assume deep tones of voice when you talk for Punch, and high, shrill tones for Judy; make the play short, full of life and action, and as funny as possible. Of course, you will have to practise with Punch, Judy and the baby in front of a mirror before giving your show in order to see how they will look as you make them act, and to learn just how to manage them.
Drama of Punch and Judy
Punch (below): Wait a minute, sha’n’t be long putting on my new boots (pops up singing). Trala-la-la-la-la-la-la. Hello, there! Watch me dance (dances, singing a lively tune to music; music stops and he leans down, calls below). Judy! Judy! Judy, come here.
Judy (pops up): Well, Mr. Punch; what do you want? I’m dreadfully busy just now.
Punch: Oh! nothing, only want to know if you’d like a box of French candy, the delicious kind that melts in your mouth; but never mind, I can get it for you next Christmas (Punch turns his back and walks off).
Judy (running after Punch): Punchy-munchy, I wish I had it now; do, Punchy, give it to me.
Punch (turning): You must give me a kiss first (they hug each other and have a merry time dancing and singing to lively music).
Judy: Oh! Oh! I forgot the baby. I’ll go and get him (disappears).
Punch (calling after her): Well, hurry up, and don’t forget our dog Toby (calls). Toby! Old dog Toby—come and jump over my stick (bangs his stick about, striking everything, accidentally strikes his nose). Oh! Oh! Oh! my poor nose, my best Sunday nose, my beautiful long nose (calls). Judy! J-u-d-y, where’s the baby? (Enter Judy with baby).
Judy: Here, Punch; catch him (tosses baby to Punch, who catches him; dances about, then tosses the baby back to Judy, who fails to catch him).
Judy: Punch! Punch! Where’s the baby?
Punch: Gone down-stairs. I’ll fetch him up (disappears).
Judy: Just think! the little dear went down-stairs all alone!
(Punch reappears.)
Punch: Here’s the little darling; pity his nose is not longer. Do you think it will grow, Judy? (baby cries; Punch tosses him up in the air singing). He didn’t dance, dance, dance; he didn’t dance all day nor yesterday.
(Judy tries to catch the baby.)
Punch: Take him! Now we will both sing while I keep time with my stick. Begin, I say; quick, hurry, quick! (Judy runs away with the baby while Punch is talking and not watching her; turning, Punch finds himself alone).
Punch (calls): Baby! Baby! Come and see your daddy’s beautiful nose (baby is tossed up from below). See! See! my boy can fly through the air (knocks with his stick, then calls). Judy! Why don’t you come? (Judy appears with baby, walks back and forth).
Judy: I must get this child to sleep.
Punch: Nonsense, I’ll amuse him (grabs child and disappears with him; baby heard crying, “Mama! I want my Mama!”).
Judy: Just listen to that (waves her arms frantically around and disappears.)
Punch (reappearing with a flag in each hand): We haven’t given you our flag dance. Judy! girl, come along.
Judy (jumps up with a flag in each hand): Hush, Punch, you’ll wake the baby.
Punch: Now let’s dance. (The music plays and the two dance and sing some popular air, then together bow to the audience, saying:) Good-by little girls and boys, good-by, everybody. We’ve had such a good time. Good-by, good-by.
The flags may be of home or store manufacture, but they must be fastened on paper sticks, made like Punch’s paper-lighter stick. They can all be American flags, or three other nations may be represented, or each flag can be of solid color, differing from all the others, as red, green, yellow and blue.
If a companion will help with the show by taking complete charge of Judy while you attend to Punch, the management will be much easier, for then you will have only one doll to make talk and act.
CHAPTER V
HALLOWE’EN MERRYMAKING
Novel Ways of Telling Fortunes
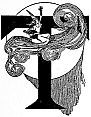
THIS year the annual festival of the fairies is to be celebrated with wilder pranks and madder mysteries than for many a long season, and if we enter heartily into the spirit of the fun and make preparations for them, the little folks will surely reveal many secrets the future holds in store for us.
Ask the fairies, gnomes and elves to your Hallowe’en frolic; they will be delighted to come, though of course, you cannot invite them in the usual fashion. Instead of writing notes, you must braid three
Invitation Rings of Grass—
fresh grass is best, but the dried will do—and hang the rings on bushes (Fig. 48), or lay them on the outside window-sill, making a wish on each grass ring as it is put into place. To insure the fulfilment of the wish, you must not see the rings again until after Hallowe’en. The fairy troupe will find the green circles as they come floating along through the air on gay-colored bubbles from the magic spring waters of Fairyland. During the last days of October fairies are always looking for such invitations.
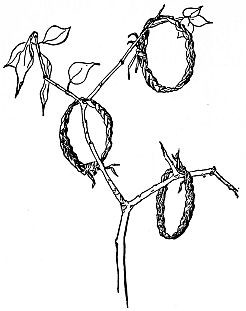
Fig. 48.—Hang the rings on bushes.
Here are some of the ceremonies and games newly revealed to me by the old witch who lives in the black clouds that sail southward on the northwest wind.
Black Cats,
the friends and companions of witches, are wonderful creatures to conjure with, but all cats can work a charm, and it is cats, or preferably kittens, you must have for the first rite. There must be a pussy in hiding for each girl and boy present at the Hallowe’en frolic. With different colored bright ribbons tie a tinkling bell around the neck of every cat, leaving one end of the ribbon one yard long. Seat your Hallow-e’en guests in a semicircle around the room. Ask them to sit quietly for a few moments, and suddenly put out the lights. With the room in total darkness let absolute stillness ensue for a second; then say very slowly and distinctly:
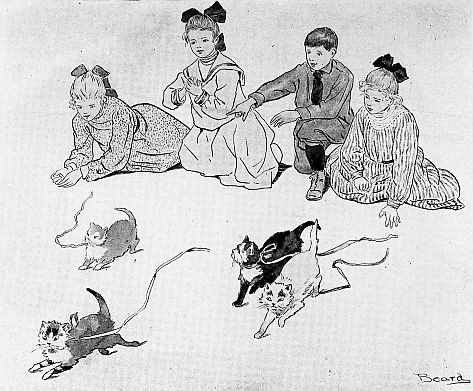
Kittens Telling Who Will be the First to Marry.
“Hold out your right hand and there will come to each one of you a disguised gnome or fairy. Be very gentle and kind to the little creature (here pause for a moment); for if by any chance ill befall the disguised sprite the fairies will be angry and will do nothing for you until next Hallowe’en.” Again pause; then say: “So I caution you once more—be kind and gentle.”
Have some one keep the kittens near by, in readiness, so that you may lead all into the darkened room without a moment’s delay. Hold the ends of the ribbons in one hand while with the other you take one ribbon at a time, and as you pass along the line place it in the outstretched hand of each successive guest, saying as you do so, “Hold fast this magic clue.” The instant the last ribbon has been given to a guest, turn on the lights and while the girls and boys are looking with surprise at the little creature they hold captive and laughingly exchanging comments, you must pin a piece of white tape on the floor across one end of the room about four feet from the wall. Request the guests to kneel, with their funny little gnomes, in a row on the enclosed space next to the wall, and face the tape. Announce that there will now take place the race of fate. Each player must hold his or her pussy with its fore paws directly on the tape, and at a given signal all the girls and boys must exclaim in unison, “Run!” at the same time releasing the kittens that they may scamper away in any direction they choose. The guests should remain stationed back of the tape line and watch them as they scatter wildly over the room trailing their bright streamers. No one may touch or in any way molest a kitten after the signal has been given to let them go. The girl or boy whose pussy first reaches the centre of the room, which has previously been marked with a second strip of tape, will be the first to marry.
Do not wait for the other kittens to make the goal, but gather up the little creatures and lead them away to be seen no more, or the spell will be broken.
Old shoes possess strange and occult powers as we all know, else why should we throw them after the coach of a newly wedded couple? So we must have a
Pair of Old Slippers
After the last cat has disappeared, bring out the slippers; any kind except toy ones will do. Place the slippers on a sheet of white paper laid on the top of a table where all present may see.
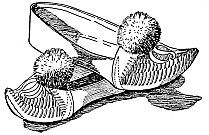
Fig. 49.—Place one slipper on top of the other.
Explain to the girls and boys that they must take one turn each in trying their fortunes by putting one slipper crosswise on top of the other, both right side up (Fig. 49), and while holding them so, repeat the following verse:
These slippers I toss into the air.
Will my love be dark? Will my love be fair?
What future is mine? I pray you show
By the turning of sole or the pointing of toe!
Lift the paper and give the slippers a slight upward toss to fall on the floor as they may, and the manner in which they reach the floor indicates the fortune:
When both slippers land upside down and do not touch, the player will be a great traveller and have no settled home.
When both slippers land right side up and do not touch, the player will go on the stage.
When the right slipper is upside down, the future mate will be cross and selfish.
When the left slipper is upside down, the future mate will be unselfish and kind.
When the slippers are crossed there will be an early marriage.
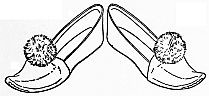
Fig. 50.—Decided difference of opinion between husband and wife.
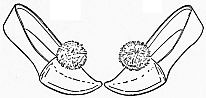
Fig. 51.—Very congenial.
When the toes of the slippers point in opposite directions, there will be decided difference of opinion between husband and wife (Fig. 50).
When the toes of the slippers point in the same direction, husband and wife will be very congenial (Fig. 51).
When the soles cross, lying one on top of the other, the player will own a gold mine.
Cups and Bowls
have supernatural power on this night and exercise a peculiar influence over marbles placed under them; consequently you must get three china cups and three marbles, a crystal (clear glass marble), a commie (ordinary brown marble), and a china (a white marble crossed by different colored lines).
Set three cups in a row (Fig. 52), under one place a “crystal,” under another a “commie,” and under the last a “china.” Blindfold each player in turn and let the girl or boy raise one of the cups. If the marble under the lifted cup is the crystal, the husband or wife will be young and life will be easy and full of sunshine. If it is the china, the husband or wife will be middle aged and life will be hard but famous. If the commie, the husband or wife will be old, and life will be filled with adventure. The marbles must be changed into different cups after blindfolding each player.

Fig. 52.—Set three cups in a row.
As no Hallowe’en ceremonies are complete without
The Apple,
there must be a dish of apples and a box of wooden toothpicks.
With the apples and toothpicks you can ascertain for your guests the nationality of their future mates.
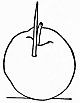
Fig. 53.—You will marry an American.

Fig. 54.—Your future partner will be English.

Fig. 55.—Your future mate will come from France.
Give every one an apple and a wooden toothpick. Each player may push the toothpick in any part of the apple; the spot occupied by the toothpick tells the fortune, but the apple must be kept in one position, and on no account turned after the toothpick is once in. When all have inserted the toothpicks each boy and girl in turn must hold up his or her apple that all may see while you read the fortune.
When the toothpick stands straight and erect in the top of the apple, the life partner will be an American (Fig. 53); if in the left side of the apple, the mate will be English (Fig. 54); in the right side, French (Fig. 55), in the back, German; in the front, Italian; sideways at the top of the apple, the mate will be a West Indian; sideways in the right side, the mate will be a Japanese; in the left side, a Russian; in the front, Spanish. When the toothpick breaks the player will not marry.
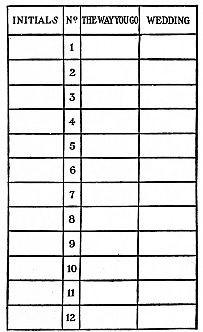
Fig. 56.—You must prepare a card like this for the Wedding Race.
Now comes the fun of forecasting to learn where the wedding will take place, so prepare for
The Wedding Race
For this you must have a card like Fig. 56; fill in the spaces under “The way you go” with the following words according to the numbers: (1) Walk slowly,(2) Walk backward, (3) Walk on toes, (4) Walk on heels, (5) Run, (6) Walk fast, (7) Skip, (8) Walk without raising feet, (9) Run on toes, (10) Walk on toes of one foot and the heel of the other, (11) Run on heels, (12) Walk sideways.
In the spaces under “Wedding” insert: (1) Church, (2) On shipboard, (3) Boarding house, (4) Hotel, (5) Home, (6) Friend’s home, (7) Top of mountain, (8) Minister’s house, (9) Tent, (10) Out of Doors, (11) Courthouse, (12) Cave. Inform the guests that each in turn must go the length of the room. He or she may walk slowly, walk fast, walk sideways, walk backward, walk on toes, walk on heels, walk on the toes of one foot and the heel of the other, etc., etc.
If many guests are present, start two at a time crossing the room, one from each end. Write the initial of every player on the line of the card corresponding to the manner in which he or she crosses the room; for example, if the first player’s name is Barbara Carter, and she runs across the room, put down her initials B. C. on the line No. 5 on which is written the word “Run.” If the second player’s name is Jamie Bartlett and he also runs write his initials J. B. on the same line of the card, but, should Jamie decide to go backward across the room his initials would then belong on line No. 2. When all the girls and boys have crossed the room, and quiet again reigns, read to them the various places where the different players will be married, for instance, if referring to your card you find the initials of Jessie Douglass on line No. 12, you should read, “Because Jessie Douglass walked sideways across the room, she will be married in a cave. Won’t that be romantic?” Always add some pleasant remark after reading each record; such remarks make things run easier and add to the fun. Probably you will be able to think of many delightful little speeches, but in case you find any difficulty, the following list may be of some assistance. Remark for line No. 1: There could not be a better place. No. 2, How charming. No. 3, Better there than not at all. No. 4, I wonder if that will be a runaway match. No. 5, The dearest spot on earth. No. 6, A friend in need is a friend indeed. No. 7, I[63] [64] [65] hope we will all be invited. No. 8, An elopement, you may be certain. No. 9, Delightful. So gypsy-like. No. 10, I am sure there will be room for us all at this wedding. No. 11, Many a happy marriage has taken place in a court-house. No. 12, Won’t that be romantic?
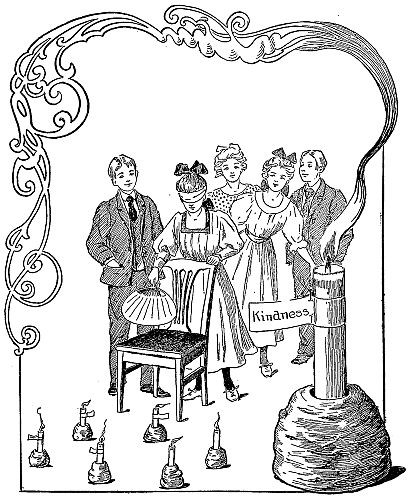
The Vesper Rite.
The communicative old witch of the northwest wind imparted so many methods of Hallowe’en fortune telling you can take your choice. Here are the rest just as she told them.
The Vesper Rite,
if observed with due solemnity, will disclose the principal characteristics of any one submitting to the test.
Take six large potatoes and cut them in half. Shape each half into a candlestick by scooping out a round hole in the small end, making it large enough to hold a candle.
Place a half candle in each of the potato candlesticks and pin around each candle a strip of paper on which is written one word indicating a trait of character, such as “modesty,” “bashfulness,” “vanity,” etc.
Then form a magic ring of the candles in the centre of a dimly lighted room. The ring should be about three feet in diameter.
Blindfold one of the players and have the entire party join hands and run three times around the lighted candles.
Then, leaving the blindfolded player standing two feet from and facing the ring, let the others fall back while a chair is placed before her, a fan is handed to her and she is told to make three trials at fanning out the candles over the back of the chair.
After the third trial she must remove the bandage from her eyes and examine the papers on the candles that are left burning, reading aloud the words which reveal her character.
To avoid any danger of skirts catching fire, care must be taken that no one approaches the candles too closely after they are lighted.
Another game is called the
Bean Bag Test
Into a bag that will hold four or five quarts, pour three quarts of dried beans and in their midst hide a ring, a thimble and a brass button.
Have ready a bright new tin cup and let each player in turn dip into the bag and take out a cupful of beans which must be emptied into a plate.
If either a girl or boy finds the ring in the beans it is a sign of an early marriage. If a girl gets the thimble she will be an old maid, and when the thimble falls to the lot of a boy he will marry an old maid.
The brass button in a girl’s cup of beans denotes that she will marry a widower, but in a boy’s cup it is a bachelor’s button and shows that he will be a bachelor all his life and will sew on his buttons himself.
Each player can have but one trial, and if only beans fall to her share, it signifies that her fate is still undecided.
Here is another test called
The Witch Screen
Fig. 57.—Through the lengthwise centre of the cloth cut two slits for each player.
Across the end or corner of the room fasten a breadth of inexpensive cloth for the witch screen; old muslin or any material most convenient will answer the purpose if not too thin. Through the lengthwise centre of the cloth cut two slits for each player. Fig. 57 has eight slits and is intended for four players. Seat the company in a row near to and facing the witch screen, adjust it so that the slits will come on a level with the hands of the players, then, standing behind the screen and looking over the top, say, “I have some wonderful treasures which the witches have loaned us for this evening, but, as the objects are very valuable and must be returned, I ask that you use the utmost caution in handling them, and take great care not to drop or break any of the things while passing them from one to another down the line.
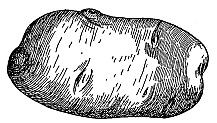
Fig. 58.—The lava from Mt. Pelee.
“The first charm is
A Piece of Lava
brought from Mt. Pelee in a witch’s pocket (Fig. 58). If you will all kindly slip both of your hands through openings directly opposite you in the witch screen (Fig. 59), you may have the pleasure of passing the lava from one to another. Receiving and giving the lava according to rule means a successful year, but woe to the one who drops it, for to him will come disappointment.”
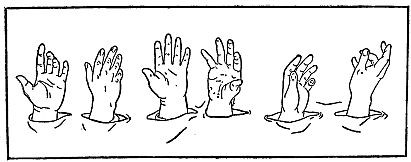
Fig. 59.—Slip your hands through openings in the witch screen.
After you have made your little speech, sit down and, hidden by the screen, take from a tray at your side a hot potato (Fig. 58), which has been in the oven only long enough to become thoroughly heated; place it in the hand at the head of the line with the words, “I give you the charmed lava; pass it on.” Though the girls and boys may not see what they have, they can assuredly feel it, and there comes in the fun, for each in turn will be sorely tempted to drop the hot potato and yet not dare to do so, and no hint being given, the next neighbor will in turn be equally startled. When the lava reaches the last player, some one back of the screen at that end must receive the precious object and store it away on a tray.
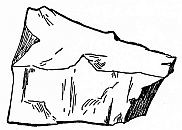
Fig. 60.—The wonderful Japanese crystal.
As soon as the hot lava is disposed of, arise and tell the company that the next charm is a piece of
Wonderful Japanese Crystal
(Fig. 60). It will enable them to see and understand everything more quickly and clearly; it will also gain new friends and delightful surprises. To drop the crystal brings dulness of comprehension, no friends and no surprises. Use a piece of ice for this. The third charm is a rare natural history specimen, called
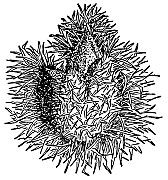
Fig. 61.—The baby porcupine.
The Baby Porcupine
(Fig. 61). The little creature signifies difficulties successfully overcome, but if dropped the fortune will be reversed. The porcupine is in reality a chestnut bur.
A Harmless Serpent
forms the fourth charm; it renders all girls and boys proof against fear of wild animals, and imparts the faculty of taming and making pets of many inhabitants of the forest, but the charm will be lost with one failing to pass it on its way. The serpent is a snake made of soft dough.
One of the best fairy gifts is
A Treasure from the Great Blue Sea
It means a joyous ocean voyage to new and beautiful lands, but if dropped, the player will encounter storms and perils. Hand the first player a slippery raw oyster.
When all the charms have been tested, announce that before returning the treasures to the witches you will place them on exhibition; then turn back the witch screen and let the girls and boys gather around the tray of queer charms, where they can laugh and exchange comments to their hearts’ content. The effect of the witch screen may be enhanced by using a breadth of brilliant-red muslin and pasting on it black moons, stars, cats, etc. Erect at each end of the screen a comic pumpkin lantern head, with white paper fastened on the inside over the features to light them up, instead of a real light placed inside. Slide each pumpkin head on the end of a pole, and rest the pumpkin firmly on four long, strong nails driven in around near the top of the pole. The lower end of each pole may be steadied and supported by being inserted in a hole bored through the centre of a heavy piece of plank, where it must form a very tight fit; or you can sink the pole into a deep pail of stones and earth. If it is possible to have the only light in the room placed back of the screen, the effect produced will add to the mystery and enchantment. Make all decorations as funny as you like, but avoid anything grotesquely unpleasant. Let every item be agreeable, from the least to the most important arrangement for the evening’s fun.
A very pretty way of telling fortunes is with
Fairy Airships
made of feathers. Take as many fluffy feathers as there are girls and boys in the party and paste on each feather a prophecy written on a bit of paper, such as:
- Yes,
- No,
- Sometime,
- Possibly,
- Never,
- At twenty-five,
- Probably,
- Depends on myself,
- If I can,
- I’ll try,
- When the time comes,
- Of course,
- Three times,
- Before you know it,
- Not if I can help it,
- Certainly,
- Doubtful,
- Surely.
Put all the fairy airships into a pasteboard box-lid, which you have previously punched full of holes, and, standing on a stool or chair, hold the box-lid high in the air while you slowly and impressively say to the company: “These fairy airships will decide your fate regarding marriage. Will you marry?” At the word “marry” launch the ships of fate by fanning vigorously under the box-lid with a large palm-leaf fan, which will send the ships flying in every direction; as they sail through the air each player must endeavor to catch one before it falls.
When order has been restored and all have their airships, each girl and boy in turn must read aloud the prophecy brought by the fairy vessel.
All the party will enjoy the
Blarney Stone Game
Place a large, clean stone on a doily-covered fancy plate which rests on a table in the centre of the room, and tell your guests that a certain spell cast on the famous Blarney Stone in Ireland caused the virtues of that wonderful stone to be transmitted to the stone in the very room where they stand, and that if a girl or boy, when blindfolded, can walk up to the table and kiss the Hallowe’en Blarney Stone, she or he will ever after be jolly and happy and prove a most agreeable companion. Then tie a handkerchief across the eyes of each of the players in turn and let them walk up to and try to kiss the stone before the witches come to take away the magic spell, which they will do long before the clock strikes twelve at midnight.
During the evening be sure to try fortunes by the
Fortune Jingle
On different sheets of paper write one of the following verses:
“One is good fortune,
Two a light heart,
Three is a carriage,
Four is a cart,
Five is a new dress,
Six, a new hat,
Seven is a pet dog,
Eight, a pet cat,
Nine is a letter,
Ten is a pleasure,
Eleven is a great joy,
Twelve is a treasure.”
Place each verse in a separate envelope and hang all on a string stretched and tied to the backs of two chairs. Distribute squares of paper each marked with a number beginning at number one. The player receiving number one has first choice of envelopes from the line. Two brings second choice, and so on. When all missives have been taken and the signal given for opening the envelopes, the player receiving verse one reads aloud, “One is good fortune”; immediately after the person with number two reads, and the other verses follow in numerical succession, every envelope bringing its gift to the recipient.
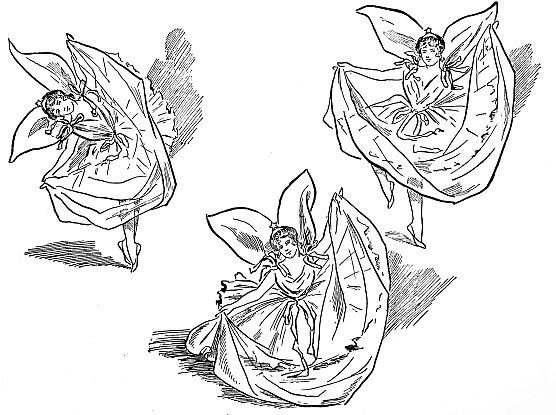
Titania Stands on Her Toes, She Floats, She Drops to the Floor in a Deep Curtsy.
CHAPTER VI
DANCE OF TITANIA, QUEEN OF THE FAIRIES
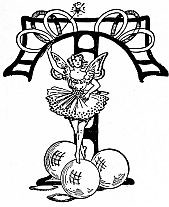
TITANIA is a graceful little fairy, dancing as though she had learned the art from the bending of the grass in a summer breeze, the swaying of the trees or the flitting of butterflies from flower to flower. Light, airy, with gossamer wings and filmy dress, looking as though she needed nothing more substantial than silvery moonbeams to dance upon, the little queen leaves her home in the deep, wild woods and comes to do your bidding.
Have Titania’s Stage Ready
that she may not be kept waiting, for queens and fairies will brook no delay (Fig. 62). Find a wooden box 18½ inches long by 13 inches wide or larger (Fig. 63). With a heavy hammer or a hatchet pry up and knock off the top and one of the long sides (Fig. 64). The open side forms the front of the roofless stage.
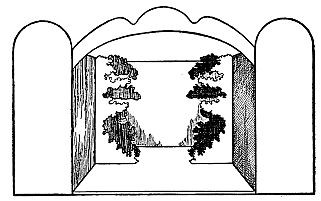
Fig. 62.—Titania’s stage.
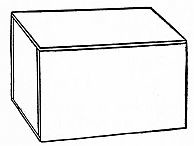
Fig. 63.—The wooden box for Titania’s stage.
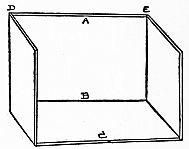
Fig. 64.—Knock off the top and one of the long sides.
The coloring of the stage should be a light sage green. If possible, procure this color in cartridge wallpaper wider than the stage. With a string measure the distance across the back wall of stage from top to bottom (A to B Fig. 64), continue the measurement in the same straight line across the floor of the stage from back B to front C. After allowing five extra inches for turning the paper over the top edge of the back wall A and front edge of floor C, cut the length according to measurement. To make the strip of green paper the required width measure the exact distance across the inside back wall from side wall D to side wall E, then fold the paper evenly along each lengthwise edge, making it the width needed; unfold and adjust the paper against the back wall over its top edge and over the floor of the stage. Cut short slits on each side of the paper where the floor and wall meet, that the extra width may lie flat up against the side walls. Bend the top edge of the paper over the top of the back wall, again slashing a little on each side to make it fit top edge of wall. In the same way bend the paper over the front edge of the floor; see that the paper lies perfectly smooth, then fasten it in place with small tacks, using three tacks on the outside at the back, one at each corner and one in the middle; two tacks where floor and wall meet, and three underneath front of floor. Measure the side walls, cut paper to fit and fasten the paper on the walls with as few tacks as possible.
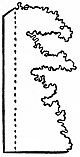
Fig. 65.—Back wing for stage.
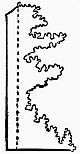
Fig. 66.—Forward wing for stage.
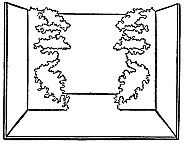
Fig. 67.—Fasten the wings to the side wall of the stage like this.
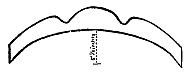
Fig. 68.—The arch.
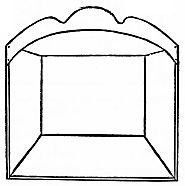
Fig. 69.—Tack the ends of the arch at the top of the two side walls.
When the inside papering is finished, cover the outside of the stage with pretty cretonne. Make four inside wings, two for each side of the stage, to represent the foliage of trees. Cut two like Fig. 65, from paper of a darker green than the walls of the stage and reverse one of them that they may face each other. Then make two wings, like Fig. 66, from paper of a lighter green than the walls, and reverse one of these also. The walls of the stage with the two sets of wings will make three different tones of green forming the background. Cut the wings long enough to extend up as high or higher than the side walls of the stage. Bend each strip lengthwise at dotted line and paste the bent margin of one wing from Fig. 65 on each side wall, running the wing up from the floor to the top of the wall about four inches from the back wall. In the same manner fasten the wings (Fig. 66) on each side wall three inches in front of the first or back wing (Fig. 67).
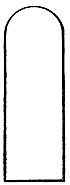
Fig. 70.—Pasteboard extension for front of stage.
Cut the arch (Fig. 68) of stiff pasteboard. The cover of a pasteboard box will do. Make the arch long enough to span the space across the front of the stage and let the lower edge of the curve in the centre of the arch be five and a half inches higher than its two ends (see dotted line, Fig. 68). Cover both sides of the arch with green paper, gluing it on only along the edges. Tack the ends of the arch to the top of the two side walls (Fig. 69).
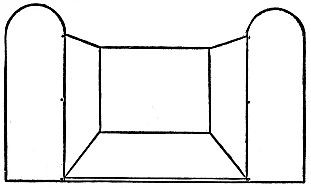
Fig. 71.—Tack one piece of pasteboard on the front edge of each side wall of the stage.
Cut two pieces of pasteboard like Fig. 70, making each six inches wide and almost as high from floor of stage as is the top of the centre of the arch. Paper these also with green, both front and back. Tack one piece of the pasteboard on the front edge of each side wall of the stage, allowing it to extend out from and beyond the side wall (Fig. 71). Bore a hole with a gimlet through the centre of the back wall of the stage five inches up from the inside floor, and your stage will be finished.
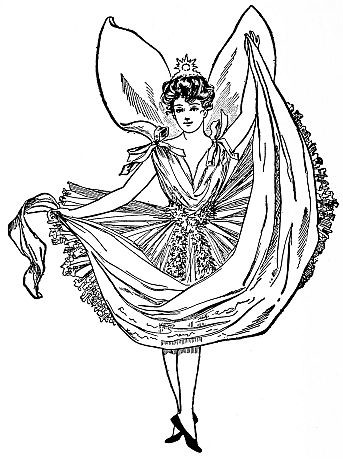
Fig. 72.—Titania.
Make Titania
(Fig. 72) of light-weight cardboard. When finished she should be ten inches in height from her toes to the top of her head. Fig. 73 is the diagram of the body and arms, measuring three and five-eighths inches from top of head to lower edge of body. Cut the two upper portions of the legs (length two and one-half inches, greatest width one inch) from Fig. 74, and the two lower portions (length three and three-eighths inches) from Fig. 75. Join the two parts of each leg together, according to the dots, with a strong thread and needle, and fasten with a knot on front and back, so that the two pieces will be strung upon the same thread and sandwiched between two knots of the thread. Attach the legs to the body in the same manner. The small circles A, A on the doll’s body (Fig. 73) give the exact spots where the thread should pass through, and the curved line above each letter shows where the upper edge of the top part of the leg should reach. Dot B marks the point on the upper part of the leg (Fig. 74) where the thread goes through, joining the leg to the body. Have all the joints of the doll securely fastened and only loose enough to move easily.
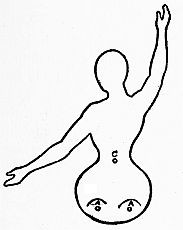
Fig. 73.—Cut the body and arms of Titania like this.
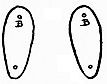
Fig. 74.—Two upper portions of legs.
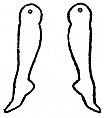
Fig. 75.—Lower part of legs.
Find a pretty head in some old paper or advertisement, cut it out and gum it on the pasteboard head. Remember, though, that the printed head must not be of very heavy paper, as the upper part of the doll should be lighter in weight than the lower, otherwise the figure will not balance. If you cannot find a head in colors, you must paint the printed black-and-white one; give the face, neck and arms a flat wash of light-pink water-color paint; color the lips and cheeks red, the eyes blue and the hair brown. Make the long stockings a darker pink than the light flesh tones, and paste slippers of gilt paper on the feet.
Puncture a hole with a coarse needle through the centre of the belt-line (C, Fig. 76). For
Titania’s Costume
make a skirt of plain white tissue paper. Cut it sixteen inches wide and three and a half inches long, after creasing the skirt by gathering up the fulness with your fingers and drawing the skirt lengthwise from top to bottom through your partially closed hand. Gather the top of the skirt with thread and needle, and fasten it on the doll, then slit up each side from the lower edge to allow of the free motion of the doll’s limbs.
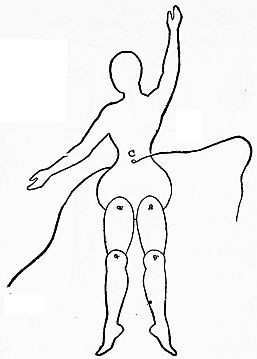
Fig. 76.—String the doll together in this way.
Make the dress of pink chiffon. Cut the dress skirt three and three-fourth inches long and one yard wide, press it in knife-blade plaits, running up and down, then gather and tie it on the doll over the white tissue-paper skirt. Do not attempt to hem any portion of the clothing, as the object is to keep it all light and airy. Fashion the waist of a smooth strip of pink chiffon tied with narrow pink ribbons at the shoulders and brought down to the belt-line into a point back and front, and sewed in place. Form a silver girdle of the tinsel ruching used on Christmas trees; place the tinsel around the Queen’s waist, allowing the two free ends to hang down over the front of the dress. Glue a little of the same tinsel around the front of her dark hair, where it will shine like a crown of diamonds. Make Titania daintily hold up and out each side of her dress. Do this by stretching out the sides of the dress skirt and gumming the material to each wrist.
Cut a scarf of pink chiffon four inches wide and sixteen inches long, fasten one end in each hand of the fairy Queen and let the scarf fall in a graceful loop.
Queen Titania’s Wings
must be of the pink chiffon cut shawl shape, two sides straight and one bias (Fig. 77). Plait the bias edge (Fig. 78) and gum the wings in place on the Queen’s shoulders at the back.
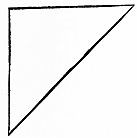
Fig. 77.—Cut the wings shawl shape.
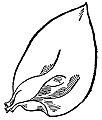
Fig. 78.—Plait the bias edge
Take a needle threaded with black thread, two or three yards long; run the needle through the centre of the belt-line of the dressed fairy at the point C (Fig. 76); then thread it through the gimlet hole at the back of the stage and tie a button on the end of the thread which extends outside of the back wall. Pull the thread on the inside of the stage until the button lies tight up against the outside of the back wall. Allow sufficient length of thread to bring the Queen within about three inches of the front edge of the stage, then make a knot in the thread immediately back of and another in front of the Queen to prevent her from slipping either forward or backward. Tie the long, loose end of the thread on a small empty spool, that it may be wound up and kept from tangling when not in use.
Place the Stage on a Chair
facing the light and, carrying the thread in your hand, take your station two yards or more away from and in front of the stage; then practise moving Titania by means of the thread until you can make her glide, pose and dance in many graceful attitudes. She will lean to the right and to the left, will stand on her toes, then curtsey, making her dress touch the floor; she will move gently and slowly, again faster and faster until her feet seem to fairly twinkle over the stage floor; she will pass back and forth almost as if floating from side to side of the stage, or stand in the centre and dance. Titania is ever fascinating, beautiful and graceful in all her movements. Ask some one to play on the piano while you make the fairy Queen dance and she will keep time to the music. When you have learned to make Titania dance her prettiest invite your friends in to see the little fairy.
CHAPTER VII
THANKSGIVING PARTY
Apple, Orange and Pumpkin Games
WE must have six little yellow pumpkins for our new Thanksgiving game, but we may hunt high and low, far and near, for real ones the required size, and not find them, because natural pumpkins are much too large. So we shall have to make oranges and apples into
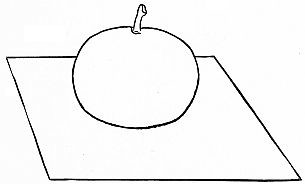
Fig. 79.—Stand an apple on a square of paper.
Little Pumpkins
Select apples about two inches in diameter, all as near of a size as possible and preferably somewhat flattened at top and bottom. Cut a square of orange-colored tissue paper and stand an apple, stem uppermost, on its centre (Fig. 79). Bring one side of the tissue paper up to the top of the apple and take a wee plait in the paper, at the same time smoothing it up from the bottom of the apple (Fig. 80). Make several more plaits and bring the nearest corner of the paper up to the apple top. Continue plaiting the tissue paper around the apple (Fig. 81) while constantly smoothing it up from the bottom and over the apple until the apple is completely covered and all the edges and corners of the orange-colored paper are folded and brought together at the top of the apple (Fig. 82). Hold the covered apple in your left hand and with your right hand twist the ends of the tissue paper around the stem (Fig. 83).
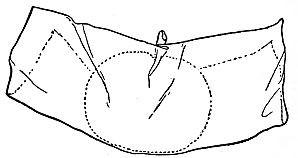
Fig. 80.—Take a plait in the paper.
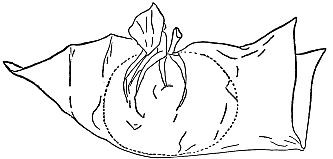
Fig. 81.—Bring the nearest corner of the paper to the top of apple.
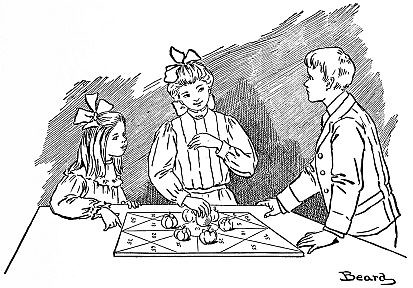
Playing the Pumpkin Game.
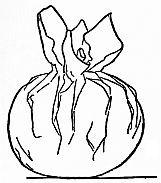
Fig. 82.—Constantly smooth it up from the bottom until the apple is covered.
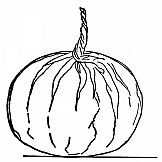
Fig. 83.—Twist the ends of the paper around the stem.
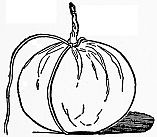
Fig. 84.—Wind the long end of the thread tightly around the apple.
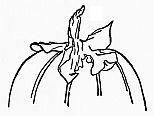
Fig. 85.—Pinch a square of green tissue paper over the stem.
Examine the apple and make sure there are no raised ridges in the paper and that the entire covering lies flat and smooth. Tie one end of a piece of brown thread around the base of the stem. Wind the long end of the thread once tightly around the apple, giving it a twist around the stem to secure it in place (Fig. 84). The thread must pass across the exact centre of the blossom end of the apple. As you wind the thread turn the fruit and watch the thread that it may not swerve either to this side or that. A second time wind the thread around the apple, making the first encircling thread band double. Cross this double band with another double band, marking the apple into quarters, secure the thread about the stem, and again wind it around the apple, dividing two opposite quarters each into two pieces.
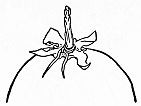
Fig. 86.—Tie a thread around the base of the stem.
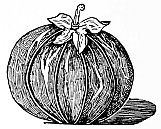
Fig. 87.—A little yellow pumpkin.
Divide all the quarters in the same way, then pinch a small square of bright green tissue paper over the covered stem (Fig. 85), smooth it down close and tight and tie a thread around the base (Fig. 86). Bend the extreme end of the stem until it curls, and the result will be a cunning little yellow pumpkin (Fig. 87). Fig. 88 shows how the cross threads should meet at the centre of the blossom end of the fruit.
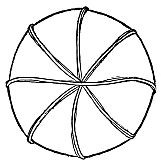
Fig. 88.—Shows how the cross threads should meet.
An ordinary pastry-board about twenty-six inches long and nineteen inches wide must do duty for
The Game Court
(Fig. 89). Find the centre of the board by running two straight lines diagonally across from corner to corner, the spot where the two lines meet and cross marks the centre of the board (Fig. 90). Make a small circle two inches in diameter around centre spot, surround this circle with a larger circle seven inches in diameter. Erase the diagonal lines within the circles and run straight lines radiating outward midway between the diagonal lines from the edge of the larger circle across the face of the pastry-board. With four more lines cut off the four corners of the court, number the divisions as in Fig. 91, and the game court will be finished.
Fig. 89.—A pastry-board for the Game Court.
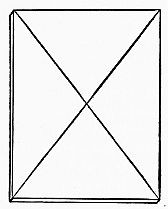
Fig. 90.—Run two straight lines from corner to corner.
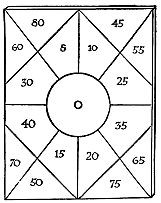
Fig. 91.—The Game Court is finished.
Stand the little pumpkins, at equal distances apart, on the larger circle of the court, and on the small circle stand a natural, large, round apple without tissue paper cover.
The Game
may be played by any number. The object of the game is to spin the apple so that it will hit one or more of the surrounding pumpkins and roll or shove them on to the highest marked divisions of the game-court.
Each player is allowed only one trial at a time, turns being taken successively by the different players. The spinning of the apple must always be started on the small central circle where the apple is stationed. When the apple rolls off the board the player may have another trial; if the apple rolls off on the second trial she simply loses her turn, there being no other penalty. When a pumpkin lands on one of the dividing lines it counts ten against the player. Often an apple will strike several pumpkins, sending them off on different divisions. Every pumpkin then counts the number in the division on which it stops; sometimes more than one pumpkin will land in the same division, and each pumpkin so landing counts the number in that division. When the apple sends but one pumpkin, the player scores merely the number of that one division on which it lands. After each play the pumpkins must be replaced in the circle ready for the next player.
Five rounds constitute a game and the highest record scored wins. When played by sides there must be an equal number of players on each side. The side making the highest score wins the game.
For the next game let all the players sit on the floor in a ring and by the light of only wee pumpkin lanterns tell a
Rapid-Transit Thanksgiving Story
The leader must begin the tale, which may or may not be original. He must speak for only a few minutes, then stop, when his right-hand neighbor, without hesitation, must take up the story and carry it on for a few moments. In this way the story goes the round, each right-hand player in turn telling his part. Every player has the privilege of making his portion of the tale original, even though the preceding part may not be so. It is also the privilege of every one to change the story to a dream, or a fairy tale. Quotations may be introduced, verses recited, or snatches of song sung; in fact, the oftener the story is twisted and turned the greater the interest; but there must always be some connection between the part being told and that which has gone before. The entire romance must be finished before the light in the wee pumpkins burns out. If a player should fail to continue the story when his turn comes, he must pay a forfeit, and when the story is finished, redeeming the forfeits adds to the fun.
If many guests are present, divide them into small groups for the rapid-transit story.
Make a miniature
Pumpkin Lantern
for each girl and boy present. Take a symmetrical apple which stands firm and steady on the blossom end. Select the best side for the face, and with the small blade of a penknife cut on it a crescent with ends turned upward for the mouth. Cut a triangle for the nose, two small squares for eyes, and two short crescents, points turned upward, for eyebrows (Fig. 92).
Turn the apple over and cut an opening in the back as shown at Fig. 93. Be extremely cautious not to break or tear the edges of the apple skin while cutting the features and back opening. With the small blade of the penknife inserted at the back opening cut away the inside of the apple little by little, taking great care not to drive the knife far enough into the apple to puncture the skin. When you reach the core, screw the large blade of the knife around until the core is sufficiently broken to allow of being cut away without danger of injuring the apple skin by accidental stabs.

Fig. 92.—Cut features in the miniature pumpkin.
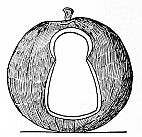
Fig. 93.—Cut an opening at the back

Fig. 94.—Cut a section from a candle.
After most of the inside has been removed turn the apple around and look at the features; if you cannot yet see daylight through them, insert the small blade from the outside of the apple, through each feature in turn, and by degrees cut away the meat, without enlarging the openings of the different features. Should this prove ineffectual, again turn to the back of the apple and work from the inside, removing more of the contents and making the layer of apple thinner next to the skin. Then once more try through the features from the outside. This time the result should be distinctly clear openings for all the features. You cannot help smiling when you look at the apple now, for you see such a comical little face.
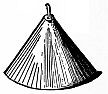
Fig. 95.—Make the bottom larger than the top.
Cut a short section from an ordinary wax candle (Fig. 94), shave down the sides, making the bottom heavier and larger than the top (Fig. 95). Run a pin through the centre of the candle from bottom to top; then pull it out. Fit the candle inside on the centre of the bottom of the apple, hold it in place while you run the pin up from the outside of the apple, through the skin and into the pinhole in the centre of the little candle. The pin should hold the candle firmly in place; if it does not do so, pull the pin out and see what is the matter; possibly the candle needs hollowing out a trifle at the base in order to fit the slight rise in the apple on which the candle stands. Put on your thinking cap, examine and make the candle stand absolutely straight and firm.
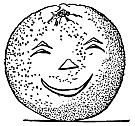
Fig. 96.
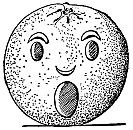
Fig. 97.
Orange Lanterns.
Manufacture all the other individual pumpkin lanterns in the same way, and when story-telling time arrives set a lantern in front of every girl and boy in the circle and light the candle in each little pumpkin. The effect will be charming and inspiring for the story-tellers. Oranges with all the pulp extracted also makes very pumpkin-like lanterns when cut in a similar way to the apple lanterns (Figs. 96 and 97).
Anything may be given as
A Forfeit
and the forfeits are redeemed in the good old way. The leader is blindfolded and seated. A girl or boy stands back of the leader, and, taking one of the forfeits, holds it over her head, while repeating these words, “Heavy, heavy hangs over your head.” The leader replies with the question: “Fine or superfine?” If the forfeit belongs to a girl, the answer is “superfine,” if to a boy, “fine.” The same player adds, “What shall the owner do to redeem it?” The leader names a penalty, such as, kneel to the prettiest, bow to the wittiest, or, look angry, then smile your sweetest. The leader may inflict one of these, or any other, making the penalty as funny as she desires, but it must never cause a player to feel in the least uncomfortable, for every girl and boy should be given just as good a time as possible, that all may return to their homes from the Thanksgiving games happy and pleased with their evening’s fun.
CHAPTER VIII
IMPROMPTU MOVING PICTURES FOR THANKSGIVING
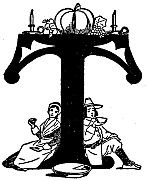
THIS entertainment is one that girls can get up themselves, though of course boys may take part. It is very funny if well carried out and will give every one a hearty laugh, which we all know is a good thing after the Thanksgiving dinner.
First make the poster, to be hung in a conspicuous place in hall or parlor. Print it in large black letters on a good-sized sheet of wrapping paper:
There Will be To-night
An Exhibition of
The World-Renowned
Moving Pictures
Taken by Madam Moselle at Great Risk of Life and Property.
No Expense or Effort Being Spared to Obtain the
Real Characters and Settings
of a
Puritan Thanksgiving
And Other Scenes from the Life
of Our Forefathers.
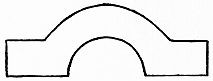
Fig. 98.—This is the way to cut the Puritan’s collar.

Fig. 99.—Cut the wide cuff like this.
Make the picture screen by stretching a large white sheet on the back wall of the room where the performance is to be held, as you would for a magic lantern exhibition. Then get your costumes ready. These may be made up very quickly from materials at hand.
The Puritan Woman’s Dress
as well as that of the man must be entirely of black and white, and to carry out the effect of black and white pictures their faces and hands should be made perfectly white with chalk, their eyebrows blackened and black wigs made of fringed tissue paper. Only a little of the woman’s hair will show but the man’s should be long and hang down to his shoulders. A tight black waist and skirt nearly to her ankles; a long white apron, white kerchief and cuffs (cut from old muslin) and a tightly fitting little black cap with a turned over edge of white form the costume of the woman. With these should be worn low black shoes and white stockings. For the
Puritan Man’s Costume
have short, full, black trousers, long black or white coat with wide white collar and cuffs, a high-crowned, broad-brimmed black hat and low shoes with black stockings. A black leather trunk strap buckled across one shoulder may be added, also a long black cloak and staff. Cut the man’s collar and cuffs like[99] [100] [101] Figs. 98 and 99, and the woman’s cuffs like Fig. 99. Fig. 100 shows how the Puritan hat is made of stiff brown paper over an ordinary straw hat. Fig. 101 is the brim, Fig. 102 the crown, which must be pinned together along its straight edges.
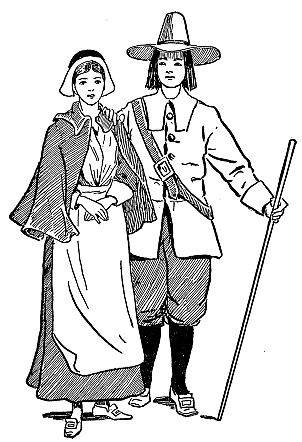
Puritan Costumes for the Moving Pictures.

Fig. 100.—Put the Puritan’s hat together in this way.
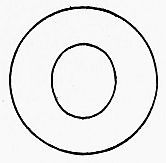
Fig. 101.—This is the hat brim.
The Properties
for the Thanksgiving dinner scene are a long, narrow table spread for dinners, and chairs enough for the actors, six or eight taking part.
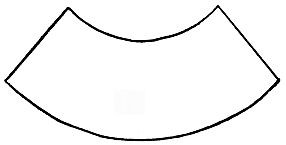
Fig. 102.—This is the crown of the Puritan’s hat.
Before showing her pictures Madam Moselle should stand in front of the screen and say a few words extolling the pictures she is about to present.
The girl who represents Madam Moselle should deliver an amusing little speech, giving a foreigner’s idea of our first Thanksgiving, and it can be made absurdly funny with its many ludicrous mistakes.
At the close of her address the lights must be put out and the scene quickly arranged close to the screen, all the actors except two being seated at the table. Thus remain two empty chairs.
As quickly as possible the light should be turned on and at the same time the actors must begin
A Pantomime
of eating, drinking and talking.
They should express anxiety for the safety of the tardy guests, some of them leaving the table to appear to look out of a door or window.
All the while (this is the great point) the actors must shake and quiver in imitation of the queer trembling and quivering always seen in the moving pictures; and their movements must be very rapid.
Soon the missing couple should appear, coming in hurriedly and by gestures telling of an encounter with the Indians.
Their clothes should be pierced with arrows, and the Puritan’s hat must be bristling with them.
All this will be very laughable if the acting is good, and absurd little by-plays introduced; but the whole thing will be spoiled unless the constant quivering and shaking is kept up by all of the actors.
The picture can be “flashed off” the screen by simply turning out the light, and others may be shown giving various incidents in Puritan life or the early history of our country.
CHAPTER IX
A VALENTINE ENTERTAINMENT WITH ORIGINAL VALENTINES
THE fun of the Valentine party begins with the invitations, which are in the shape of a heart. The message on the outside (Fig. 103) leads to the opening of the invitation (Fig. 104), and on the inside are found the time and place where the frolic is to take place and the names of those who are to give the party.

Fig. 103.—The invitation closed.
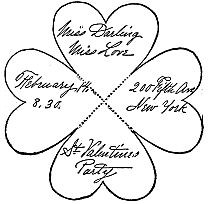
Fig. 104.—Invitation opened.
To make the design, fold through the centre a square piece of paper measuring five and one-half inches along each edge. Fold this oblong crosswise through its centre, and you will make a small square of four layers of paper. On one side of this square mark the outline of a heart, allowing the corner of the small four-folded square, which is also the centre of the large square of paper before it is folded, to form the point of the heart (Fig. 105). Cut out the top of the heart through all four layers of paper, also the curves of the sides of the heart; cut these only part way down as shown by A and A (Fig. 105). The dotted lines in Fig. 104 represent creases.
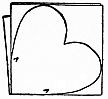
Fig. 105.—Cut out the top of the heart through all four layers.
Answers to the invitations might read:
“My dear Miss Darling and Miss Love, too,
I’ve opened your heart and will come to you
On the day you’ve appointed, the pleasure is mine,
And I hope you’ll accept me as your Valentine.”
Make as many valentines as there are guests, that all may be sure of receiving at least one. Address each of the girls’ valentines “To My Sweetheart,” and each of the boys’ valentines, “To My Valentine.”
Let either a girl or a boy be selected to run
The Post-Office
which you can make of a clothes-horse draped with sheets. Place a table inside across the opening, and on the table, resting on a pile of large books, stand an empty wooden box minus top and bottom. Set it up on one end to serve as the post-office window. The table and space on each side of the window should be screened with sheets. Across the outside top of the window fasten a pasteboard sign marked in large letters:
ST. VALENTINE’S POST-OFFICE
and decorate the white sheets covering the clothes-horse with red paper hearts of various sizes fastened on singly, doubly and in festoons. On the table at the right-hand side of the window[105] [106] [107] place the girls’ valentines and on the left-hand side of the window the boys’ valentines.
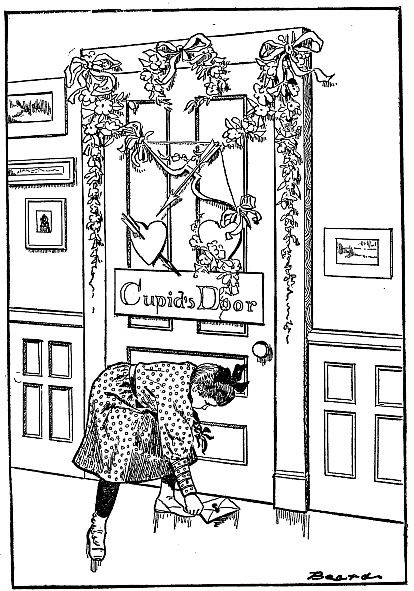
Sending Her Valentine.
Ask all the girls to form in line and march around the room to the post-office, while some one plays a suitable lively air on the piano. Each girl in turn must stop at the post-office window, where a box of St. Valentine’s stamps is set before her with one of the boys’ valentines. She must close her eyes and take one stamp from the box, then open her eyes, read the stamp and on it sign her name at the right-hand corner, then fasten the stamp on the valentine with paste given her by the postmaster, and move onward to give place to the next girl in line.
When all the boys’ valentines have been stamped, the girls take their seats and the boys form in line and stamp the girls’ valentines in the same manner.
The Valentine Stamps
should be previously prepared. They are made uniform in size of small squares of white writing paper, on which is written any kind of a wish which may add to the fun, such as:
I wish you would smile at me.
I wish you would sing me a song.
I wish you would tell me a funny story.
I wish you would sit by my side now.
I wish you would walk around the room with me.
I wish you would recite poetry to me.
When entering the room each guest is given a card. On one card is written,
“When the Bell Rings
once go to the post-office”; on another, “When the bell rings twice go to the post-office,” and so on, each card designating a specified number of rings. The postmaster sounds the bell at intervals, giving a different number of taps at each ring, until every girl and boy is supplied with a valentine; then each boy seeks the girl who has signed the stamp on his valentine and she asks that the wish be fulfilled. The request is, of course, laughingly and courteously granted. The valentines being sealed with St. Valentine’s stamps, the mystery of the sentiment enclosed cannot be revealed until the wish on the stamp is granted, and neither the girls nor the boys are aware of the contents of the valentines they stamp. Later in the evening the girls find the boys who have signed their stamps, and then, entering into the spirit of the fun, they grant the boys’ wishes as written on their stamps.
The guests may bring extra valentines made especially for and directed to either hostess or guests. These are not sent through St. Valentine’s post-office. The hostess keeps one door of the parlor closed for the benefit of those desiring to send special valentines. A sign posted upon it reads:
CUPID’S DOOR
and quantities of paper flowers with gilded pasteboard hearts, bows and arrows adorn it, giving it a very festive appearance. Each guest is at liberty at any time during the evening to slip from the company, make her way through the hall to Cupid’s door, slide her valentine under the door, give a quick knock and scamper off before she is caught. Only the hostess has the privilege of opening Cupid’s door, and to her belongs the pleasure of delivering these valentines to the various guests for whom they are intended.
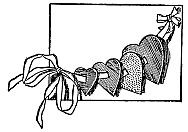
Fig. 106.—Which heart will you take?
There are many styles of valentines which you can make. Fig. 106 is effective and requires only a few moments to manufacture. For
The Heart Valentine
use a plain white card about four and one-half inches long and three and one-half inches wide for the foundation. Make four hearts graduated in size, the largest of red paper, the next gold, then green, and the smallest of blue paper. Cut a small slit in each heart a short distance from the top centre (Fig. 106). String the hearts on a narrow ribbon and tie one end of the ribbon through two slits cut in the lower left-hand corner of the card, and run the other end of the ribbon through two slits in the upper right-hand corner, then tie. Write across the top of the card, “Make your choice.”
Beneath it write this verse:
“The Red Hearts take without return,
The Green with envy always burn,
The Blue are cold and hard and small,
The Gold ask nothing but give all.”

Fig. 107.—Shade a little to suggest roundness.
The World Valentine
is another design. For this use a circular piece of white paper about four inches in diameter. Shade it around the edge a little to give an idea of roundness (Fig. 107), then with ink draw on the disk the outlines of North and South America to represent the world (Fig. 108). Paint the continent a light yellow. Put the lettering on in bright colors, placing an awl drawn in outline (Fig. 109) and a figure 2 in the position shown in Fig. 110. Paint the awl red.
Fig. 108.—North and South America.
Fig. 109.—The awl.
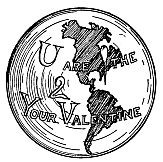
Fig. 110.—You are all the world to your valentine
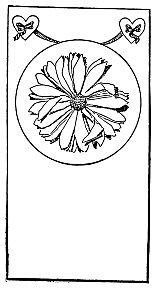
Fig. 111.—The daisy valentine.
This message is a rebus and reads: “You are all the world to your Valentine.”
Next Comes the Daisy Valentine
(Fig. 111). On a piece of paper six inches long and three and a half inches wide draw a circle near the top, making it not quite three inches in diameter. Paint the circle bright green as a background for the white daisy. Make the daisy of three or four layers of white tissue paper folded like Fig. 112 and cut along the scalloped outline shown in Fig. 112. Unfold the petals and they will be like Fig. 113; but as the number should be odd, you must cut off one of the petals. Sew the centre of the daisy to the centre of the green circle, then paste a small yellow paper disk (Fig. 114) over the stitches. Paint a small red heart at each upper corner of the valentine and paint a narrow blue ribbon tied to each heart and looped between, as in Fig. 111. If the valentine is intended for a girl write under the green circle in red letters:
“Pluck the daisy petals off, saying first: ‘He loves me.’
With the next: ‘He loves me not.’
Then again: ‘He loves me.’
With the fourth: ‘He loves me not.’
Going on: ‘He loves me,’
Till the last when torn away
Tells you this: ‘He loves you.’”
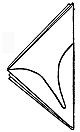
Fig. 112.—Paper folded ready for making daisy.
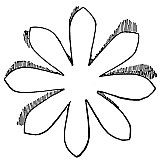
Fig. 113.—Petals of daisy.
When the valentine is for a boy substitute the pronoun She in place of He.
Love’s Palette,

Fig. 114.—Yellow center for daisy.
the last valentine (Fig. 115), is to be made of light cardboard cut in the shape of a palette. The palette should be about six inches high and four and one-half inches wide at the broadest part. Beginning near the top, cut short slits in pairs in the palette, placing the pairs one inch and a half apart (Fig. 116). Get a quarter of a yard each of narrow blue, red, white, yellow, pink and green ribbon, and slipping the ends through the slits in the palette tie them in bows as shown in Fig. 115. In the centre write in red ink, “Love’s Palette,” and on the back the following lines:
“This ribbon blue means I am true.
The knot of red says, ‘Will you wed?’
The bow of white, ‘You’re pure as light.’
The yellow, too, means thoughts of you.
The tie of pink is love’s own link.
The loops of green say, ‘Youth so keen
Must conquer all and win his queen.’”
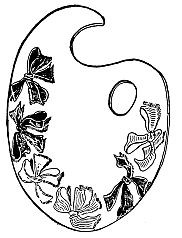
Fig. 115.—Love’s palette.
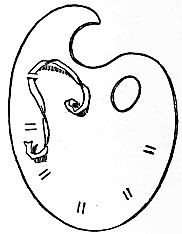
Fig. 116.—Slits cut in palette.
CHAPTER X
THE WILD WEST SHOW ON A TABLE
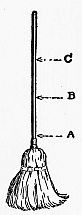
Fig. 117.—An old broom for rollers.
CITY people, country people, young people, old people, busy people, idle people, all come flocking to the Wild West Show when it posts its gay pictures and spreads its fascinating white tents for the benefit of the public.
But did it ever occur to you that the show could come to you—that is, you might organize a show of your own and arrange things to suit yourself? If you want the Wild West Show first and a circus after you can have them. Should you prefer both shows at the same time they are yours, for you can make the entire affair—horses, riders, Indians, wild animals and tent. You may do even more—you can cause all the performers actually to move, and that by the mere turn of your wrist, because your show will be in reality the moving pictures of
A Panorama
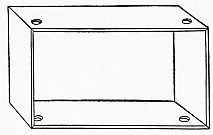
Fig. 118.—Box for show with holes in top and bottom.
Get a common old house-broom (Fig. 117) and saw the broom part off evenly from the handle at the dotted line A; then saw two pieces of equal length from the handle at dotted lines B and C, making each piece fourteen inches long. These we will call the rollers.
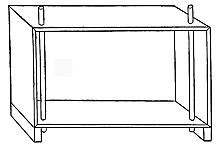
Fig. 119.—Broom stick rollers fitted in box.
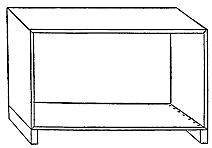
Fig. 120.—Blocks of wood across each end of bottom of box.
Find or make a wooden box about twelve inches high, eighteen inches wide and eight inches deep; carefully pry off one of the eighteen-inch sides and cut two round holes through the top of the box, one at each end, two inches from the front and one and one-fourth inch from the end; then turn the box over and cut corresponding holes through the bottom; reverse the box again, bringing the right side up (Fig. 118). The holes on the bottom must be exactly under those on the top and all four holes must be only large enough to allow the roller to slip in, and while in, to turn easily (see Fig. 119). Remove the rollers and nail a strip of wood two inches thick across each end of the bottom of the box (Fig. 120). Then hammer two strong staple-tacks on each roller two and one-half inches from the top, or smaller end, and on opposite sides of the stick;[115] [116] [117] guide the tacks so they will incline very slightly upward while being hammered in (Fig. 121).
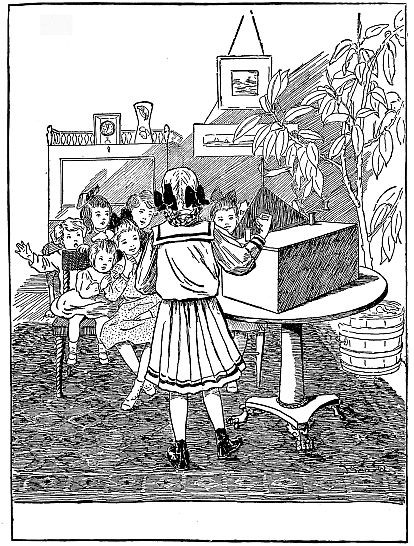
The Wild West Show Performance.
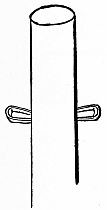
Fig. 121.—Tacks in roller
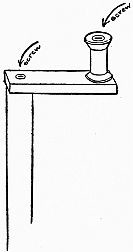
Fig. 122.—Spool on strip of wood for crank.
Fit an empty spool on one end of a piece of wood, one inch wide, three inches long and not less than one-fourth of an inch thick. Slide a large-headed screw in the hole of the spool until the screw rests on the block of wood; then screw it down tight, fastening the spool securely on the wood (Fig. 122); screw a second spool on another piece of wood of the same size as the first (Fig. 123, D and E). Fit the free end of the block of wood over the top of the roller and mark off the space on the block occupied by the end of the roller; with a gimlet bore a hole through the centre of this space, and also in the centre of the top of the roller; place the block of wood over the top of the roller, bringing one hole on top of the other, and fasten the roller and block together with a screw. In like manner screw the other block to the top of the second roller; these blocks and spools form the crank-handles for turning the rollers (Fig. 124).
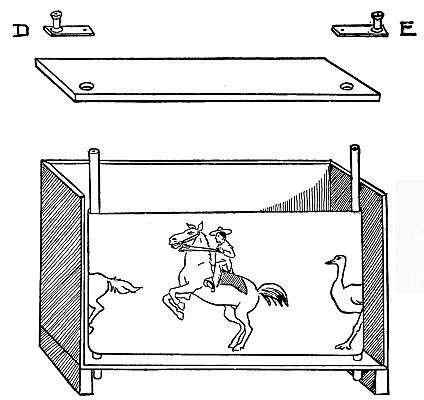
Fig. 123.—Top of box and the crank ready to be fastened on box.
Unscrew the blocks from the rollers and carefully remove the staple-tacks, in order that
A Strip of Cloth
may be tacked to the rollers and the rollers replaced in the box.
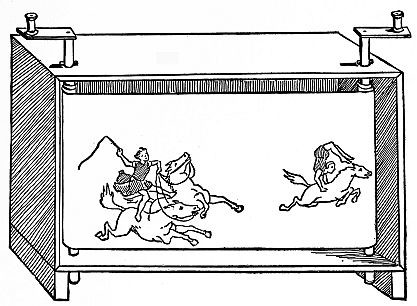
Fig. 124.—Box ready for tent front.
Fig. 125.—Lapped ends of strips of cloth sewed.
Purchase two yards of low-priced white cambric dress skirt lining; fold the cambric lengthwise into three equal divisions; then cut the folds apart, making three lengths each two yards long and about eight and one-fourth inches wide; sew the pieces together along the end edges, lapping one over the other that the seam may be as thin and flat as possible (Fig. 125). This will give you a strip almost six yards long for the panorama. Do not hem either the top or bottom. Allow a blank space of white cloth, sixteen and one-half inches long, at the beginning of the panorama; then commence
Pasting Pictures
on the strip. Colored newspaper pictures are best, because the paper is thin and easily pasted on the cambric. Almost all leading newspapers publish in their issues from time to time colored pictures of wild animals, rough riders, Indians and circus performers.
When you have a collection of the pictures you want, cut each one out neatly. When all are ready, sort them over, selecting the one you wish to come first on the panorama; then the second picture and so on. Have them all in order so you need waste no time hunting for a print while pasting the pictures on the cambric.
Make a good paste of flour and water, allowing it to boil well before using. A drop or two of oil of cloves mixed with the paste after it has cooked will keep it fresh a long time.
Select an attractive, comical picture for the first design on the panorama; but save the best and most startling picture for the very last.
You should arrange
The Performers
in your panorama in much the same way as a story is written or a play put on the stage. Always begin with something which will cause the audience to want to see more; then paste on various pictures, but toward the last lead up to the best and most exciting design; the last picture stands for the climax in a story or a play.
When placing the pictures on the strip of cambric, remember not to have them close together; keep them apart, allowing a little blank space between each successive object, so your audience will have an opportunity of enjoying every one of the performers and wild animals as it first appears peeping from behind the roll at one side of the tent, showing only its head, then coming in full view and passing slowly before them until it finally disappears around the roll at the other side (Fig. 123).
When the Pictures Are All Pasted
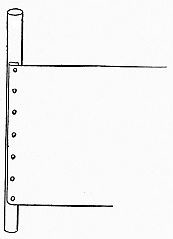
Fig. 126.—Cloth fastened on roller.
on the strip, turn over and crease down half an inch of cambric along the edge of the first end of the panorama; tack this end on one of the rollers. If the thickness of the top of your box is one-half an inch, tack the end of your panorama fully four and one-half inches below the top or smaller end of the stick. Should the thickness of the lid be one inch, the cambric strip must be tacked on still lower—about five inches from the top.
You cannot be too particular about having the edge of the cambric perfectly even and straight on the roller, so the strip will lie at a true right angle to the roller when laid out flat (Fig. 126).
Having tacked the cambric on, gradually roll it around the stick, keeping the strip running over, not under the stick, so the roller will stand behind the cambric; have the cloth perfectly even as it winds around and around. When the end of the cloth is reached, turn in one-half an inch of the end edge and tack the cambric to the second roller as you tacked the beginning on the first roller (Fig. 127).
Use the same precaution and wind in the same manner but in an opposite direction when rolling the cambric on the second stick. With a strong hammer strike the top or lid of the box along the edges from underneath until it loosens and can be removed; take it off and slide the rollers with the attached panorama into the holes on the bottom of the box (Fig. 123).
Fig. 97.
Fig. 99.—Cut the wide cuff like this.
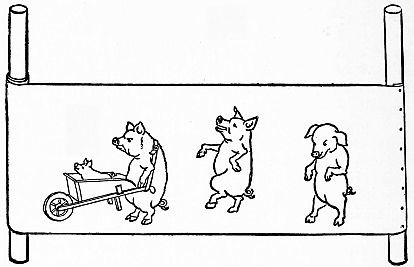
Fig. 127.—Method of rolling cloth on the broom-stick rollers.
Replace the lid of the box, passing the top ends of the rollers through the holes, and nail the lid down to the sides of the box; then refit the staple-tacks in their respective places and see that they are in tight; restore the crank-handles on top of the rollers and rescrew them in position (Fig. 124). Now the panorama is ready to go into
A Tent
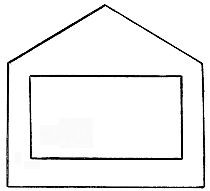
Fig. 128.—Pasteboard tent front for box.
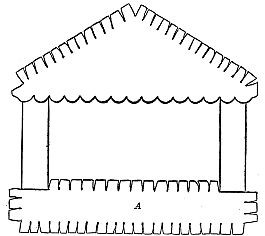
Fig. 129.—Manner of covering tent front with white cloth.
Cut a stiff piece of pasteboard box like the tent design (Fig. 128) with an opening to fit the strip of muslin, spanning the space between the two rollers; the edges of the opening must cover both top and bottom edges of the cambric. Cover the pasteboard with white muslin cut into four pieces—one piece for the top, one for the bottom and one for each side. Cut the bottom piece into a strip to fit, slashed on all edges (Fig. 129, A). Paste this on the tent (Fig. 128) first, turning the slashed portion over and fastening it on the back of the pasteboard; then fasten a curtain on each side (Fig. 130) and paste the top piece of the tent on last; scallop this along the bottom edge and paste it only along the two slanting slashed top lines; turn the slashes over on the wrong side of the pasteboard and paste. When dry, fit the tent over the front of the box and tack it firmly in place. Make three little flags of gay paper, paste on sticks and glue the sticks to the top peak and sides of the tent (Fig. 130); paste strips of paper over and across the flag handle to the pasteboard to hold the flag more securely on the tent (Fig. 131). Your show will then appear to be moving inside of a white circus tent.
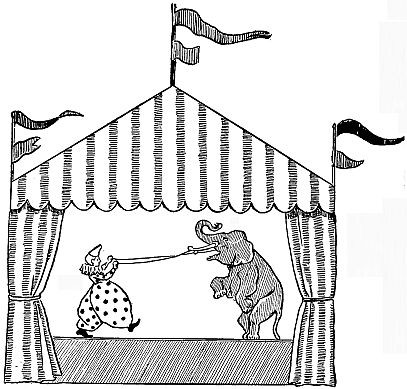
Fig. 130.—The Wild West Show with side curtains attached.
Fig. 131.—Method of fastening flagpoles on tent.
Set the box upon a table with the entire panorama wound on the second roller, leaving only the blank portion of the cloth visible, and while the audience is seated in front, begin slowly turning the crank-handle of the first roller; at the same time telling in clear, well enunciated words all about your Wild West Show. Do not try to have your remarks sound as though learned from a book; that would be stiff and unnatural. Talk in an every-day way, exactly as though you were speaking only to your most intimate friend, and wanted to tell her all about the strange sights and queer people, and the funny bears who are not afraid of any man woman or child.
If you have been to a real Wild West Show, that will give you ideas, or if you have traveled way out West and seen the actual Wild West life it will be an inspiration for your show. Even to have read about the life with its daring riders, wild horses, buffaloes, hazardous stage coach drives, Indians and their war dances will be an immense help in aiding you to enter into the spirit of the show.
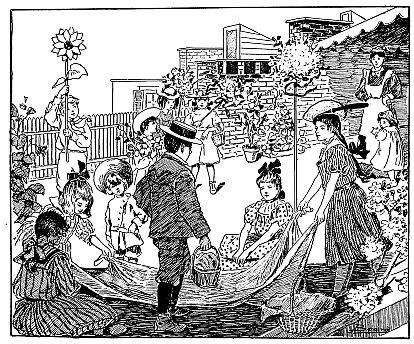
A Picnic on the Roof.
CHAPTER XI
ROOF PICNIC WITH BROOK TO CROSS AND FLOWERS TO PICK
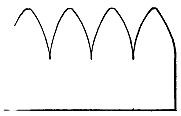
Fig. 132.—Cut the sunflower petals this way.
INVITE your friends to an afternoon picnic, and in the morning prepare the grounds for the frolic. Have a lot of growing flowers and growing fruit to give the place an attractive and festive appearance. The fruit must be real, not make-believe; it must be ripe and ready to pick; but the flowers may be of tissue paper, cheerfully bright and large in size. The aim should be more for general effect than detail in making these outdoor decorations.
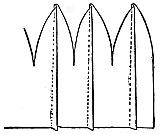
Fig. 133.—Fold each petal through centre.
Sunflowers
can be fashioned rapidly by cutting orange-colored tissue paper into strips twenty-five inches long and six inches wide, pointing the strips into petals three inches deep and two and a half inches wide at the base (Fig. 132), ten petals to each strip; then creasing each petal lengthwise through its centre to give stiffness (Fig. 133), and gathering each strip separately along its straight edge with needle and thread (Fig. 134); in this way forming the two strips into two pointed circles (Fig. 135). These circles, together with a brown centre, make one sunflower.
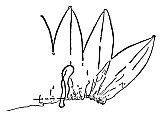
Fig. 134.—Gather the strip of petals.
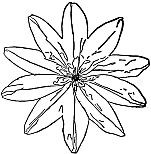
Fig. 135.—One gathered circle of sunflower petals.
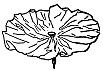
Fig. 136.—Sunflower centre.
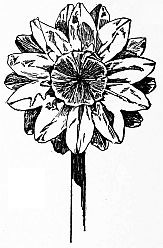
Fig. 137.—Paper sunflower growing on broom-stick.
Cut a strip of brown tissue paper nine inches long and two inches wide for the centre, gather the paper tightly along one lengthwise edge and tie it close up under and against the head of a slender nail (Fig. 136). Around the nail under the brown centre, slide on first one, then the other, circle of gathered yellow petals, taking care to have the petal points of the lower circle lie between and not over those of the top circle. Finish by driving the nail which runs through the sunflower, into one side of a stick or broom-handle, with the lower end sharpened (Fig. 137).
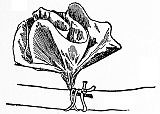
Fig. 138.—Paper hollyhock tied on stick.
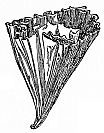
Fig. 139.—Paper crimped for pinks.
Fig. 140.—Paper disk for making poppy.
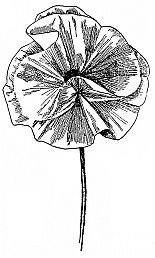
Fig. 141.—Paper poppy.
Hollyhocks
of every color can be made of circles of tissue paper five and a half inches in diameter, held at the centre, two circles one inside of the other, and the centre pushed and squeezed together, causing the edges to fold and turn until they resemble the real flower (Fig. 138). Smaller circles, crimped by drawing the paper through the partially closed hand (Fig. 139), can be made into pinks, and you may have brilliant, nodding poppies in the same way, only these are of smooth, uncrimped circles (Fig. 140), placed one inside the other, with a small circle of dark-green paper for the centre, and all three layers pinched together at the extreme centre (Fig. 141). Large peonies are similar in construction to some of the flowers you have made, so try to work these out yourself.
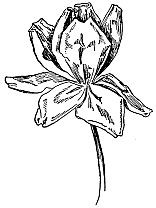
Fig. 142.—Paper rose.
A simple way to make
Roses
is to cut tissue paper into strips two and a half inches deep; cut the square-cornered slashes two inches wide, then with knife or scissors blade curl the sharp corners of each separate division, making the slashes into rose petals. Curl the corners of the petals along half of the strip inward, and those along the other half, outward. Fold two or three plaits in the straight bottom edge of each petal; then begin with the half where the petals curl inward and wind the strip around the end of a slender stick. The first petals form the central group and are curled inward; the remainder, curled outward, form the outward circle of petals (Fig. 142). Make a generous supply of blossoms and tie them on bushes. Let each bush bear but one kind, that the flowers may appear natural and as if actually growing.
Get a Variety of Fruit, Peaches, Plums, Apples
or any other sort you may prefer. Tie the fruit to those bushes which have no blossoms, allowing each fruit bush to bear only one kind of fruit.
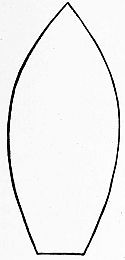
Fig. 143.—Pattern for green leaf.
In case there are no bushes, or if the bushes are too few in number, use branches or sticks with natural foliage, or leaves made of green tissue paper; make the latter of paper in several layers, that a number may be cut at a time like the pattern (Fig. 143). Crimp through the centre by folding lengthwise over a hat-pin and pushing the folded centre together (Fig. 144). The method is quick and gives satisfactory leaves (Fig. 145). Cut leaves in different sizes as you will need some larger than others.
The sticks used as bushes should be of varying heights sharpened at the lower end and driven into the ground.
Pretend the sticks are fruit trees and flower bushes and plant them where they will appear to best advantage.
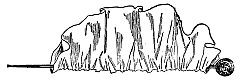
Fig. 144.—Crimping green leaf.
If your yard happens to be
On the Roof
of the house, as often occurs in large cities, there will probably be no earth in which to plant things; then you must fill flower pots and deep boxes with earth, sand, or gravel, and plant your make-believe trees and shrubs in them; such a garden will be entirely different from all others.
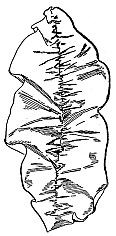
Fig. 145.—Green paper leaf.
Build a wooden fence over which the girls and boys climb to enter the picnic grounds; even though the improvised fence may not closely resemble the real article, it will help to render the feeling of being in the open country more realistic.
Make the fence by sinking the legs of two strong kitchen chairs partially but firmly into the earth. Place the two chairs facing each other and a short distance apart; then run a large, strong pole or narrow board for a rail, across the chair seats, allowing the rail to extend out beyond the back of the chairs. Lash the rail securely to the chairs with the heaviest twine or slender rope, and place very heavy weights on the seat to keep the chair steady, and avoid all possibility of the rail slipping or chairs tipping.
If possible get either a swing, a teeter or a jogging board; all these will afford a lively time for your guests, as will also a wheelbarrow in which the girls and boys may take turns in riding and pushing or wheeling each other.
If you want to make the affair seem just like a regular
Country Picnic
let each guest bring his or her own little basket of lunch.
As your guests arrive, usher them into the house and do not let them even see the yard if it can be avoided; keep the grounds for a pleasant surprise a little later.
Form the girls and boys into a single file and lead them marching around the room while they join in singing some lively air. After winding in and out among the chairs and tables, open the door, let them look out into the pretty garden, and, while still singing,
Climb Over the Fence
and march among the flowers and fruit trees; end the procession by circling around the spot chosen for your dinner table, where all must deposit their lunch baskets. Of course you will not have an actual table, as the tablecloth must be spread on the ground and the girls and boys sit around it.
Mark the four corners of the space reserved as a table with sticks about forty-six inches high, decorated with bright flowers (Fig. 146), and the sharpened ends planted in the earth, or in flower pots.
Spread the Tablecloth,
bringing each corner to meet a garland pole; then let the guests take from their baskets the different articles. Reserve some space at the centre of the table for fruit, and let each boy and girl in turn walk about the grounds and select one piece of fruit, pick it, bring it to the table, and lay the chosen piece on the centre of the tablecloth. No person may pick more than one piece of fruit during one turn. Each player is privileged to place his fruit in any way he desires, remembering always that each piece goes to form the centre-piece, which should always be made as decorative as possible.
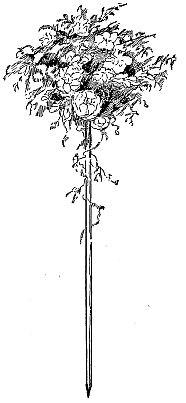
Fig. 146.—The decorated pole.
Crossing the Brook
is a lively game and great fun. Get a number of flat stones that will lie steady, and are large enough to step upon; arrange them about eighteen or twenty inches apart, in an irregular line, over a stretch of ground twenty or more feet across. Let the players in turn tip-toe on the stones just as though they were crossing a brook of running water, each girl and boy being obliged to pay a forfeit for every misstep into the make-believe water. If stones are not to be had, use blocks of wood, or, if need be, pieces of paper in place of stones. As each player crosses the brook, the rest of the party must call to her to be careful, not to fall, that she is going too fast, that she is going too slow, or make similar comments. They can cheer her, and in many harmless ways try to confuse the player with their calls, but it is against the rules to touch or even go nearer to her than two yards.
After all the girls and boys have taken their turn at crossing the brook, try
Japanese Tag
Each player must keep her hand on the spot where she was last tagged, making the game present a most laughable appearance, with all the young people dancing about in strange attitudes, holding a hand on the top of the head, on the knee, chest, back, or foot, as it happens. The players are not allowed to remove the hand until tagged in another spot. When tagged in the middle of the back or any spot difficult to reach, the player may hold a stick in his hand with one end resting on the spot where he was tagged.
In starting
The Game
any person who first shouts, “Pick her up and stone holder,” may hold both hands in front of her, each doubled up tight and one clasping a small stone, immediately some one calls out “First knock,” another player cries “Second knock,” another “Third knock,” and so on, according as they are able to get the call in after the preceding cry. The player calling
“First Knock”
taps one hand of the girl or boy holding the stone; if the hand touched contains the stone, the player knocking is “it,” and the game begins, but if the hand is empty, the player is free and the stone-holder puts her hand back of her while she does or does not change the stone to the other hand; again stretching her clinched hands forward, she allows the player calling “Second knock” to try her luck by tapping one of the outstretched hands. The trials are continued until a player taps the hand holding the stone and becomes “it,” then
The Others Scatter
and “it” endeavors to tag some one, who in turn becomes “it,” and so the game goes on.
After the players have grown tired of this game, there are many others which will suggest themselves to the young people, and it will be found a good plan to alternate the livelier kind with those of a more quiet nature.
When the picnic is over give each guest one of the pretty paper flowers to carry home, and your roof or back-yard picnic will have been an event long to be remembered.
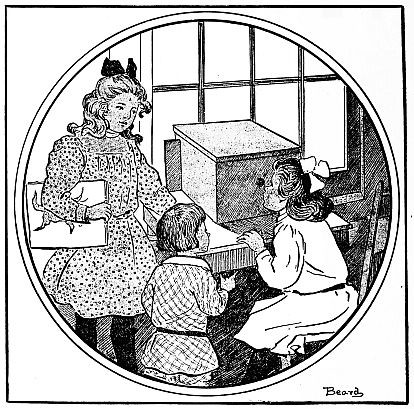
The Magic Peep Show.
CHAPTER XII
THE MAGIC PEEP SHOW
FIND or make a simple pasteboard box, twelve inches long, ten inches wide and nine inches high, or you can have it a little smaller if you like, for your Magic Peep Show.
Fig. 147.—Back end of box opening.
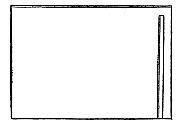
Fig. 148.—Slit cut in side of box.
Cut a large square opening in the end of the box, leaving a margin one-half inch wide at the top and sides (Fig. 147). Make a small round hole in the centre of the front of the box, only large enough for one eye to look through, and cut a slit a quarter of an inch wide on each side of the box half an inch from the open end and half an inch from the top; extend the slit to the bottom of the box (Fig. 148). Fig. 149 shows the box with the front, sides, and back cut.
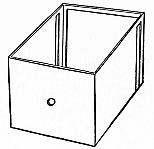
Fig. 149.—Peep-hole cut in front of box.
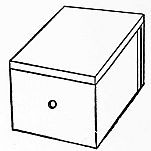
Fig. 150.—Peep show ready for slides.
If the bent-down edges of the box-lid are wide, cut them off within half an inch of the top; then put the lid on the box and it will be ready for the slides (Fig. 150).
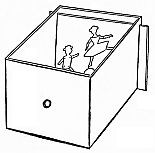
Fig. 151.—Slide in box.
The Slides
must be stiff and perfectly opaque, so they will appear black when held up to the light. Make them of pieces of pasteboard boxes cut to fit in the side slits and long enough to extend a trifle beyond on each side of the box (Fig. 151).
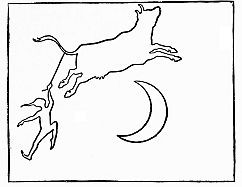
Fig. 152.—Cow jumps over the moon.—Front side of slide.
Draw the different designs given here on separate slides, and with a sharp penknife cut them out, leaving holes in the slides exactly the shape of the designs. The holes should appear with clean-cut edges.
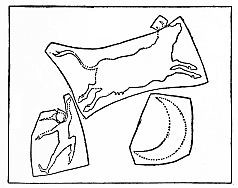
Fig. 153.—Wrong side of slide.
Of course, the complete designs on the slides must be drawn much larger than in these printed diagrams, but you can enlarge the drawings by the system of squares. Explained in Chapter XIV.

Fig. 154.—White paper over horns.
After the designs are cut out, paste colored tissue paper over the openings, and when you look through the little hole you will see wonderfully bright and gay scenes all in transparent colors. An ambitious red cow will be found jumping over a yellow moon, and instead of being accompanied by the usual dish running away with a spoon, you will find an energetic wood sprite dressed all in Lincoln-green. The sprite has tied a rope of wild grape-vine to the cow, and, clinging to the rope, is sailing through the air and over the moon with his queer steed. Fig. 152 shows
“The Cow Jumped Over the Moon”
Cut out the group and paste a piece of dark-red tissue paper over the entire cow with the exception of the horns. Across these paste white tissue paper. Cover the moon with one piece of yellow tissue paper and the sprite with green, all except his face; have that pink. Cut out a thin line for the rope and paste a bit of brown tissue paper over it. Fig. 153 shows the wrong side of the slide and explains how the work is done; dotted lines designate the openings, which are covered with tissue paper, in the manner described.
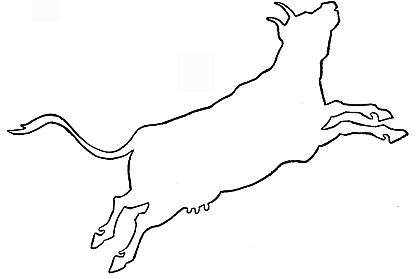
Fig. 155.—The jumping cow.
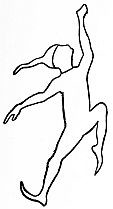
Fig. 156.—The green sprite.
The tissue-paper coverings may be cut in any shape, but each piece must cover well the opening of the figure or portion of figure intended to be the color of the paper. Have the white paper across the horns lap less than one-eighth inch over the red paper of the cow (Fig. 154), and manage the pink paper of the sprite’s face in the same way where it meets the green of his cap and clothing.
Fig. 157.—The moon.
In making the other slides, follow this method throughout whenever two pieces of tissue paper come in contact on the figure, and when pasting paper over designs on the remaining slides always use one large piece of paper in preference to several small pieces for covering different parts of the design, which are the same in color. Figs. 155, 156 and 157 give the cow, sprite and moon for you to copy or trace.
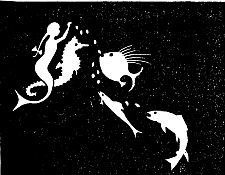
Fig. 158.—Life in fairy waters.
Life in Fairy Waters
Fig. 158 shows how dark the slides appear when seen in the peep show and gives an idea of the decided contrast of the light design against the dark background, only the black and white print cannot give the charm of the clear, bright, transparent coloring of the mermaid feeding her many-hued pets as she rides her sea-horse in the fairy waters.
The different parts of the composition are Figs. 159, 160, 161 and 162, and the food merely little oval-shaped holes covered with white tissue paper. Make the mermaid’s hair and ribbon brown; her face, arms and body to the waist line, pink; the remaining portion of the mermaid’s figure orange-color. The fish, scarlet, purple and white. Paste wee round pieces of black paper on the fish for the eyes.
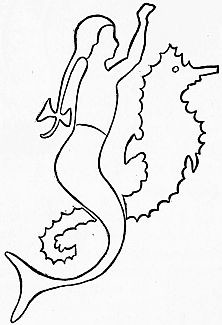
Fig. 159.—Mermaid on sea-horse.
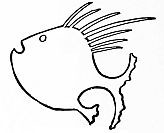
Fig. 160.—Fairy fish.

Fig. 161.—Fairy fish.
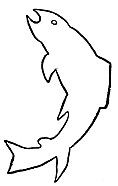
Fig. 162.—Fairy fish.
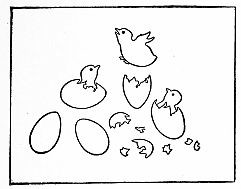
Fig. 163.—Easter chicks.
As soon as you finish the slide, fit it in the peep show box, turn your face to the light, then peep through the hole and find how pretty the bright group looks with all the eager fish gathering around the little mermaid as she calls them to breakfast.
Next comes Fig. 163, the
Easter Chicks
Make Fig. 164 light yellow; Fig. 165, blue; Fig. 166, orange chick, white shell; Fig. 167 A, green, B, purple; Fig. 168, white chick, scarlet shell; the broken shells (Fig. 169) red, blue and white. The poor little chicks are glad to escape from the shells even though the shells have been gayly painted.
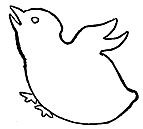
Fig. 164.—Light yellow chick.
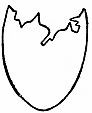
Fig. 165.—Blue shell.
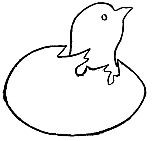
Fig. 166.—Orange colored chick—White shell.
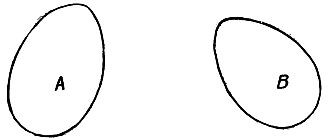
Fig. 167.—Green egg.—Purple egg.
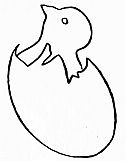
Fig. 168.—Scarlet shell.
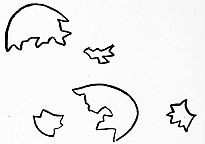
Fig. 169.—Pieces of red, blue and white shell.
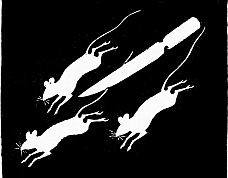
Fig. 170.—Three blind mice.
In the Three Blind Mice
(Fig. 170), which are pursued by the knife belonging to the farmer’s wife, the first mouse can be orange-color; the second, white, and last one brown. The blade of the knife, scarlet, and its handle green, or any other colors which may please your fancy. Remember, this is a magic peep show, and often the natural color of animals is changed to more brilliant hues in order to secure a more vivid effect.
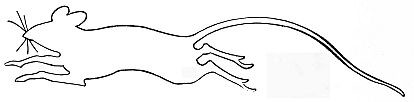
Fig. 171.—One of the three blind mice.
You can make all three mice from one outline (Fig. 171) and the knife from Fig. 172. Set the slide of mice in place in the box, peep through the hole and “see how they run!”
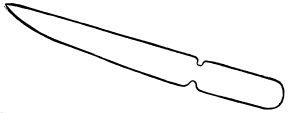
Fig. 172.—The butcher knife.
The next illustration will undoubtedly prove to be the most amusing of all, and will bring forth gales of laughter from your little brothers, sisters or friends. It is the
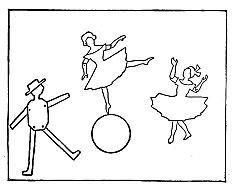
Fig. 173.—Dancing toys.
Dance of the Dolls (Fig. 173)
On Fig. 174 paste orange-colored hair, a scarlet dress and green shoes; then over all paste one large piece of white tissue paper which will make the doll’s face, neck, arms and stockings white. The layer of white paper placed over these colors does not affect them in the least.
Cut a circular hole for the ball and cover it with brown tissue paper. Dress Fig. 175 in the same manner as the doll just described, but in other colors. For instance, make her hair brown, her dress light purple, her shoes yellow, and her face, arms and stockings white. If you want features on the faces, use a very soft lead-pencil and draw eyes, nose and mouth, though features are not really necessary, and, as a matter of fact, the dolls look very well without.
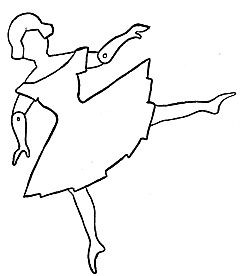
Fig. 174.—Girl to dance on ball.
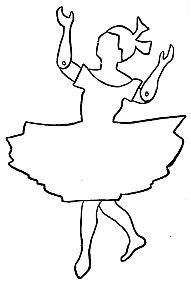
Fig. 175.—Dancing doll.
Let Jumping Jack (Fig. 176) be all in blue, except his face—make that white. Joints on all the toys, as seen in the illustrations, are indicated by pasting thread lines of black paper and pin-head dots of black paper over the places where joints should be, according to the outlines and dots at the elbows of the girl dolls and the shoulders and hips of dancing Jack.
The Bouquet
(Fig. 177) consists of a red tulip (Fig. 178); a deep-yellow ox-eye daisy with a brown centre pasted over the yellow—in this case it can be done (Fig. 179)—a bluebell (Fig. 180); and a white daisy with yellow centre (Fig. 181). You will find that this piece, with all its bright colors, will be one of the prettiest of your designs. Fig. 182 is a branch of green leaves.
Fig. 156.—The green sprite.
Fig. 157.—The moon.
Fig. 160.—Fairy fish.
Fig. 161.—Fairy fish.
Fig. 162.—Fairy fish.
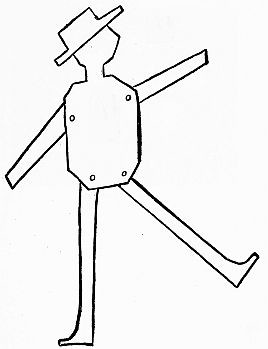
Fig. 176.—Jumping Jack.
Cover each blossom with its respective color, and then paste one piece of green tissue paper over all the leaves and stems and the effect will be very natural.
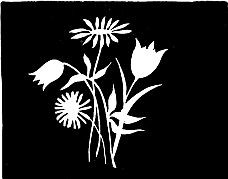
Fig. 177.—Floral slide.
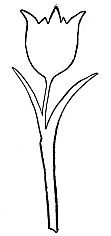
Fig. 178.—The red tulip.
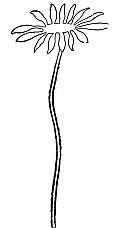
Fig. 179.—Ox-eyed daisy.
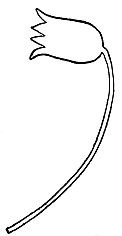
Fig. 180.—Bluebell.
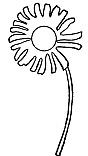
Fig. 181.—White daisy.

Fig. 182.—Green leaves.
The Little Sun-bonnet Girl
(Fig. 183), playing with a lot of bright-colored balloons, forms the last slide. Make the little girl’s dress blue, her sun-bonnet white and her hands, feet and ankles pink (Fig. 184). Let the strings of the balloons be of white tissue paper and each balloon of a different color from all the others; one may be dark red, the others green, pink, purple, light yellow, blue, scarlet, orange, brown, light green, white and vivid yellow. The slide will be very brilliant.
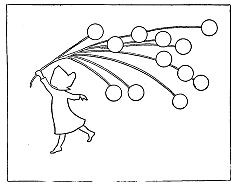
Fig. 183.—Little sun-bonnet girl.
Invent other designs yourself. Think of something you would like to see and try it on a new slide; when you succeed with one, you will want to make another and another. The more slides you have for your magic peep show the longer the fun will last, and you will be able to give no end of pleasure to your little friends.
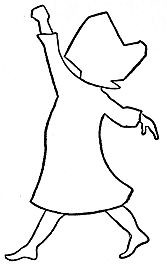
Fig. 184.—Sun-bonnet girl.
When exhibiting the peep show set the box on top of a table where the light will shine through the slides and let the party take turns facing the window and peeping through the little hole at the novel, brilliant scenes beyond.
[151] [152]
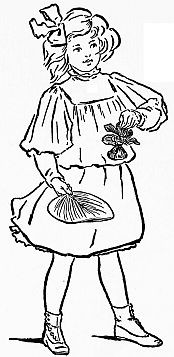
Champion of the New Outdoor Game
CHAPTER XIII
PLANT YOUR GARDEN IF YOU CAN
A New Flower Game
BRIGHT summer days are the time to be out of doors in the sweet, fresh air, with the birds and flowers, where there is plenty of space to run and have a good time. What a lot of games can be played in the open. There is Hide-and-Go-Seek, Catcher, Tag, Hop-Scotch and many more. You will be able to add a number to the list. Probably, though, you have played all of them over and over again, so we will try and think of something new. We must have a game that will be lively, interesting, and at the same time require a certain degree of skill, and the game must be one where we can enjoy the making of things requisite for the sport; but the material must not cost more than a few cents.
I have it! A game of flowers with roses that will not wilt or fade but last for a long time fresh and bright. We will call it “Plant Your Garden if You Can,” because one cannot always be absolutely sure of planting the flowers, and that is part of the fun.
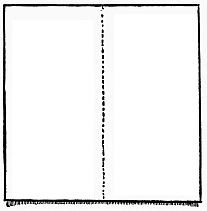
Fig. 185.—Square 12 inches each side.
Two Dozen Roses
will be needed for this garden game, half a dozen white, half a dozen red, half a dozen yellow and half a dozen pink. The flowers are of tissue paper and very pretty.
Cut squares measuring twelve inches along each of the four sides, from white, pink, yellow and red tissue paper; the dotted lines on the diagrams indicate where the paper must be folded (Fig. 185). Fold each square across the centre (Fig. 186). Fold again crosswise through the centre, forming a small square of four layers (Fig. 187). Again fold, this time diagonally (A to B, Fig. 187), and you will have a triangle (Fig. 188). Fold once more diagonally (Fig. 188) A to C; this will give Fig. 189. Cut straight across from E to dot D (Fig. 189), then cut a slash an inch and three-quarters deep in the centre of the edges as shown by the line F in Fig. 190. Open out the paper (Fig. 191). The slashed edges will form the petals of the rose. Curl each corner edge of every petal with a blade of a pair of scissors according to dotted lines on the petal (Fig. 192).
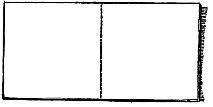
Fig. 186.—Square folded once across centre.
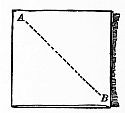
Fig. 187.—Square folded twice.
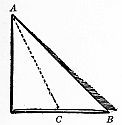
Fig. 188.—Four layer square folded diagonally.
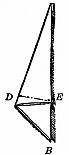
Fig. 189.—Triangle folded diagonally through centre.
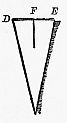
Fig. 190.—Second triangle slashed on edges.
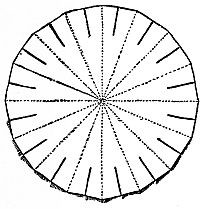
Fig. 191.—Unfolded triangle with slashed edges for rose petals.
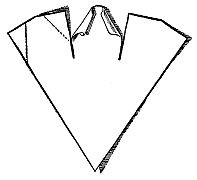
Fig. 192.—Section of paper for rose showing one curled petal.
Begin by holding one corner of one petal between the thumb of your right hand and one blade of the scissors; gently pull your[155] [156] thumb and the scissors blade outward, sliding them along each side of the petal, while you hold the remainder of the paper steady with your left hand. The thumb rubs over the petal; at the same time the edge of the scissors blade scrapes the under side of the petal, which causes the paper to curl. Fig. 192 shows one petal with both of the side corners curled. When you have curled around the first half of the circle, turn the paper over and curl the petals around the other half of the circle in an opposite direction. Fig. 193 gives two petals curled forward and two backward, representing two petals on each half of the tissue-paper rose. After all the petals are curled lay the centre of the tissue paper out flat and place on it three level teaspoonfuls of flour; then gather up the edges of the rose and wind a strong thread several times around below the petals and above the flour-bag formed by the centre of the paper (Fig. 194). Tie the string, adjust the petals and the rose will be finished (Fig. 195).
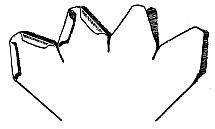
Fig. 193.—Two curled petals on each half of rose.
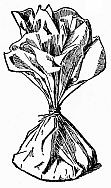
Fig. 194.—Flour in centre of paper and string around below rose petals.
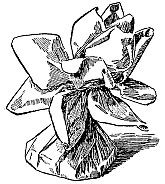
Fig. 195.—Finished rose and flour bag.
Mark Out Two Flower Beds
where the roses are to be planted. Each bed must measure three yards in length and one yard in width. The beds must run parallel to each other and be separated by a space of three yards. Each of the two flower beds must then be divided crosswise through the centre, making four flower beds in all, two on each side—one for every player. Fig. 196 shows the plan with flower beds divided. The circles denote the station points or places where the players stand, and the dotted line the direction the roses should take when played by the girl or boy stationed at the position marked “Barbara.” The other players send their roses in like manner over the intervening space to the flower bed diagonally across from their position.
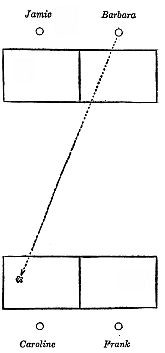
Fig. 196.—Plan of flower bed for game.
That there may be no mistake regarding each particular enclosure where the different-colored roses should be planted,
Use Flags
to designate the color of the various flower beds. From inexpensive cotton cloth of a solid red color cut a flag eighteen inches long and twelve inches wide; hem the raw edges; then tack one end of the flag on a slender stick one yard or more in length; sharpen the free end of the stick and push it down into the earth at the outer back corner of the flower bed intended for the red roses. Have the flag stand straight and firm. Make a white, a yellow and a pink flag in the same way. Erect each in the outer back corner of its own bed, which will be the bed where roses of corresponding color are to be planted. All the flags must be of equal height.
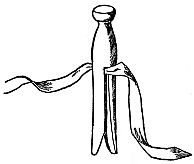
Fig. 197.—Tape in clothespin for pegging to ground.
If the game is played at the seashore on a smooth, hard beach, mark out the flower beds by running the end of a stick along in the sand. If the game takes place on a level lawn, use white tape for marking the beds; peg the tape down to the earth with common wooden clothespins (Fig. 197), first sliding the tape in the clothespin (Fig. 198).

Fig. 198.—White tape outlining flower bed.
The Four Rackets for the Game
are ordinary flat palm-leaf fans, one fan to each player.
The game is played by sides, and calls for four players, two on each side.
The Game
is that each player in turn shall plant as many roses in her own garden as she can. Every player has six roses of one color; the two holding respectively the white and the red roses are on one side, while the two with the yellow and the pink roses take the opposite side. When all is ready and the players are at their stations, a signal is given and the game begins.
The first player holds one of her roses out with the left hand, strikes it with the fan-racket held in the right hand, and endeavors to send the rose flying and land it in her own garden. If she succeeds, the rose is said to be “planted,” and scores her one point, but should the rose go beyond the boundary line of her flower bed, fall short of it, or the flour-bag of the rose be broken, the play is a “failure” and scores one point for the opposite side. When a rose falls on the boundary line of its own flower bed, the play is a “fault,” and the player may try again with the same flower. After the first player has had her turn, a player on the opposite side tries her skill, for the turns must alternate from side to side. The game ends with the playing of the last rose, and the side scoring the greatest number of points wins the game. All roses when played must remain where they fall until the close of the game, with the exception of those falling on the boundary line of their own beds.
A Tally Card
will be required for keeping a record of the game. Make one of white pasteboard (Fig. 199). The initials can be changed to those taking part in the sport. Every point scored must be written under the color and initial or name of the person who scores it. When, because of the failure of one player, the opposite side scores a point, the score must be recorded in the third column belonging to that side on the tally card under the word “Won.”
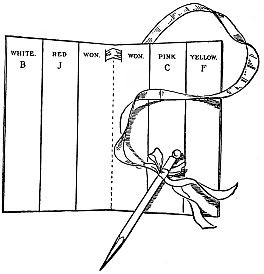
Fig. 199.—Tally card.
To Determine the Choice of Sides,
which shall be first, and the distribution of colors, draw straws for the colors and toss for position of sides. To draw straws, take four straws of varying lengths, and grasp them in your hand in such a way that the extending ends of the straws seen by the other players are the same in length, while the uneven ends are closed within the hand; allow each player to draw a straw. The girl or boy taking the longest straw has first choice of colors; the player holding the straw next in length has second choice, and so on.
To toss for position of sides means that a player from each side shall toss a small stone toward a stick laid on the ground two yards distant from the spot where the players stand. A twig placed on the spot may mark the point from which the stones are to be tossed. The stones must be tossed in turn, not at the same time, and the player whose stone comes nearest to the mark wins the right for his side to the choice of position on the grounds, also the right of first play.
One charm of this game is that the roses when volleyed by the players invariably land on the ground blossom uppermost, and these twenty-four bright blossoms scattered over the green lawn or sandy beach, with gay, colored flags outlining the four corners of the garden court, and, best of all, the group of merry boys and girls, make a very attractive and pretty scene.
The game, though intended for four players, may also be played by either two or eight players. When only two take part, each must play the twelve roses belonging to his side; in other respects the rules are the same as in a four-handed game. When there are eight players, four must stand on each side and each player have three roses, two players necessarily playing the same color, but not in the same bed, as the garden on both sides must be divided into four beds that every player may plant roses in a separate flower bed; otherwise the original rules hold good.
“Plant Your Garden if You Can” may be adapted to the house when chill Autumn days appear and the weather grows cold and rainy. When played indoors the beds may be marked out by white tape as on the green lawn, only in this case wooden clothespins would be of no use, and thumb tacks, such as are used by artists, must take their place to fasten the tape down on a bare wooden floor, and safety-pins when the floor is carpeted.
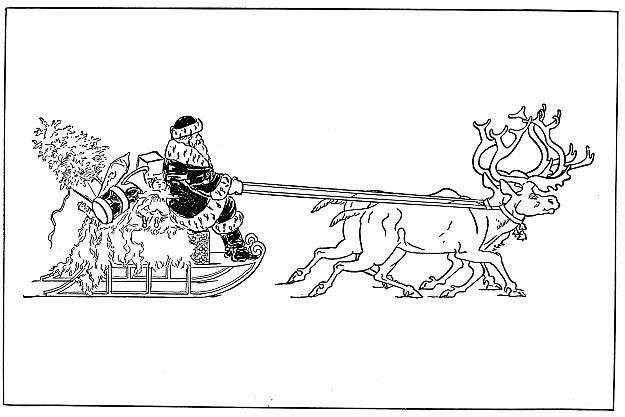
Fig. 200.—Home-made Santa Claus as He will Appear on Your Hearth Christmas Morning.
CHAPTER XIV
JOLLY LITTLE SANTA CLAUS WITH HIS REINDEER AND SLEIGH
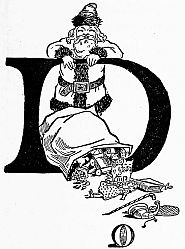
DO you want to see—actually see!—Santa Claus seated in his sleigh filled with toys, and driving his famous reindeer? You may do so and have him come to your home. Even if there is no chimney and open fireplace for Santa Claus to climb through, the blithe little fellow can be induced to appear, sleigh and all, and he will keep his turnout standing perfectly still that all the family may have a good, long look at him. But you must carefully follow directions and help Santa Claus get ready for your Christmas (Fig. 200).
It would be difficult to say positively how long Santa Claus has lived, or when he first made his appearance, but we all know just how he looks,
“His eyes twinkle, his dimples are merry,
His cheeks are like roses, his nose like a cherry.”
We know that he is sure to come every Christmas, and the girls and boys look forward gladly to his visit. The little Hollanders name our Christmas Saint Santa Claus, the same as we do, though sometimes we call him Kris Kringle. In England he is both Santa Claus and St. Nicholas, in Switzerland Samiklaus, in Russia he is St. Nicholas. But no matter by what name he may be called, he is always the same, always the jolly little fellow bringing good cheer to every one. Santa Claus takes great delight in driving his tiny reindeer and sleigh full of toys over roofs of houses for the special benefit of the girls and boys he knows, and that includes all of them.
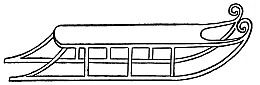
Fig. 201.—Ordinary sled.
Possibly Santa Claus will drive only two reindeer in his sleigh this year. He is willing, however, to bring them all if you wish.
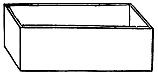
Fig. 202.—Box for top of sled.
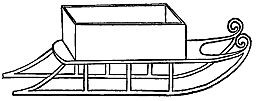
Fig. 203.—Santa Claus sleigh ready for fur robe.

Fig. 204.—Extensions on each hoof.
An ordinary sled (Fig. 201) will do for the foundation of
The Sleigh,
and a box for the body of the sleigh (Fig. 202) to set on the sled (Fig. 203). Find some furs to use as robes to hang over the sides and back of the sleigh; any kind will do—boas, collars, circulars or rugs. Fit them in and over the sides of the box. If you have no furs, try plush or colored blankets. Tack gay-colored paper over those portions of the box which are not concealed by the robes, and lay a small, light board over the top front of the box, resting the ends of the board on the sides of the box to make the seat on the sleigh. Cover the board with the same paper as that tacked on the box.
Make two
Reindeer
of stiff pasteboard like Fig. 204. Now, do not think you cannot make the deer because you may not be skilled in drawing, for you can do so easily. Take a large sheet of paper and draw on it an oblong forty-eight inches wide and thirty-six inches high; divide the oblong into squares measuring six inches on each of the four sides, which will give eight squares in width and six squares in height. With the aid of these squares it will be fun to copy the reindeer. Number the side lines of your oblong and letter the top and bottom lines as in Fig. 205. Examine the lower corner space of Fig. 205 enclosed by the lines A-5, and you will find the hind hoof and part of the hind leg stretching diagonally across the space. Use a soft lead-pencil and begin copying the deer by drawing a slanting fine from the extreme outward lower corner upward about one-third of the distance from the bottom to the top of the space A-5. This short slanting line forms the bottom of the hoof, the little space, enclosed between the hoof and the long toe above it reaches very nearly to the centre of the lower part of the square A-5. Make yours so. Draw the upper edge of the long toe; then run a slanting line up to the top line of the square space A-5, and make it touch the top line 5 less than one-quarter the distance from the side line A to the opposite line of the same square. Return to the lower part of the hoof already begun and draw the inside line of the hoof and portion of the leg in the same space, A-5.
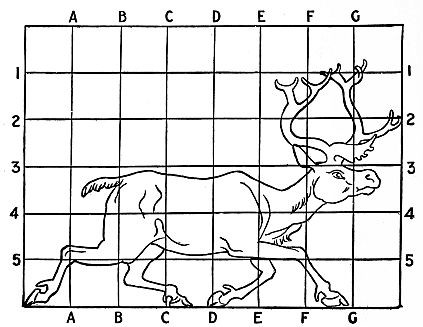
Fig. 205.—Reindeer enlarged enclosed in squares.
In the space 4-5, immediately above the space A-5, you will perceive that only a lower corner is drawn in and that all the four squares above the square 4-5 are vacant, so continue your drawing on the bottom space A-B. The extreme upper corner of this is cut off by a short straight line; then a shallow scallop extends entirely across the upper part and runs into the third lower space B-C. If you notice closely the space enclosed by the lines 4-5, A-B, immediately over the one you have been working on, you will see that the corner on the line 4-A is vacant, while all three of the other corners are occupied by portions of the hind leg, and that the empty space extending from the vacant corner 4-A forms almost a square with two lines slightly curved and the corner diagonally across from the vacant corner 4-A, on the line 4, cut off by a short line bent bow-shaped. Draw it in the same way over the corresponding space on your paper. Look at Fig. 206, following the line on the space 4-5, A-B, and you will discover that it is the same as in Fig. 205, only smaller, and by carefully comparing the two diagrams, Fig. 205 and Fig. 206, you will find the lines are formed alike in each, differing only in size; thus you will understand how you can make your deer very much larger simply by drawing it on larger squares. Continue as you have begun, taking one square space at a time, and copy on your large squares the outline of the entire deer as given on the squares of Fig. 206.
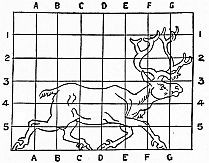
Fig. 206.—Reindeer enclosed ready to be enlarged.
When the drawing is finished, go over all the pencil lines which form the deer with black paint or ink, making the lines heavy and plain, that they may be seen from across the room. As soon as the paint is absolutely dry erase the pencil-lined squares.
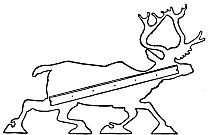
Fig. 207.—Reindeer re-enforced by strip of wood.
To make sure that the deer will stand firmly, extend downward a slanting line from the top of each hoof and draw another level line out from the bottom of each hoof to meet it, according to dotted lines in Fig. 204.
Cut out your deer and with pins or thumb-tacks fasten him out flat on another large sheet of paper; then with the soft lead-pencil run a line on the paper around the deer, which will give you the second deer; outline the markings on this like those on the first deer; then cut it out. If you want six deer for Santa Claus’ sleigh make them as you did the second deer. Back each deer with very heavy, stiff pasteboard and nail a thin strip of wood on each of them. Let the wood reach from the middle of the head to the edge of the hind leg (Fig. 207). Fasten the two animals together with three narrow flat sticks tacked across from deer to deer, one stick at the centre and one on each of the two ends of the slanting strips of wood fastened on each deer. The framework will then rudely resemble an inclined ladder. Stand the reindeer in front of Santa Claus’ sleigh and see how fine they look.
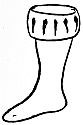
Fig. 208.—Santa Claus’ boot.
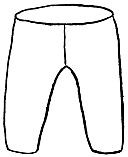
Fig. 209.—Santa Claus’ trousers.
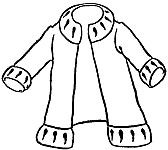
Fig. 210.—Santa Claus’ coat.

Fig. 211.—Santa Claus’ cap.
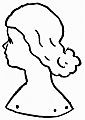
Fig. 213.—Santa Claus’ wig.
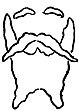
Fig. 214.—Santa Claus’ whiskers and eyebrows.

Fig. 212.—Cap trimmed with ermine.
To represent
Santa Claus,
make a large rag doll stuffed with straw or excelsior. It is not necessary to spend much time on making the doll, as it will be used only once, and will then be almost entirely covered, showing only the upper portion of the face for which you can mark easily with features. Make the boots (Fig. 208) like stockings of black muslin; have them long and loose enough at the ankle to form wrinkles. The trousers (Fig. 209) should be of scarlet cotton flannel, fleece side out; the coat (Fig. 210) cut of the same material; the cap (Fig. 211) of the red cloth cut melon shape, and sewed together. Santa Claus’ costume must be trimmed with bands of fur. Ermine will look best, and it is easiest to make. Cut strips of white cotton flannel and mark them with black ink to represent the little black elongated spots on real ermine. Trim the tops of the boots (Fig. 208), the neck, sleeves and edge of the coat (Fig. 210) and edge of the cap (Fig. 212) with fur. Make the wig of raw white cotton, and fasten it on the doll’s head (Fig. 213), then the beard, moustache and eyebrows also of raw cotton (Fig. 214), and glue them on the face. Paint Santa Claus’ face pink, his cheeks and the end of his nose bright red, and his eyes blue. When dressing him, bring the fur-topped boots up over the trousers (Fig. 200).
With tacks and string fasten Santa Claus in an upright sitting position on the seat of the sleigh. Tie a long, narrow red ribbon around the neck of each reindeer and pin or tie the ends of these ribbon reins on to the mitten-covered ends of the arms which form his hands. He will then seem to be gayly driving his reindeer.
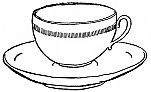
Fig. 215.—Christmas cup and saucer.
Fill the box of the sleigh with
Christmas Gifts
wrapped in bright colored tissue paper. Any article liable to break should receive special attention. A cup and saucer (Fig. 215) is one of the most difficult articles to manage, and if you can wrap this up, properly, the wrapping of all other gifts will be easy.
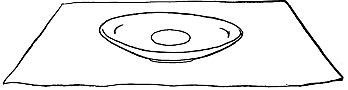
Fig. 216.—Saucer in centre of tissue paper.
Take the saucer first, place it on the centre of a piece of tissue paper (Fig. 216), fold the paper up around it, bringing the ends together at the centre (Fig. 217). Do the same with the cup (Fig. 218); then crush down the top of the paper over the saucer and set the paper-covered cup on it (Fig. 219). Now place the two on more paper and wrap up both together (Fig. 220).
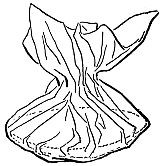
Fig. 217.—Tissue paper over saucer.
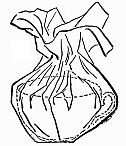
Fig. 218.—Cup in tissue paper.
If there are not enough gifts to fill the box of the sleigh, open newspapers and crush them into the bottom of the box to fill up the extra space; spread white paper over the top of the newspapers, and fill in with the prettily wrapped gifts. Each parcel should be tied with a ribbon and decorated with holly, mistletoe or evergreen (Fig. 220). Cover the top of the paper parcels with various toys (Fig. 200), and Santa Claus with sleigh and reindeer will be ready to surprise the family early Christmas morning.
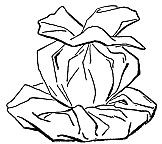
Fig. 219.—Wrapped cup and saucer together.
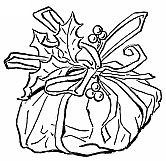
Fig. 220.—Cup and saucer ready for the sleigh.
Try to have as many home-made gifts in the sleigh as possible.
Your Christmas Cards
can be plain white pieces of cardboard decorated with the head of Santa Claus made of an almond on which is inked a face; the long hair and beard of refined white cotton being glued on the nut and a red peaked cap fastened on the top of the head; this makes a fine Santa Claus. The head should be glued on the left side of the card, and on the blank portion should be inscribed the greeting, “Merry Christmas.”
CHAPTER XV
A LIVING CHRISTMAS TREE
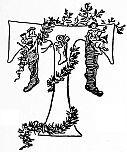
THIS Christmas tree is not planted in a tub or fastened to a stand; it does not remain just where it is put, neither is it attached to a mechanical device that makes it whirl and spin around dizzily as they sometimes do in the shops. It is a living Christmas tree, a green Christmas tree all covered with glittering ornaments and bright colored toys, with little bells at the bottom that tinkle musically as it moves, and on the topmost point a brilliant star that sends out tinsel rays from every point. Then, a little distance below the star, a face—a laughing face with shining eyes that reveal the guardian angel of the tree.
You can keep the preparation of the living tree absolutely secret and make it a complete surprise, for it does not have to be set up where all may see in order to be decorated, and no hint of its existence need be given until the time arrives, the door is thrown open and the beautiful, sparkling Christmas tree glides slowly into the room.
How to Prepare the Living Christmas Tree.
Choose quite a tall girl for the angel of the tree and from dark green, undressed cambric cut a long, plain cloak that will fit smoothly over her shoulders and hang like an inverted cornucopia from neck to feet.
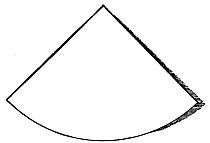
Fig. 221.—Cut the hat after this pattern.
Make the Peaked Hat
out of stiff brown paper, cutting it like Fig. 221, and pasting it together like Fig. 222. Cover the hat with some of the green cambric, allowing a cape of the material to fall from hat to shoulders at the back (Fig. 223). Get three or four quires of moss-green tissue paper, cut it into strips six inches wide and cut each strip into rather coarse fringe, leaving a solid strip for heading at the top, two inches wide. Beginning at the bottom sew the fringe around the cloak, allowing it to reach just to the edge of the cloth.
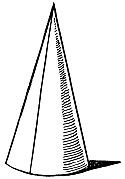
Fig. 222.—Paste it together like this.
Above the first row of fringe, and overlapping it, sew the second row, bringing its lower edge within three inches of the bottom edge of the first row.
In this way put on row after row of fringe, always overlapping it, until the cloak is entirely covered, then cover the hat and its cape in the same manner.
Take a light wooden hoop—one of the kind the children roll on the pavements in “hoop time,” and, turning the edge of the cloak up once, fit the hoop in the fold and hem the edge over it. This will hold the cloak out firmly at the bottom and it should hang smooth and straight from the shoulders with a generous lap where it closes in front.
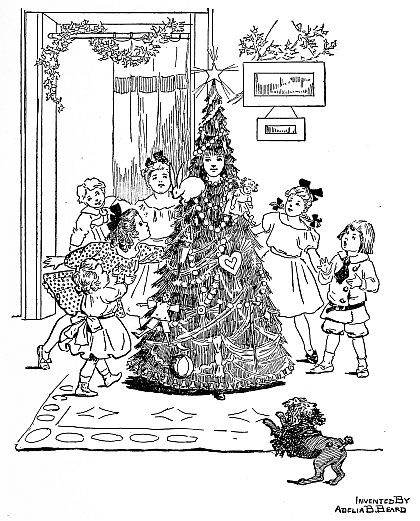
The Living Christmas Tree.
[176] [177]
Pin the fronts together, leaving an opening only large enough to slip over the head.
Now suspend the cloak on a waisthanger in such a way that you can reach it from all sides, and proceed
To Decorate
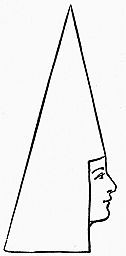
Fig. 223.—Cover the hat and leave a cape of the material.
Around the bottom sew a row of small bells, and here and there all over the cloak, sew large dress hooks, on which to hang the fragile glass ornaments and small presents. Pin on the tinsel decorations and strings of popcorn with safety pins and leave the finishing touches until the angel has entered her tree.
The tall hat, tipped by its bright star, may be completely trimmed and put safely away until needed. All decorations and presents must be light in weight.
On the eventful night let the Christmas tree angel slip into the tree, and, after it is nicely adjusted, hang around her neck strings of colored glass balls, and suspend from the hooks the glass ornaments and presents. Put the peaked hat on her head, and the living Christmas tree will be ready for her triumphant entry. To avoid the danger of accident do not allow the tree in a room where there are unprotected gas lights, candles or open fire, and let the cloak be put on the angel in a room adjoining the one in which she is to appear, for going up or down stairs incased in the cloak is not to be thought of.
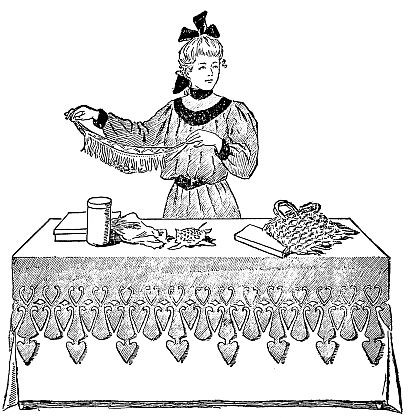
One of the Booths at the Girls’ and Boys’ Fair with Articles Made by Themselves.
CHAPTER XVI
HOW TO GET UP A GIRLS’ FAIR
LET two or three young friends help you get up the fair. Tell them that this is not to be an ordinary fair, it will be more interesting and unique; that buyers will find things which cannot be purchased elsewhere for any amount of money, as all articles for sale and even the decorations will be made by the girls and boys themselves, and duplicates are not to be found in the stores. Inform the young people that a prize will be given to the girl and to the boy whose work is the best.
Form a Managing Committee
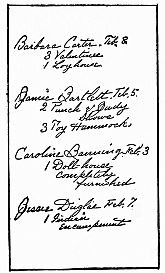
Fig. 224.—List of promised articles.
and talk over arrangements with them.
If the fair is to be large, you will need either one large room or several small ones.
When the question of place has been settled to the satisfaction of all, make out a list of the various girls and boys who will help with the entertainment, and divide the list into as many parts as there are young people on your managing committee, including yourself. Give each member of the committee his or her portion of the list, with instructions to see every person whose name is on the paper and find out what each particular one will promise to make for the fair. Do not confine the soliciting to young people of your own little circle, ask for contributions from all the girls and boys your managing committee are able to reach. Some may want to make several articles each, others may wish to do the decorating, and so on. Space must be provided on the list of names for writing down under each name the articles promised (Fig. 224).
Let each contributor understand that every article sent in must have the name, age, and address of the sender written in ink and fastened securely on each separate article, that every girl and boy may receive full credit for what she or he has made (Fig. 225).
In addition to the attractive booths you should have the ever popular grab-bag and the
“Four and twenty blackbirds
Baked in a pie”
will be just the thing.
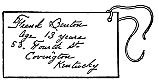
Fig. 225.—Card ready to attach to one article.
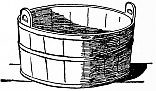
Fig. 226.—A tub like this for the blackbird grab-bag.
Take an ordinary wooden tub (Fig. 226), cover the outside with gay tissue paper laid on in flat plaits from top to bottom. Paste the paper along the inside of the top edge, carry it over on the outside down under the bottom edge. Cover the handles with the same paper, and fasten ribbon bows on the outside of the handles (Fig. 227). If the tub is covered with pink tissue paper, tack pink ribbons on the handles; if red paper is used fasten green on the handles.
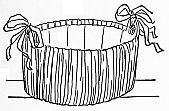
Fig. 227.—The grab-bag tub covered with colored paper.
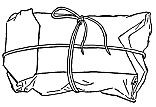
Fig. 228.—Package ready for grab-bag.
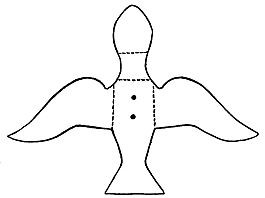
Fig. 229.—Pattern of blackbird.
Fill the bottom of the tub with large, lightly crushed pieces of newspaper, cover these with a double layer of smooth paper, leaving sufficient space at the top for a layer of sawdust, bran or sand, deep enough to cover the different sized articles intended for the grab-bag. Each separate article must be wrapped in paper and tied with a string (Fig. 228).
Make as many
Blackbirds
as you can place conveniently, without too much crowding, on top of the pie.
Use medium stiff cardboard or smooth water color paper, not too limber, for the birds. Cut them from an enlarged pattern of Fig. 229, as the birds must be life-size. Paint or ink the bird black on both sides and, when it is dry, bend up the tail in a curve. Bend up the neck at dotted line of Fig. 229. Pinch together the beak and bend it downward, bringing the head forward at dotted line of Fig. 229. Turn up the wings according to dotted lines on Fig. 229, and curve them over and outward at the top (Fig. 230). Puncture two holes in the back of the bird at the dots A and B (Fig. 229).
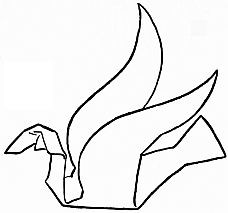
Fig. 230.—Blackbird bent in shape.
Fig. 231.—Bend one end of a hairpin into a square hook.
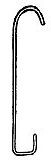
Fig. 232.—Top of hook bent into handle.
There must be a handle for lifting the blackbirds; make it of a hairpin. Bend one end of a wire hairpin into a square hook (Fig. 231) and slide the longer end up through the foremost hole on the underside of the bird; tie the centre of a string, nine inches long, on the horizontal bend of the hooked end of the hairpin; then push the short end of the hook up through the other hole in the bird, bringing the string up close against the bird’s breast. Bend the short end of the hairpin down on the bird’s back and flatten it with a hammer. Curve the top of the hairpin into a handle (Fig. 232) and fasten the hooked end of the hairpin more securely to the breast and back of the bird by pasting a piece of paper over the short portion of the hairpin lying over the back (Fig. 233). Push the paper up tight around the edge of the wire. Paste another piece of paper over the short length of hairpin on the bird’s breast in the same manner (Fig. 234).
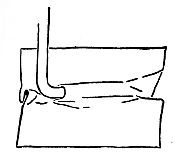
Fig. 233.—Hairpin fastened to back of bird.

Fig. 234.—Hairpin fastened to breast of bird.
Set the blackbird away until next day, when it will be perfectly dry, and you will find the hairpin secure in its place, standing straight and steady.
Tie the two ends of the string together into a hard knot; then bend one half of another wire hairpin into a hook (Fig. 235) and fasten it securely on the string at the end of the loop; twist the long handle of the hairpin hook (Fig. 235) around and over the string, as shown in Fig. 236.
Fig. 235.—Make a hook of another hairpin.
Fig. 236.—Fasten the hook to the string.
Instead of making one complete blackbird at a time, it will be much quicker and easier to make a pattern and cut out all your blackbirds first; then ink or paint them all, and continue working on them in this way until all are finished about the same time. It will not take long when once you have the pattern enlarged, and you can make the pattern the proper size by the system of squares, large and small, as explained in Chapter XIV.
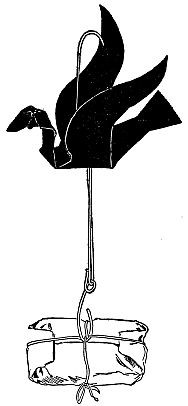
Fig. 237.—Blackbird with package ready for pie.
When the birds are made and ready for the pie, hook
A Package on Each Blackbird
(Fig. 237), and hide the parcel and string down under the sawdust, resting the bird on top of the pie; then when any one wants to purchase a “grab” let him lift any bird he chooses from the pie by means of the hairpin in the bird’s back.
The girl or boy in charge must take the parcel from the hook, give it to the purchaser, quickly slide another package on the hook and sink it down in the pie in place of the first one. While the purchaser is left entirely free to choose, she should take care not to disarrange the packages in the pie.
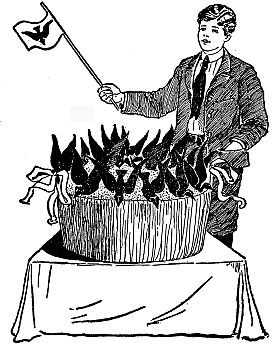
The Blackbird Pie.
Extra packages must be kept in a covered box or basket at one side, back of the “Blackbird Pie.”
Another original idea for your fair will be
The Express Office
At this table each article must be daintily tied up in white paper and the package labelled with the Christian name of one of the young people. Wrap up a number of articles that your friends may find parcels waiting for them when they call at the express office. The packages should also bear the name of the city from which they are supposed to have been sent. For instance, if you have a friend named Mary, and Mary happens to be acquainted with some young people in Cincinnati, mark the parcel for her with the name Mary and the place Cincinnati, Ohio. The addition of the name of some city will add greatly to the interest and excitement when the package is received.
Though a package may be intended for a certain person, any one with the same Christian name may purchase the article, but it cannot be sold to a buyer bearing another Christian name, and should some one come for an express package and the express agent be unable to find a parcel labelled with the purchaser’s name, the would-be buyer must leave the office empty-handed.
The uncertainty of finding a package at the express office lends a certain charm to this table, for every one will feel some curiosity to ascertain for a surety whether he or she is included with the fortunate ones whose names appear upon packages.
Arrange all your articles for the express office in alphabetical order, those on one side of the table for girls, and on the other side for boys; then the parcel bearing the name called for may be quickly handed out to the inquiring purchaser.
Letters to Girls
and letters to boys are easy to write. Ask as many friends as possible to write one or more letters to any companions they choose whom they think will attend the fair. The letters must be signed by fictitious names, never the writer’s own name or the name of any real person; then those receiving the missives will have the sport of trying to find out which of their friends actually wrote the letters.
Several days before the fair opens all the mail, after being addressed and sealed, should be sent under additional cover to you personally.
The Post-office
must be made very attractive, though it need not occupy much space. A mere corner of the room screened off with dividing drapery of turkey-red cotton cloth or any gay material will answer the purpose. Open the drapery at the centre division and make a three-cornered tent-like window in front between the two curtains with the aid of a chair. Place a box on the chair reaching to the top of the chair-back, set the chair between the two curtains, turn its back toward the people and cover it with the same material used for the curtains; then pin this drapery to the curtains on each side.
The Decorations
must be very simple and inexpensive; something which can be made easily and quickly, and when finished they should be bright and effective.
Have your decorating committee cut a number of flags from different colored tissue paper or low priced muslin varying in length, anywhere from ten to fifteen inches, and in width from five to nine inches (Fig. 238 and Fig. 239). If the ceiling is very high the flags may be larger.
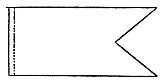
Fig. 238.—Pattern of flag.
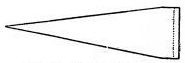
Fig. 239.—Pattern of pennant.
Paste the straight dotted edge of each flag over a strong string long enough to extend in a graceful loop from the centre of the ceiling to the side wall (Fig. 240). Place the flags about twelve inches apart on the string and make four strings to reach to the four corners if the room is small, if large, a dozen or more flag-strings, according to the size of the room. Have a generous supply.

Fig. 240.—Flags for decoration.
Tie one end of each of the flag-strings close to the ceiling on the chandelier or lamp hook. Wind an extra string tight around and over the string-knots on the chandelier to hold the strings in place and keep them from slipping down. Tie the free ends of the flag-strings to picture-hooks and fasten the hooks on the picture-moulding. In this way you can obtain good results without the slightest injury to the walls. Should there be no picture-moulding, fasten the strings to large, strong tacks or small wire nails driven in on the top ledge of the window and door frames where they will do no harm.
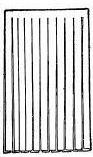
Fig. 241.—Fringe cut for tassel.
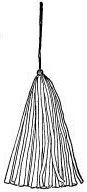
Fig. 242.—Winding top of fringe into tassel head.
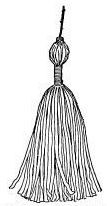
Fig. 243.—Tassel ready for decoration.
Fasten extra strings from top of window and door frames, and draw them taut along the walls, then tie the intervening flag-strings on these and the effect will be much the same as with picture-moulding, almost like a tent of small flags.
Hang a long, gay tassel on the wall at the end of each flag-string. Make the tassels of bright tissue paper. Take the once folded sheets of the variously-colored tissue paper as they come from the store, and cut them into long fringe, lengthwise of the folded sheets (Fig. 241), making each separate strand of fringe not less than one inch wide. Pinch the twenty-inch-length fringe together at the top, wind and tie it with a string (Fig. 242), allowing one end of the string to extend out at the top; wind farther down and tie again to form the head of the tassel four and one-half inches from the extreme top (Fig. 243).
Fig. 244.—Red paper folded for cutting design.
These large tassels tied to picture-hooks by eight or twelve inch lengths of string wound with gay paper and attached to the picture-moulding at the end of each line of flags make a fine finish and form a decoration for the walls.
Let your tables be of different sizes, and cover them with white cotton sheets folded in such a way that the sheet will fall within one inch of the floor at the front and at the two sides.
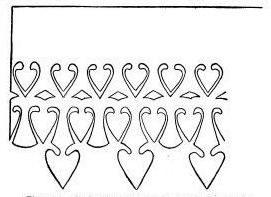
Fig. 245.—Unfolded red paper ready for decorating fair booth.
Decorate the white covering in various ways, making the tables gay with inexpensive colored cambric, or crimped tissue paper. The plain tissue paper will not be strong enough to use for this purpose.
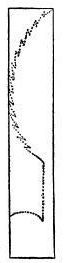
Fig. 246.—Folded paper for green decoration.
The first covering of white gives value to the colors, causing them to appear even more brilliant than they are in reality, and it also renders it possible to use much less colored material than would otherwise be required, in this way lessening the outlay for decorations. But in order not to tear the muslin sheets while fastening on the decorations, paste must be used in place of tacks or pins.
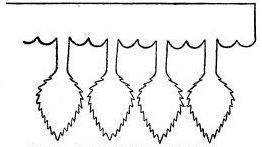
Fig. 247.—Green decoration cut and opened.
Make the colored material into wide strips cut into points or fanciful designs and paste the strips at their upper edges along the top of front and sides of the white covered tables, allowing the lower edge to hang entirely free, except where pendant portions are inclined to stand out; these may be fastened in place with a little paste.
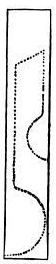
Fig. 248.—Orange design ready to cut.
Cut some of the strips about fourteen inches wide; others wider, a few narrower; and make each strip long enough to reach around the front and two sides of one table. Lay a brilliant red strip eighteen inches wide down on a flat surface and fold crosswise through the centre; fold again and again until the piece is of the desired width, about two and one-half inches; then cut according to dotted lines (Fig. 244). Open out and cut off every other lower ornament and you will have Fig. 245. Attached to a table this decoration gives the effect seen in the first illustration.
Fold and cut a green strip fourteen inches wide like Fig. 246. Open and it will be Fig. 247. Another design of orange color is given in Fig. 248 and Fig. 249.
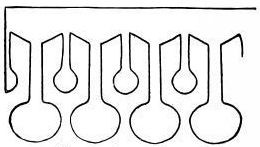
Fig. 249.—Orange design open.
You can devise many other decorative designs fully as attractive as these, and it is well to experiment with pieces of old newspaper, cutting them into various designs until you find just what you think will make good patterns. In this way your originality is brought out and in a measure your artistic sense developed.
Select a cheery, happy girl for
Postmaster
—one who cannot help giving a bright smile with every letter, and try to induce her to make some pleasant appropriate remark when handing out the mail, as this will add much to the enjoyment of the occasion.
More important though than anything else will be the large, the small, the useful, the beautiful and the odd articles for sale made by the girls and boys. There should be a lot of original valentines, May baskets, Easter-egg novelties, paper fireworks, Hallowe’en games, funny and instructive toys, tiny log cabins, scenes from Japan, Russia, the Philippines, and many other interesting things, not forgetting the Punch and Judy shows, the circus, the seven wonders of the world, and the home-made rugs, candles and candlesticks.
The post-office entails little or no extra expense and money taken in for letters will be almost clear gain. Expense incurred by the entire fair need be but slight and all the proceeds might be devoted to some charitable purpose.
One of the best of objects for the money obtained by your fair is the “Fresh Air Fund,” which helps the poor little suffering city children to a breath of pure fresh air and saves the lives of many frail girls and boys. Think how glad you can make some of these young people; then, of all the enjoyment your own companions will have in getting up the fair, and how proud and happy your parents and teachers will feel when they see the result of your work. If a “Fresh Air Fund” does not exist in your locality there are other methods of using your profits to good ends. Really there is no telling how much good your fair may accomplish in many ways.
CHAPTER XVII
CAMPING OUT IN YOUR BACK YARD
WHO is ready to go out on a camping expedition to Make-Believe Land?
It is a wild land, full of wild creatures if you choose to believe in them. Cats you will probably meet on the trail, and they are wild ones if you will. Wolves, too, may prowl around, for what else are Tramp and Nipper, your own dearly loved dogs, but descendants of the wild wolf. There will be plenty of sailing, fishing and outdoor sports. Guides can be secured at headquarters and you will not have to travel far, for the camping ground is your own back yard.
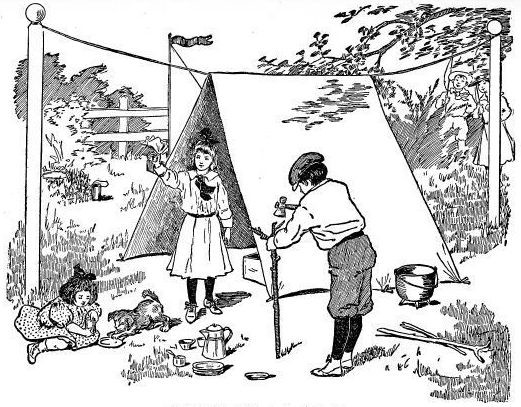
Camping in Make-believe Land.
You must have your
Camping Outfit,
as all campers do, and it is the proper thing to think, plan and talk much about this same outfit. As the trip is to be made overland and you will have no camping wagon, use bags for carrying the various articles needed in camp. Old flour bags are just the thing. Into these you can put all your things except perhaps the camp kettle. The camping party should be supplied with a tent, a hatchet, a camp kettle, coffee pot, tin plates and cups, old knives, fork and spoons, a tin pail and dipper and a tin wash-basin; all these, as well as provisions must be taken on the journey in true campers’ fashion, for there should[195] [196] [197] be no running back from Make-Believe Land to get forgotten articles. Shawls and blankets to spread on the ground if it seem too damp will be a welcome addition to the outfit, and the party should be provided with sharp pocket knives for whittling stakes and for other needs.
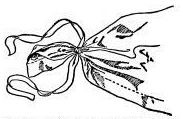
Fig. 250.—Tie the corners of the sheet with tape.
Fig. 251.—The sheet is ready to put up for the tent.
Select the site of your camp and pitch your tent with reference to the clothes line, for the line is to support the tent and act as a ridge pole.
Make the Tent
Fig. 252.—This is the wooden tent peg.
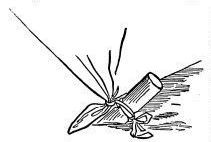
Fig. 253.—This is the way to peg your tent to the ground.
of two muslin sheets sewed together along two of the edges, one edge on each sheet, which run from the wide hem at the head to the narrow hem at the foot of the sheet. Tie a tape on each of the four corners (Fig. 250) and tie a tape at the centre of the ends of the tent sheet-covering. This will give three tapes on each side of the tent—six tapes in all (Fig. 251).
Make six wooden pegs resembling Fig. 252. You can have them either round, square, three-cornered or irregular; the only essentials are that the pegs be strong and large enough to hold the tent securely. Have a notch cut near the top for the tape and a point whittled at the bottom that the peg may be easily driven into the ground.
Look about carefully and decide exactly where you want the tent placed on the clothesline; then hang the crosswise centre of the covering evenly over the line. Hold the top ridge centre in place with clothespins while you stretch one side out away from the clothesline, and peg it to the ground by tying the tapes around the pegs and pushing the pegs slantingly into the ground, with the peg head running from and the point directed toward the tent (Fig. 253). Remove the clothespins and peg down the other side of the tent in the same way.
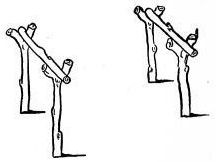
Fig. 254.—The sticks are laid across the table legs ready for the board.
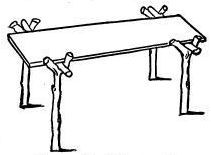
Fig. 255.—Your little camp-table.
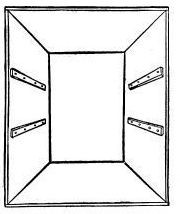
Fig. 256.—Nail the cleats inside the box for the shelves.
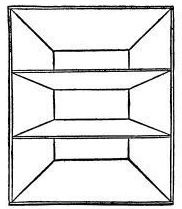
Fig. 257.—This is your camp-cupboard made of a box.
Find the best place near the tent for
A Table,
and make the table in true woodsman fashion. Take four strong forked sticks, sharpened on the lower end, and drive two of them into the ground in a straight line about one foot or more apart, and the remaining two in a line with, and two feet from the first sticks (Fig. 254). Have the sticks stand above the ground about two feet, or the height you want the table, and keep the crotch, or angle where the two forks separate, on all the sticks at an equal height from the ground. Lay a stick across each pair of forked sticks. Get a piece of board, rest one end on each of the supports you have just made, and you will have a rustic table, strong and suitable for any camp (Fig. 255). Use wooden boxes for seats. Select one box for your
Safe or Cupboard
in which to keep supplies and camping utensils. Fit one or two shelves, made from a side of another wooden box, in the cupboard. Do this by first nailing strips of wood, for cleats, on the inside of each side of the cupboard at equal distances from the bottom (Fig. 256). Slide in the shelves, resting each on two pieces of wood (Fig. 257). Set a lot of lids of tin cans in the cupboard to serve as camping plates, also a few tin spoons, an old table knife, a kitchen fork or two, three tin cups, and a smooth, clean, folded piece of white paper for a tablecloth.
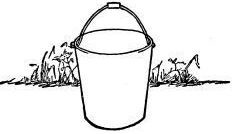
Fig. 258.—Sink the pail part way into the ground.
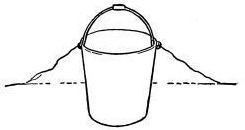
Fig. 259.—Bank the earth up around the pail for the spring.
Now for
The Spring
Ask your mother to let you have a large, clean pail suitable for drinking water. Carry the pail to the opposite side of the yard from your tent. There dig a hole large enough to sink the pail down about half its height (Fig. 258). Bank the loose earth up all around the pail (Fig. 259), and cover the earth with leaves, grass, moss and vines; hiding the pail completely with the greenery; then fill the pail with fresh, cool water, and lo: there is your mountain spring (Fig. 260).
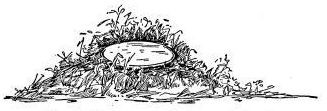
Fig. 260.—Like a country spring in your back yard.
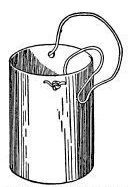
Fig. 261.—The camp-pail is made of a tin can.
A clean tomato can, free from rust, with the top removed, will make
A Fine Pail
for carrying water. You can make a hole in the tin, near the top on each side of the can, by hammering a good-sized wire nail through, and then form a handle to the pail by threading one end of a piece of twine through each hole and tying a large knot on the outside to prevent the string from sliding out of place (Fig. 261). When you need water in the camp, always go to the spring for it, and carry the water in the little tin pail.
It is not necessary to have a real
Camp Fire,
but you can pretend there is one. Drive two forked sticks in the ground a short distance from each other; lay a stout stick across from one to the other forked stick; then pile up some dry twigs midway between the stakes. Tie a strong cord on the centre of the cross stick, leaving one end long enough to loop down and under the handle of a pail or kettle and reach up and tie to the short end of the cord. You can put various things into the camp kettle and pretend to cook them over the make-believe fire (Fig. 262).
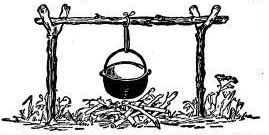
Fig. 262.—You can pretend to cook over the make-believe fire.
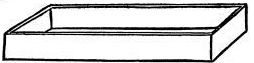
Fig. 263.—A low wooden packing-box for the boat.
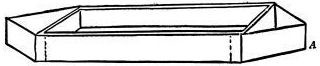
Fig. 264.—The box with its pasteboard ends.
Of course you must have a boat, for there are lakes in Make-Believe Land and plenty of fish to be caught, so
Make a Boat
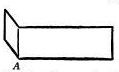
Fig. 265.—The pasteboard strip with end bent.
for your camp. Select a rather long, narrow wooden packing-box (Fig. 263), and on each end tack an extra pointed pasteboard end (Fig. 264). To make the pasteboard end you will have to measure the height of the packing-box, and cut from an old pasteboard box a strip of pasteboard wide enough to fit the height of the wooden box and long enough to allow for tacking on the end of the wooden box and extending far enough out beyond the box to form half, or one side, of the pointed end with two inches over. Score the extra two inches and bend (Fig. 265); the bend A forms the extreme end when the pasteboard point is bent in shape. Cut another strip of pasteboard two inches shorter than the first strip, and sew it on the two-inch bent flap of the first strip (Fig. 266). Score the two ends of the long strip and be careful to score them on the side that will cause the pasteboard to bend outward in the right direction, then bend (Fig. 267).
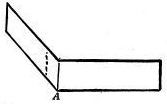
Fig. 266.—The second pasteboard strip is sewed on first strip.
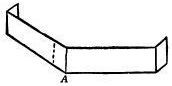
Fig. 267.—The pasteboard is now ready to be tacked on to box making pointed end.
Tack the pasteboard strip on the end of the wooden box and make another pasteboard point for the other end of the box (Fig. 264). Cover both pasteboard ends with stout paper by gumming the paper over and down on the outside top edge of the pasteboard points.
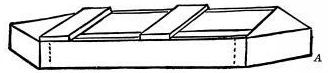
Fig. 268.—With the seats in place it is a boat.
Make the boat seats of short boards laid across from side to side of the wooden box and nailed in place (Fig. 268). Use broom-sticks for oars, and make believe the boat is off on the water, a long distance from the tent.

Fig. 269.—The row-boat is turned into a sail-boat.
If you want to play that you are
Out Fishing
in the boat, take any kind of long sticks or walking canes for fishing poles, with common string for line and a bit of paper tied to the end of the string for bait. When you want to turn the row-boat into a sail-boat, you can tack a three-cornered piece of white cloth on the end of a pole and rig up a sail (Fig. 269). Cut a hole in the forward centre of the bottom of the boat immediately next to the covered bow, run the pole through the hole down into the earth until it is well planted in the ground and stands straight and steady; then tie a string to the free end of the sail and fasten the string to the boat to keep the sail stretched out, just as if there were truly a good stiff breeze and you were sailing along at a rapid rate with the spray dashing upon, and at times over, the sides of the boat.
If your back yard is large and you need more tents for friends, erect several, one on each stretch of the clothesline. Should the line be fastened to four posts, a tent can be put up on each of the four turns of the clothesline, making a little settlement of tents.
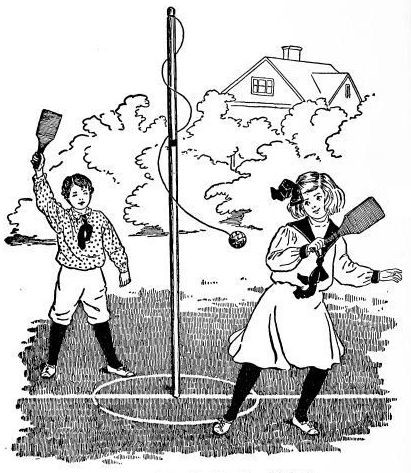
Playing Tether-Ball with the Home-Made Game.
CHAPTER XVIII
OUTDOOR FUN WITH HOME-MADE TETHER-BALL
WITH an outlay of a few cents you can make this entire tether-ball game and make it well. The common hollow rubber ball should be two and a half inches in diameter—about the size of a tennis ball. You will not need any money for the two rackets, which are cut from old boxes or shingles.
The Pole
may be a stationary clothesline post, a small, unused flagstaff, an extra long clothesline pole, a long curtain pole, or a very long, straight bean pole, and for smaller children the handle of an old long-handled broom will answer.
Use strong, soft twine to make
The Cover for Your Ball
Cut twelve pieces, each twenty-four inches in length; place all the lengths straight and evenly together; then tie a string around the entire bunch, an inch and one-half from the centre (Fig. 270). In this figure and several other diagrams the single strands of twine are not drawn in detail, because, should every separate thread be outlined, much confusion might ensue.
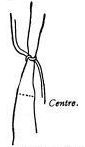
Fig. 270.—Tie all the strands of the string together.
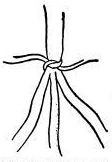
Fig. 271.—Tying the strings for the tether-ball covering.
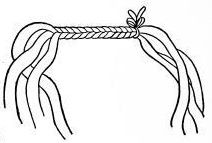
Fig. 272.—The braid for ball loop.
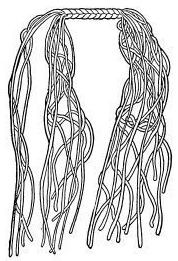
Fig. 273.—Untie and remove the string.
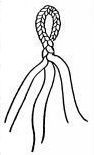
Fig. 274.—Braid into one braid.
After tying the lengths of twine together, separate the longest part into three divisions of four strands each (Fig. 271). Braid these strands together in one braid, beginning close to the string tied around the bunch; continue braiding firmly and tightly for the distance of two and a half or three inches (Fig. 272), then untie and remove the string from around the bunch (Fig. 273); bring the two ends of the braid together, and joining all the loose strands into three bunches of eight strands each, braid all into one braid (Fig. 274). When this larger braid is one inch long, with another string tie the loose ends of it firmly together close up to the braid. You will then have a braided ring on a braided stem. Wind the stem with an extra string; then tie a hard knot and cut away the ends of the string (Fig. 275).
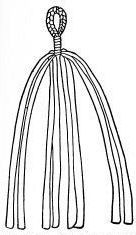
Fig. 275.—The strands are ready for netting the ball cover.
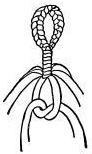
Fig. 276.—First step in tying string covering for the ball.
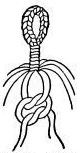
Fig. 277.—Tie the knots in this way.
Divide the loose strands into bunches of three strands each, making eight bunches (Fig. 275). Pin the stem down to something stationary and firm; then take three strands, or one bunch, in each hand, and pass the first finger of your left hand between the two bunches; hold it there while you carry the bunch in your right hand across the bunch in your left hand; this forms a loop. Do not take your finger out of the loop until the entire double knot is made. Bring the bunch from your right hand under and through the loop formed by the crossing of the bunches; this will give Fig. 276. Pull the strings until the tie is a short distance from the stem; then tie the same strands again to form a firm knot. Fig. 277 shows the method.
Tie together two more bunches, and two more, until all the bunches have been used and you have made four knots (Fig. 278).
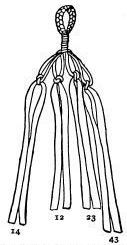
Fig. 278.—First row of knots in ball cover.
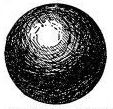
Fig. 279.—The uncovered tether-ball.
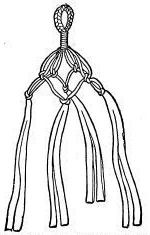
Fig. 280.—The second row of knots in ball covering.
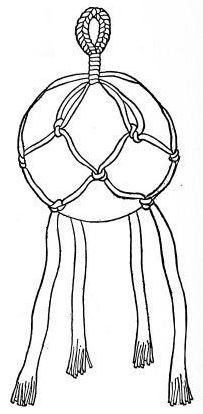
Fig. 281.—Covering of tether-ball almost complete.
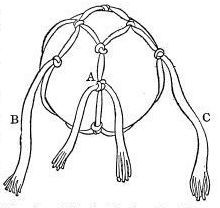
Fig. 282.—Tying final knot on the bottom of the ball.
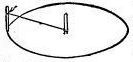
Fig. 283.—Mark out the tether-ball court in this way.
Fit the network over your ball (Fig. 279), allowing the covering to remain on the ball while you tie the bunches of strands into another row of four knots below the first row. Look at Fig. 278. The bunches are all numbered, showing how they are to be united. Corresponding numbers must be tied together: 1 with 1, 2 with 2, and so on. The result will be like Fig. 280.
Keep the ball in the net and make another lower row of knots, which will give you Fig. 281.
Now turn the ball over and tie two opposite bunches of strands up tight and firm against the bottom of the ball (Fig. 282 A). Bring together the remaining two bunches, B and C, and tie them over the knot A. Again tie in a hard, firm knot; then bind all the strands together by winding with a separate piece of string. Fasten securely.
It is necessary for the ball to be covered, so that it may have a strong yet harmless ring at the top, for no metal may be used on the ball.
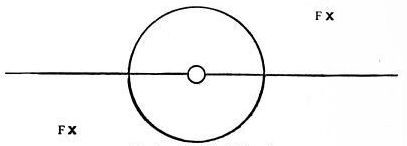
Fig. 284.—The tether-ball court.

Fig. 285.—Cut a notch near the top of the pole.
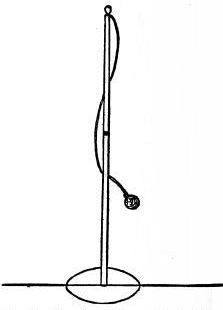
Fig. 286.—The tether pole is erected and ready for the game.
Before erecting the pole you must mark out
A Court on the Grounds.
Drive a stick in the earth where you want your pole to stand. On this stick tie a piece of string close to the ground; then sharpen the end of another short stick and tie the other end of the string on the second stick near its top; let the string measure two and one-half feet from one stick to the other stick. Pressing the point of the second stick slantingly against the earth, run it around and around in a circle until a circular line is distinctly marked (Fig. 283), then you can pull out the stake and dig a hole where it stood at the centre, and plant your pole. Mark a straight line across the centre of the circle and extend this straight line beyond the edge of the circle six feet on each side. On opposite sides of each of the straight lines running out from the circle mark a cross about two and one-half feet from the circle and two and one-half feet from the line, F and F (Fig. 284). The cross designates the spot where the player on either side must stand to serve the ball when the game begins. The crosses are called service crosses.
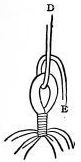
Fig. 287.—This is the first step in tying the ball to the pole-string.
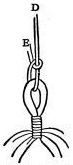
Fig. 288.—Second step in tying ball to pole-string.
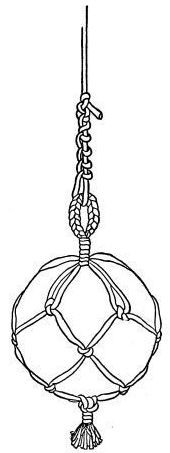
Fig. 289.—The tether ready to play.
The length of the tether pole you are to use depends upon your height and that of your young friends. Make the pole long enough to allow being planted sufficiently deep to be firm and steady and extend up above the surface of the ground, vertically, to the height of about three feet above your head. Cut a notch near the top of the pole before erecting it (Fig. 285). Tie one end of a long string fast around the notch. The string must be well waxed, twisted and doubled and waxed again, and it must reach within two feet of the ground. Tie the ball on the loose end of the string and erect your pole so firmly that it will not even tremble when you bat the attached ball ever so vigorously (Fig. 286). Fig. 287 gives the first step in tying the ball on the pole string. D is the end attached to the pole, E is the loose end. Pass E under D, then around back again over D and through the loop (Fig. 288); repeat this stitch over and over, drawing the string very tight each time. Finish by tying the E end of the string on the D end in several knots. Examine Fig. 289. It will give you the process of tying, but the knots are drawn loose that you may see how each is made. Paint a red ring around the pole just above the height of your head. Make
A Pattern for the Rackets
of a piece of paper twelve inches long and five and one-half inches wide; fold the paper lengthwise through the centre and cut according to curved line in Fig. 290. Open the pattern and lay it over a shingle, the handle at the thickest part; draw a pencil line around it and carefully whittle out the racket. Smooth down the rough edges with sandpaper (Fig. 291). Make a second racket in the same way. Now let us thoroughly understand the meaning of the divisions of the court before attempting the game. Inside the ground circle no one shall go, for it is not allowable at any time during the game to step on, or within, or reach over the circle line on the ground surrounding the tether pole. The straight line is used to divide the ground into two courts, one on each side of the line, making a separate court for each player.
Fig. 290.—Paper pattern for the racket.
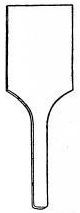
Fig. 291.—The finished racket looks like this.
The cross in each court is intended to mark the spot where a player must stand to “serve” or strike the ball when the game first begins. The player must stand on the cross of the chosen court while serving; at other times during the game she may go any place within her court, but she must stay in her own court on her own side of the line.
The Object of the Game
is for each player to strike the ball on the end of the string in such a way as to cause the string with ball attached to wind completely around the pole above the red band.
The game is intended for two players, and it begins by each one, in turn, tossing a small stone or piece of wood as near as possible to the tether pole while standing at a spot, previously marked, ten feet from the pole. The girl landing a stone nearest the pole has first turn and choice of courts; the other player must go in the court on the opposite side and beyond the circle.
The server holds the ball in her hand and, striking it with her racket, endeavors to send the ball winding around the pole, but as the ball approaches the other player or opponent, the opponent tries to stop the progress of the ball with her racket and send the ball back to wind around the pole in the opposite direction. As the ball returns toward the first player, a second time she endeavors to strike it and wind the string her way around the pole. In this manner the ball is kept going back and forth between the two players until one player succeeds in winding the entire string and ball above the red band; this wins the game, and the girl winning the greatest number of games out of eleven wins the set.
While playing the game the ball may be struck but once at a time, no player being allowed to have two or more trials during one turn.
The turns shall alternate between the two players.
If a player fails to send the ball into her opponent’s court on its way around the pole, the failure is called a fault, and the player making the fault loses her turn. The lost turn goes to the opponent, who then stands on the cross in her own court and has a free strike at the ball.
If a player strikes the ball more than once during one turn, she is guilty of a fault, and loses her next turn. If a player over-steps the boundary of her own court in any way, she is guilty of a fault and loses a turn. When the string winds around the handle of the racket, or winds about the tether pole below the red band, the player so winding the string commits a fault and loses a turn.
All faults give the opponent a free hit from the cross on her own court.
When grown-up girls and boys play tether-ball, the pole must stand nine feet high when erected. The red band on the pole must be six feet above the ground. The circle on the ground around the pole must be three feet in diameter. The straight line dividing the courts must extend ten feet outward from each side of the pole, making the entire length twenty feet. The ball must hang, when at rest, two and one-half feet from the ground.
This game may be played by sides, of equal numbers.
PART II
MINIATURE SEVEN WONDERS OF THE WORLD
[218] [219]
CHAPTER XIX
THE PYRAMIDS OF EGYPT
IF you could have seen a certain little boy who lived so long ago that it would make you dizzy to try to think back to the time when he ran about playing and learning many things, you would have thought him a queer looking little chap. He was not clothed like boys of our day, and his skin was almost a copper color, resembling somewhat that of the American Indian. His name was a very odd one, spelled C-h-e-o-p-s and pronounced Ke-ops—possibly his comrades nicknamed him “Key” when they played together on the sand. He had another name, Khufu, and it is hard to tell which the boy liked better.
Cheops’s Home
was in Egypt, where there are more crocodiles than you can count, and doubtless the little brown fellow, at a safe distance, enjoyed watching the sleepy creatures while he vaguely wondered why crocodiles always crawled up on the banks to lie so long and still in the sun. There were many other strange animals and queer Egyptian things—unlike any you have ever seen—that interested and delighted the child. When Khufu grew to be a man he was
A Great Monarch,
an Egyptian King, and instead of watching crocodiles busied himself watching and ruling a nation. The King did not bother greatly about the house he lived in, but spent much energy and many years in building an enormous pyramid, the largest ever erected at any time. When you grow older you may possibly take a trip to Egypt and see this
Wonderful Structure,
built 900 B.C. It is made of huge stones, most of them thirty feet long, five feet high and four or five feet wide. How do you suppose men ever managed to lift such monstrous blocks to build the pyramid? Well, they were obliged to labor very hard, for it took two hundred layers of stones for the pile, and all the work was done with the utmost care and precision.
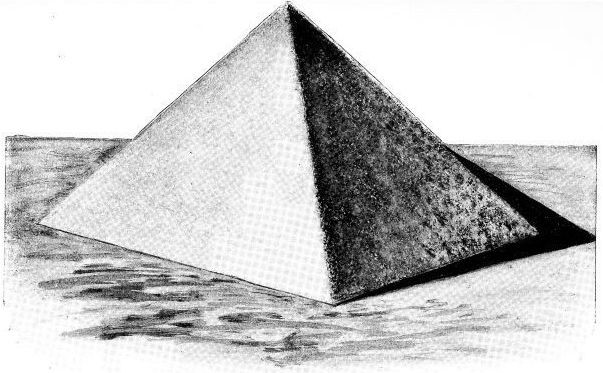
The Great Egyptian Pyramid Cheops, Made of Sandpaper.
You must also use care and precision in building your Egyptian pyramids. Have them exact, and in place of the heavy stone blocks use
Coarse Sandpaper
If possible, get it of a tawny yellow hue, that the miniature pyramids may be the same color as the originals, now that the outside casings of the latter are off. King Cheops had an army of one hundred thousand men laboring constantly during twenty long years to pile up his stones. You can make your Khufu Pyramid in twenty minutes and need employ only ten fingers instead of one hundred thousand men.
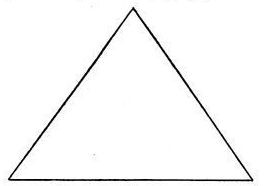
Fig. 292.—Cut one side of the pyramid of sandpaper.
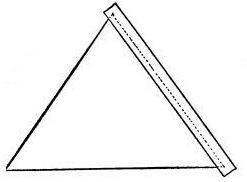
Fig. 293.—Gum narrow strips of muslin along the right side edge.
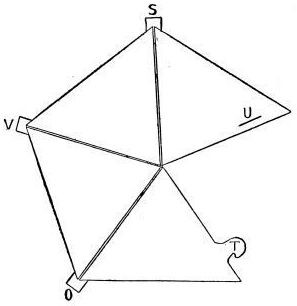
Fig. 294.—Join all the parts together.
Cut one side of
The Pyramid
from sandpaper (Fig. 292); if the paper is not stiff enough, paste it on a piece of cardboard; an old box-lid will do. Make two more sides like the first and gum narrow strips of muslin along the right side edge of each (Fig. 293). The dotted line shows the edge of the pasteboard underneath the cloth. Join all the parts together by means of these strips (Fig. 294). When making the fourth side, extend it out into the projection (T, Fig. 294) and cut a corresponding slit in the first side (U, Fig. 294). Place the pyramid down flat on a level surface under a weight to dry. When ready remove it and cut off the ends of the strips (S, V, O, Fig. 294); then bend the toy into shape by bringing the first and fourth sections together and sliding T into U (Fig. 294). The pyramid must stand erect and firm as in Fig. 295. Remember that the four sides of the real pyramid are built upon
A Perfect Square,
and the base lines of yours should also form a true square. If you can get some tough paper which will fold together in a flat crease without breaking, you may make the pyramid of one piece instead of four, by cutting it the shape of Fig. 296 and bending it evenly along the dotted lines to form the four slanting sides. The loose ends must be fastened together by means of extension and slit. If you have no regular sandpaper make some. Give the paper a thin wash of glue, and before it dries sprinkle it evenly with sand. An old kitchen pepper-box filled with sand will make a fine sprinkler. If you cannot get the pepper-box, take a small empty baking-powder can and punch tiny holes in the cover by hammering a fine wire nail through the tin in many places; use it as a sprinkler. You must prepare the paper and have it evenly sanded before cutting out the design.
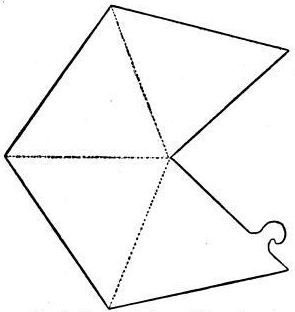
Fig. 296.—You may make the pyramid in one piece.
In Egypt there are three famous structures in addition to the Sphinx: the great pyramid, the middle-sized pyramid and the little pyramid—like the big bear, the middle-sized bear and the little wee bear in the story book. Each
Pile of Stones
was set up by a different king, and each one is named for the monarch who built it. The largest is called for Cheops; the second is named Chephren (pronounced Kefren) and the smallest has the longest name Mycerinus (pronounced Me-ker-in-us). Make the colossal Cheops as large as the dimensions of your paper will admit. The original is like a mountain, measuring 746 feet each side of the square foundation and reaching up 450 feet and nine inches in height.
King Chephren did not build his stones quite as high; he was satisfied with a base, each side of which is 690 feet and nine inches and a height of 447 feet and six inches. The last, King Mycerinus, must have grown tired of playing with the stone blocks, for his pyramid is merely a hill 203 feet high, with each side of the foundation 354 feet and six inches, not nearly so tall as Cheops’s monument. Build your little pyramid about half as high as the second one.
After making the Egyptian structures, naturally you might think that they could be grouped as you pleased to place them, but these pyramids are
Different from Ordinary Toys
and must always be fixed in certain positions. Stand them in a diagonal row, each one facing exactly E. W. N. S. Fig. 297 gives their correct positions. The first must stand to the northeast of the second, the second to the northeast of the third, and the Sphinx east of the second monument.
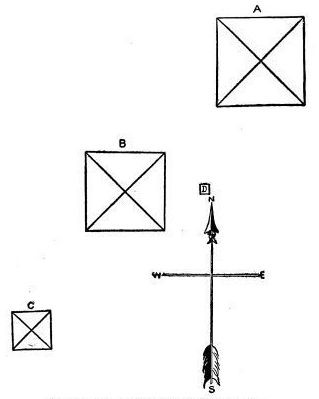
Fig. 297.—Stand the pyramids in a diagonal row.
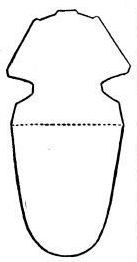
Fig. 298.—Cut the Sphinx out like this.
There, they are finished. Now that we have built the pyramids, let us
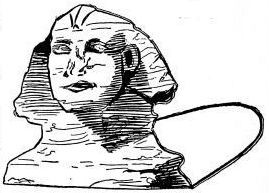
Fig. 299.—The head of the Sphinx should look like this.
Carve the Wonderful Sphinx
with its body like a crouching lion and its head, like a man’s, modelled from that of an ancient Egyptian. The original is an enormous queer creature hewn from stone and made before the pyramids were built; consequently, it is very old. It was on the plains more than 4,000 years before the birth of Christ. Little wonder that it now appears worn and chipped and that, like your small sister’s doll its nose is broken off.
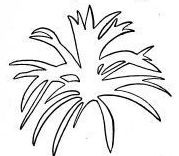
Fig. 300.—Cut this from green paper.
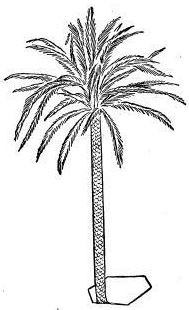
Fig. 301.—The tall date palm.
Begin carving the Sphinx by cutting a larger size from Fig. 298 of stiff sandpaper. Mark the head with ink as nearly as possible like Fig. 299. Should you fail in this, find a print of the head in some old paper or magazine, cut it out and paste it on Fig. 298. Bend the design across the dotted line, and the Sphinx will be ready to crouch close down on your sandy plain. There is no need of carving the body, because that of the real Sphinx is entirely covered with sand, with only the head above ground, and we want ours to look like the original.

Fig. 302.—Bend the stem where it joins the base.
In parts of Egypt the wind sweeps the sand in great masses against and over all objects, so the people had their
Buildings Made with Slanting Sides
that the sand might slip off when it struck them. Try pouring some sand on your pyramids and you will understand the reason of the peculiar style of architecture. The land in Egypt on which the Sphinx and pyramids stand is the plain of Gizeh; consequently, you must give that name to the place where you set up your structures. The
Tall Date Palm
is a beautiful tree. The leaves are glossy and spread out in a graceful crown; its stem is marked with old leaf scars, giving it a very different appearance from the bark of our native trees.
Cut Fig. 300 from light-weight green paper, and mark it as Fig. 301; then cut Fig. 302 of very stiff pasteboard. Paste Fig. 300 on the top over the letter P; next bend the stem where it joins the base (Fig. 302) and plant the tree almost any place on your plain of Gizeh.